Working with 6 gauge wire requires careful attention due to the significant current it can carry, often used for high-power applications. Properly connecting this thick gauge wire within a junction box is crucial for safety and the reliable operation of your electrical system.
This blog post will guide you through the essential steps involved in connecting 6 gauge wire inside a junction box. We’ll cover important aspects like choosing the right box, selecting appropriate connectors, ensuring secure connections, and adhering to safety best practices.
What Is 6 Gauge Wire
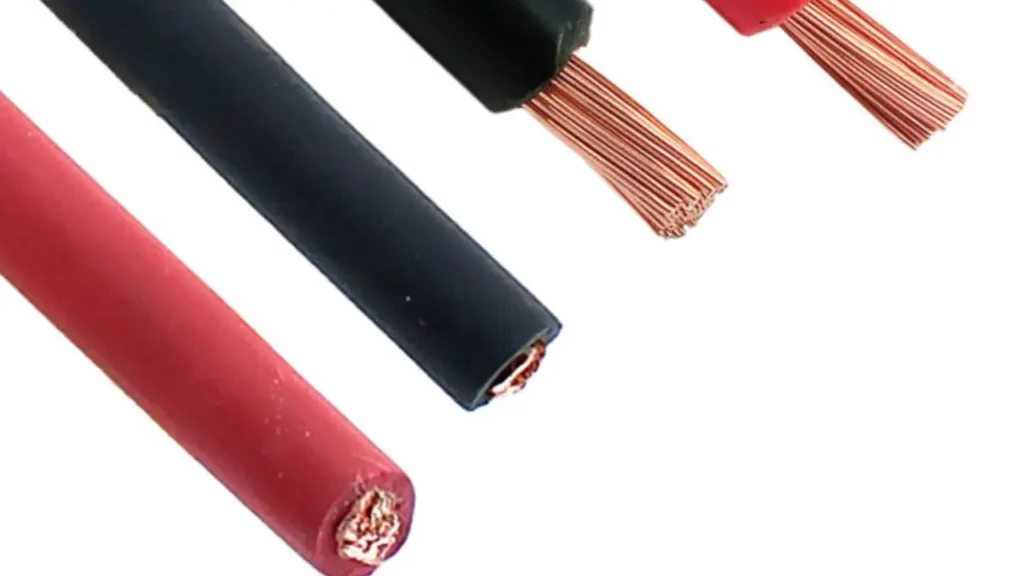
6 gauge wire, often referred to as 6 AWG wire (American Wire Gauge), is a type of electrical wire characterized by its specific thickness, which directly impacts its capacity to safely carry electrical current. It is notably thicker than wires with higher gauge numbers.
This substantial gauge allows 6 gauge wire to handle higher amperage loads, making it suitable for applications requiring significant power transmission in both residential and commercial settings.
How to Connect 6 Gauge Wire in Junction Box?
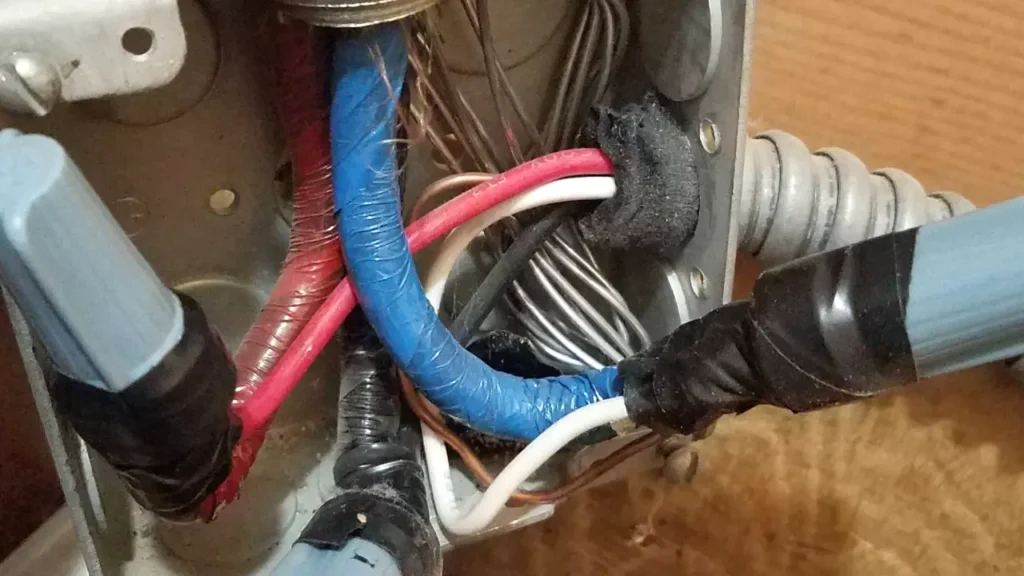
Connecting 6 gauge wire in a junction box is a task you might encounter when dealing with high-power appliances or sub-panels. Due to the thickness of the wire and the significant current it can carry, it’s crucial that you follow each step carefully and prioritize safety.
This guide will walk you through the process to ensure a secure and reliable connection.
Step 1: Turn Off Power
Before you start any electrical work, the very first thing you need to do is ensure your safety by completely shutting off the power to the circuit at the main electrical panel. Locate the circuit breaker that controls the specific area or appliance you’re working on and switch it firmly to the “off” position. This will prevent any accidental electric shock during the process.
To be absolutely sure the power is off, it’s a good practice for you to double-check using a non-contact voltage tester or a multimeter. Test the wires inside the junction box area to confirm that there is no live current present. Never assume the power is off just because you flipped a switch; always verify it with a testing device before you proceed with any wiring.
Step 2: Prepare the 6 Gauge Wire
Now that you’ve confirmed the power is off, you can begin preparing the 6 gauge wire. First, carefully measure and cut the wire to the length you need for your installation, making sure to leave enough extra for comfortable working within the junction box. Due to its thickness, you might need sturdy wire cutters designed for larger gauges.
Next, you’ll need to remove a portion of the outer insulation to expose the copper conductor for connection. Using a wire stripping tool specifically designed for 6 gauge wire, carefully remove about 1 to 1.5 inches of insulation from the end of the wire. Be mindful not to nick or damage the copper strands, as this could weaken the wire and affect its conductivity.
Step 3: Insert the 6 Gauge Wire into the Box
With the 6 gauge wire properly stripped, the next step is to insert it into the junction box. Locate an appropriate knockout opening on the box that is large enough to accommodate the thick 6 gauge wire and the connector you’ll be using. Remove the knockout if it’s still in place.
Carefully push the stripped end of the 6 gauge wire through the knockout opening and into the junction box. Make sure you feed enough wire into the box to allow for easy manipulation and connection. Avoid bending the wire sharply at the entry point, as this could cause stress or damage to the insulation.
Step 4: Install a Suitable Connector for 6 Gauge Wire
To securely hold the 6 gauge wire in the junction box and ensure a reliable electrical connection, especially for grounding, you’ll need to install a connector that is specifically rated for this wire size. Common types include set-screw connectors or split-bolt connectors, which can accommodate thicker wires like 6 gauge.
Slide the connector over the end of the 6 gauge wire inside the junction box. Ensure that the connector’s parts are correctly positioned to grip the wire firmly. Tighten the screws or bolts on the connector securely using the appropriate tool, such as a screwdriver or wrench. This secure connection is important for both the mechanical stability of the wire and the electrical grounding path.
Step 5: Strip the Insulation (If Needed for Connection)
If you need to connect the 6 gauge wire to another wire within the junction box, you might need to strip the insulation from that other wire as well, following a similar process as you did for the 6 gauge wire in Step 2. Ensure you use the correct size setting on your wire stripper to avoid damaging the conductors.
The amount of insulation you need to remove from the other wire will depend on the type of connection you’re making and the specific connector you’re using. Typically, about 1 to 1.5 inches of exposed conductor is sufficient for most types of connections in a junction box.
Step 6: Connect the 6 Gauge Wire
Now you can connect the 6 gauge wire to other wires or terminals in the junction box as required by your electrical setup. Due to the thickness of 6 gauge wire, you might need to use specific types of connectors that are designed to handle larger conductors, such as wire nuts rated for larger gauges, split-bolt connectors, or terminal lugs.
When making the connection, ensure that the bare copper conductors are in direct contact and that the connector is tightened firmly to create a secure electrical joint. For example, when using a wire nut, twist the bare ends of the wires together tightly before screwing on the wire nut. For split-bolt connectors or terminal lugs, follow the manufacturer’s instructions for proper installation and tightening to achieve a reliable connection.
Step 7: Secure the 6 Gauge Wire Inside the Box
While the connector at the knockout secures the wire’s entry into the box, it’s often beneficial for you to provide additional support inside the junction box to prevent stress on the connection points, especially with a thick and somewhat rigid wire like 6 gauge.
Carefully position the 6 gauge wire within the box, ensuring it’s not bent too sharply and that there’s no undue tension on the connections you just made. Some larger junction boxes might have internal clamps or tie-off points that you can use to help secure the wire and keep it organized inside the enclosure.
Step 8: Grounding the 6 Gauge Wire and/or Box
Ensuring proper grounding is absolutely critical for safety. If your 6 gauge wire has a bare copper ground wire or if you’re working with a metallic junction box, you’ll need to make sure everything is correctly grounded. This usually involves connecting the ground wire to the green grounding screw or grounding terminal inside the junction box.
For 6 gauge wire, ensure the ground wire is securely wrapped around the grounding screw and tightened firmly. If the junction box is metallic and you’re using a connector that grounds to the box, that connection also needs to be secure. Proper grounding provides a safe path for fault currents, protecting you and your electrical system.
Step 9: Close the Junction Box
Once you’ve completed all the wiring and grounding, carefully inspect your work. Double-check that all connections are tight, no bare wire is exposed, and the 6 gauge wire is securely in place within the box. Arrange the wires neatly inside so that they won’t interfere with the cover.
Place the cover on the junction box, aligning the screw holes. Insert the screws and tighten them firmly to secure the cover. A properly closed junction box protects the connections from dust, moisture, and accidental contact, ensuring a safe and reliable electrical installation.
Step 10: Turn On Power
After the junction box is securely closed, you can now safely restore power to the circuit at the main electrical panel. Locate the circuit breaker you turned off in Step 1 and flip it back to the “on” position.
Finally, test the electrical appliance or system that the 6 gauge wire is connected to, to ensure it’s functioning correctly. If everything works as expected, you’ve successfully completed the connection. If you encounter any issues, immediately turn off the power again and re-examine your wiring for any mistakes.
What is 6 Gauge Wire Used For
6 gauge wire, due to its significant current-carrying capacity, is primarily utilized in scenarios demanding substantial power transmission. Its thickness allows it to handle higher amperage loads without overheating, making it a suitable choice for various residential and commercial applications where standard household wiring would be insufficient. This wire gauge often serves as a critical component in connecting high-demand appliances and distributing power to sub-panels within a building’s electrical system.
Here are some common specific applications of 6 gauge wire:
- Connecting Large Appliances: You’ll often find 6 gauge wire used to supply power to major appliances that draw a significant amount of electricity, such as electric ovens, stoves, and clothes dryers. These appliances require a robust electrical connection to operate safely and efficiently, and 6 gauge wire provides the necessary capacity for their high power consumption.
- Wiring for HVAC Systems: High-power heating, ventilation, and air conditioning (HVAC) systems, including central air conditioning units and heat pumps, frequently require the reliable power delivery offered by 6 gauge wire. This ensures that these energy-intensive systems can function optimally without overloading the electrical circuit.
- Running Power to Sub-Panels: In larger homes or commercial buildings, electricity is often distributed through sub-panels. 6 gauge wire is commonly used as the feeder wire running from the main electrical panel to these sub-panels, effectively extending the power distribution network to different areas of the building.
- Connecting Generators: For backup power systems, 6 gauge wire is often employed to connect a generator to the main electrical system or a transfer switch. This allows the generator to safely supply power to the building during power outages, ensuring essential appliances and systems can continue to operate.
- Specific High-Power Devices: Certain other high-power devices, depending on their electrical load requirements, may also necessitate the use of 6 gauge wire for their connection. This could include welders, some power tools in workshops, or specific industrial machinery that operates on a higher current draw.
Can You Use Wire Nuts on 6 Gauge Wire?
Yes, you can use wire nuts on 6 gauge wire, but it’s important to use the correct size and type of wire nut that is specifically rated for this gauge. Standard wire nuts come in various sizes, and some are designed to accommodate larger wires like 6 gauge. You should always check the manufacturer’s specifications on the wire nut packaging to ensure it is suitable for the wire gauge and the number of wires you are connecting.
For connecting 6 gauge wire, you’ll typically need a larger wire nut, often colored blue or gray, that is rated for this size. While they are acceptable for many applications, especially when joining one or two 6 gauge wires together or a 6 gauge wire with smaller wires within their listed combinations, for more robust connections or when dealing with multiple 6 gauge wires, you might also consider using other types of connectors like split-bolt connectors or terminal lugs which are specifically designed for larger gauge wires and can offer a more secure connection in some situations.
Conclusion
Connecting 6 gauge wire in a junction box demands careful attention due to its thickness and the amperage it typically carries. Proper preparation, including selecting the correct box size and wire connectors designed for this gauge, is essential for a safe and effective installation. Ensuring adequate working space within the box is also crucial.
When making connections with 6 gauge wire, the security and tightness of each connection are paramount to prevent overheating and potential hazards. Always double-check that screws and connectors are firmly tightened according to manufacturer specifications. Prioritizing safety measures throughout the process is non-negotiable for this gauge.
For all your junction box needs, especially for robust applications requiring larger gauge wires, consider sourcing high-quality, wholesale options from Linkwell Electrics. They offer a variety of durable junction boxes suitable for your electrical projects.