A well-functioning cooling fan is critical for the longevity and performance of countless devices, from computers to industrial machinery. Overheating can lead to system crashes, reduced lifespan, and costly repairs. Knowing how to quickly assess your fan’s health is an essential skill.
This guide provides simple, effective checks to test your cooling fan’s performance. By following these straightforward steps, you can proactively identify issues, prevent thermal damage, and ensure your equipment operates at its optimal temperature, maintaining efficiency and reliability.
Why Test the Cooling Fan?
Testing a cooling fan is crucial for several reasons, primarily to ensure the sustained reliability and longevity of the equipment it’s designed to cool. A failing or underperforming cooling fan can lead to a cascade of issues, from minor operational glitches to complete system breakdowns.
Here’s why regular cooling fan testing is essential:
- Prevent Overheating: The most critical reason is to prevent components from overheating. Excessive heat is a leading cause of premature failure in electronics and machinery, leading to costly repairs or replacements.
- Maintain Optimal Performance: Equipment often has a specific temperature range for optimal performance. A malfunctioning fan can cause temperatures to rise above this range, leading to reduced efficiency, slower processing speeds, or erratic operation.
- Extend Lifespan of Equipment: By effectively dissipating heat, cooling fans help to reduce thermal stress on internal components. Regular testing ensures the fan is doing its job, thereby extending the overall operational lifespan of the equipment.
- Avoid Costly Downtime: In industrial or commercial settings, an overheated system can lead to unexpected shutdowns and significant downtime, resulting in lost productivity and revenue. Testing helps identify potential fan issues before they cause such disruptions.
- Reduce Energy Consumption: A fan that is struggling or partially blocked will have to work harder, consuming more power to achieve the same or even a reduced cooling effect. Testing can identify inefficiencies and help maintain energy costs.
- Ensure Safety: In some applications, extreme heat can pose safety risks, including fire hazards. A properly functioning cooling fan is a critical safety measure to prevent such incidents.
- Identify Early Warning Signs: Testing can reveal subtle issues like reduced airflow, increased noise, or intermittent operation, which are early indicators of a fan that is about to fail. This allows for proactive replacement rather than reactive emergency repairs.
How to Test Cooling Fan?
Testing your cooling fan is a crucial step in preventing equipment failure and ensuring the longevity of your systems. Overheating can lead to irreversible damage and costly downtime, making regular fan checks an indispensable part of your maintenance routine. This comprehensive guide will walk you through a series of detailed steps to thoroughly test your cooling fan and verify its optimal functionality.
Step 1: Visual Inspection
Begin your testing process with a meticulous visual inspection of the cooling fan and its immediate surroundings. This initial step can often reveal obvious problems that might otherwise go unnoticed. Carefully examine the fan blades for any signs of physical damage, such as cracks, chips, or warping, which can significantly impair airflow and create imbalance.
Extend your visual check to the fan’s housing and grille, looking for any fractures, dents, or loose components that could impede its operation or indicate previous impact. Furthermore, assess the level of dust and debris accumulation on the blades, motor, and grille; excessive buildup can severely restrict airflow and reduce efficiency. Ensure all mounting screws are tight and the fan is securely seated in its designated position, as vibrations from a loose fan can lead to premature wear.
Step 2: Power Check
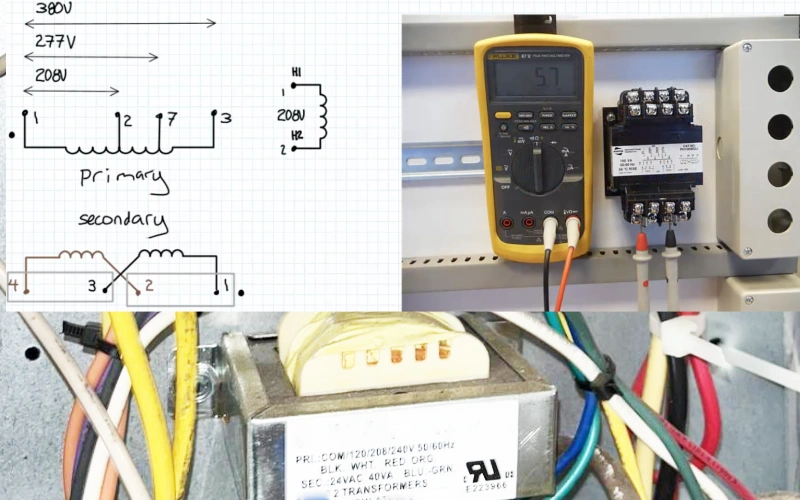
After the visual inspection, the next critical step is to confirm that the cooling fan is receiving the correct and consistent power supply. For AC-powered fans, carefully use a multimeter to measure the voltage at the fan’s terminal connections, verifying it matches the fan’s specified voltage rating (e.g., 120V, 230V). Any significant deviation could indicate a problem with the power source or wiring.
If the fan is DC-powered, ensure that the DC voltage supplied is within the acceptable range for the fan’s operation. Also, check the polarity of the connection to prevent damage. Inspect all wiring for fraying, exposed conductors, or loose connections that could interrupt power flow. If the fan incorporates an indicator light, observe whether it illuminates when power is applied, which can serve as a quick confirmation of power presence.
Step 3: Listen for Abnormal Noises
Once power is confirmed, activate the fan and listen intently for any sounds that deviate from its normal operational hum. A healthy cooling fan should produce a consistent and relatively smooth sound. Any grinding, rattling, whining, buzzing, clicking, or scraping noises are strong indicators of a problem.
These abnormal sounds can point to various issues, such as worn-out bearings, a loose impeller, obstructions contacting the blades, or an imbalanced motor. Identifying these noises early can help pinpoint the root cause of potential failure and allow for timely intervention before a minor issue escalates into a complete breakdown, protecting the internal components of the system it’s cooling.
Step 4: Airflow Test
With the fan running, evaluate the quality and quantity of the airflow it generates. This is a direct measure of the fan’s effectiveness. Place your hand near the exhaust side of the fan to feel the strength and consistency of the air current. A healthy fan should produce a noticeable and steady stream of air.
Compare the perceived airflow to what you expect from a properly functioning fan of that size and type, or, if possible, to a known good fan. A weak, inconsistent, or non-existent airflow suggests a significant problem, such as a failing motor, heavily obstructed blades, or a severely clogged filter. This step directly assesses the fan’s primary function: moving air to facilitate cooling.
Step 5: Temperature Monitoring
For a more objective assessment, monitor the temperature of the components or enclosure the fan is meant to cool. This can be done using a contact thermometer, an infrared thermometer, or by checking internal temperature sensors if available (e.g., within a computer’s BIOS or via dedicated software for industrial equipment).
Observe if the temperatures remain within the safe operating range specified by the equipment manufacturer. If temperatures are consistently higher than normal, even with the fan running, it indicates the fan is not effectively dissipating heat, either due to insufficient performance, incorrect sizing, or an underlying issue preventing proper cooling. This step directly validates the cooling fan’s ultimate purpose.
How to Test Cooling Fan Relay?
A properly functioning cooling fan relay is essential for your system’s thermal management. If your fan isn’t activating, the relay could be the culprit. Learning to test it can save you diagnostic time and prevent component damage.
Step 1: Locate the Relay
First, identify the cooling fan relay. It’s typically a small, cube-shaped component found in a fuse box or relay box within your system. Refer to your equipment’s manual or wiring diagram for its exact location and identification.
Step 2: Visual Inspection
Perform a visual inspection of the relay. Look for any signs of physical damage, such as cracks, burns, or corrosion on the casing or terminals. A burnt smell can also indicate a faulty relay.
Step 3: Continuity Test
With the relay removed, use a multimeter on the continuity setting. Test the resistance between the coil terminals (usually two smaller pins) and the switch terminals (usually two larger pins). Consult the relay diagram for pin identification.
Step 4: Power the Coil
Apply the correct voltage (e.g., 12V DC for automotive relays) to the coil terminals. You should hear a distinct click as the relay actuates. This sound indicates the coil is engaging and the internal switch is closing.
Step 5: Test Switched Terminals
While the coil is powered and the relay is clicked, use the multimeter to check for continuity across the switch terminals. There should now be continuity, indicating the circuit is complete. If not, the relay is faulty.
How to Test Cooling Fan Control Module?
A faulty cooling fan control module can prevent your fans from operating correctly, leading to engine or system overheating. Testing this module is crucial for diagnosing cooling system issues and ensuring proper thermal regulation.
Step 1: Locate the Module
Begin by locating the cooling fan control module. This component is typically found near the radiator fan assembly, fuse box, or sometimes integrated into the fan shroud itself. Consult your vehicle’s service manual or wiring diagrams for its precise location.
Step 2: Visual Inspection
Perform a thorough visual inspection of the module and its connectors. Look for any signs of physical damage, such as cracks, burns, corrosion on the terminals, or melted plastic. Also, check for loose or damaged wiring connections.
Step 3: Check Power and Ground
Using a multimeter, verify that the module is receiving proper power and ground signals. Test the main power input wire and ensure a good ground connection. Incorrect voltage or a poor ground will prevent the module from operating.
Step 4: Test Input Signals
With the engine running (if applicable) and system calling for cooling, use a scan tool or multimeter to check for input signals to the module. This might include signals from the engine control unit (ECU) or temperature sensors. No input means the module won’t activate.
Step 5: Test Output Signals
Finally, test the output signals from the module to the cooling fan motors. Use a multimeter to check for voltage at the fan motor connectors when the module should be active. No output voltage indicates a faulty control module.
When to Test Cooling Fans?
Testing cooling fans should be a proactive measure, not just a reactive response to overheating. Regularly scheduled checks, ideally as part of a routine maintenance plan, are crucial.
The frequency can vary based on the application: for critical electronic equipment or industrial machinery operating in dusty or high-temperature environments, monthly or even weekly checks might be warranted.
For less critical home electronics, an annual check or testing whenever you perform other system maintenance (like cleaning dust) can suffice. Additionally, always test a cooling fan immediately after installation or replacement, and whenever you notice any unusual noises, reduced airflow, or an increase in system operating temperatures.
Conclusion
Regularly testing your cooling fans is crucial for preventing equipment damage and ensuring system longevity. Simple checks, like listening for unusual noises or verifying airflow, can preempt costly failures and maintain peak performance.
By proactively monitoring your cooling fans, you safeguard your investments and ensure continuous operation. For reliable and efficient thermal management solutions, consider sourcing your wholesale cooling fans and filters from Linkwell Electrics.
Their extensive range of quality cooling fans and filters provides the essential components needed to effectively manage heat and maintain optimal operating conditions for your electronic enclosures and machinery.


