Understanding the junction box installation cost is essential for budgeting any electrical project, whether a minor repair or a major renovation. Several factors influence the final price, making it crucial to consider the scope of work, the type of junction box needed, and the complexity of the wiring involved. Labor costs, material expenses, and any necessary permits all contribute to the overall expense.
This blog post aims to break down the various elements that affect the cost of junction box installation. We’ll explore the typical price ranges for different types of junction boxes and the labor involved in their installation, providing you with a clearer understanding of what to expect when planning your electrical work.
Junction Box Installation Cost Factors
Understanding the factors that influence junction box installation costs is essential for accurate budgeting and project planning. These costs can vary significantly based on several key elements, from the type and size of the junction box itself to the complexity of the wiring and labor involved. Here’s a breakdown of the primary factors:
Junction Box Type and Material
The cost of the junction box itself varies based on its material (plastic or metal) and type (standard, weatherproof, fire-rated). Metal boxes are generally more expensive than plastic ones. Specialized boxes, like those for outdoor use or specific applications, also contribute to the overall material cost.
Junction Box Size and Capacity
Larger junction boxes, designed to accommodate more wires or larger gauge wires, tend to be more expensive. The required capacity, determined by electrical codes and the number of connections, directly impacts the price.
Wiring Complexity and Labor
The complexity of the wiring job significantly affects labor costs. Simple installations with few connections are less expensive than complex projects involving multiple circuits, intricate wiring configurations, or difficult access.
Location and Accessibility
Installation in easily accessible locations is generally less costly. Installations in confined spaces, attics, crawl spaces, or areas requiring special equipment or techniques will increase labor expenses due to the added time and effort.
Permits and Inspections
Local electrical codes often require permits and inspections for junction box installations. These fees add to the overall cost. The complexity of the project and local regulations influence these costs.
How to Install Junction Boxes

Installing junction boxes correctly is a critical step in any electrical wiring project, ensuring safety, organization, and code compliance. These protective enclosures house wire connections, preventing accidental contact and shielding them from environmental factors. Proper installation involves careful planning, secure mounting, and ensuring the box is appropriately sized and located for the intended wiring needs. Following these steps diligently will result in a safe and functional electrical system.
Step 1: Plan the Location and Layout
Before installing any junction boxes, carefully plan their location and the layout of your wiring. Consider the number of wires that will need to be joined, the direction from which the cables will be entering and exiting, and accessibility for future maintenance. Ensure the chosen location complies with electrical codes regarding clearances and accessibility. For instance, boxes should be readily accessible and not concealed behind permanent structures. Sketching a wiring diagram can be helpful in visualizing the placement of junction boxes and the routing of cables.
Step 2: Select the Right Size and Type of Junction Box
Choosing the appropriate size and type of junction box is crucial for a safe and effective installation. The box must have sufficient internal volume to accommodate all the wires, connectors, and any devices that might be housed within it without overcrowding. Electrical codes specify fill capacities for junction boxes based on wire gauge and number. Select the material (metal or plastic) based on the application and local codes. Consider environmental factors; for outdoor or damp locations, use weatherproof or waterproof boxes with appropriate NEMA or IP ratings.
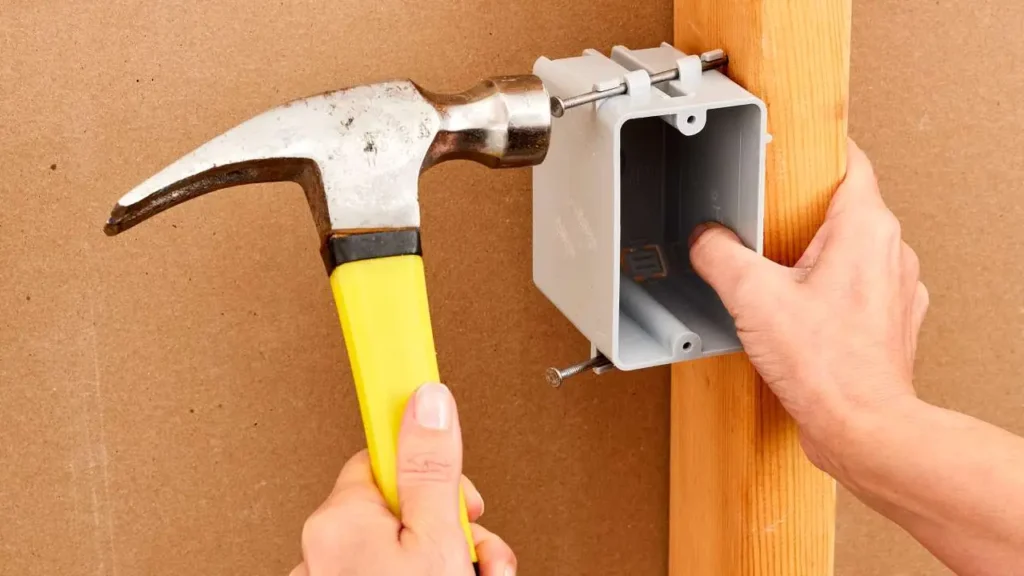
Step 3: Mount the Junction Box Securely
Once the location and box type are determined, securely mount the junction box. The mounting method will depend on the box type and the surface to which it’s being attached (e.g., wall stud, ceiling joist, surface mount). For flush-mounted boxes in walls or ceilings, secure them to framing members using screws or nails through the mounting ears or brackets. Surface-mounted boxes are typically screwed directly to a flat surface. Ensure the box is firmly attached and will not move or vibrate, which could potentially loosen wire connections over time.
Step 4: Prepare Cable Entry Points
After the box is mounted, prepare the entry points for the electrical cables. Most junction boxes have knockouts – pre-scored circles that can be removed to create openings for cables or conduit fittings. Select the appropriate size and number of knockouts needed for your wiring plan and carefully remove them using a screwdriver and hammer or knockout pliers. To protect the wires from abrasion and provide strain relief, install cable clamps or conduit connectors into the prepared openings. Ensure these fittings are properly tightened to secure the cables or conduit to the box.
Step 5: Run Cables into the Junction Box
Carefully run the electrical cables into the junction box through the installed cable clamps or conduit fittings. Ensure that there is enough slack in the wires within the box to make connections comfortably, typically around 6 to 8 inches. Tighten the cable clamps or conduit connectors to secure the cables to the box, preventing them from being pulled out and providing strain relief on the wire connections inside. For non-metallic (NM) cables, ensure the outer sheathing extends at least 1/4 inch inside the box.
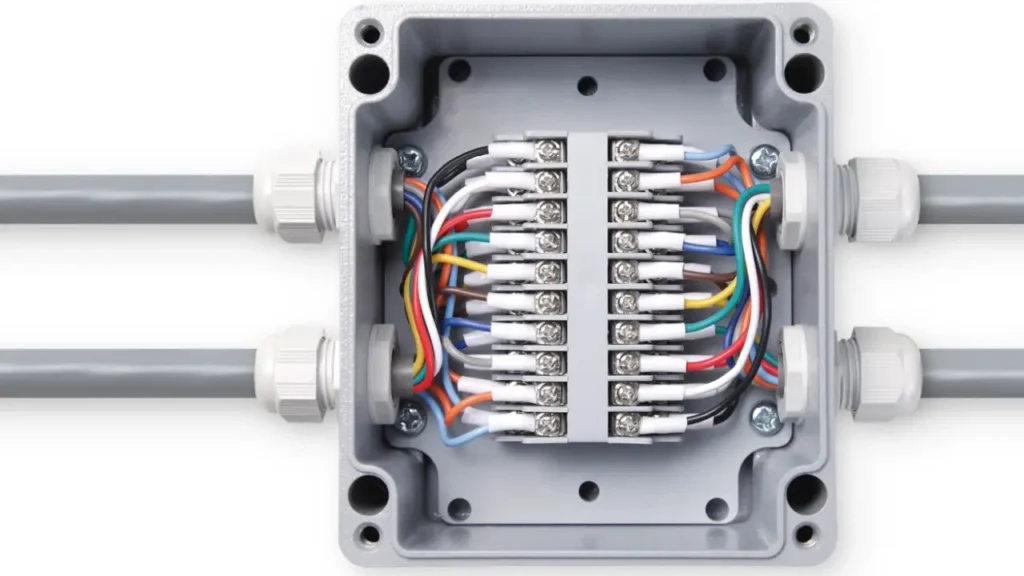
Step 6: Make Wire Connections Inside the Box
With the cables properly routed into the junction box, proceed to make the necessary wire connections according to your wiring diagram and electrical code. This typically involves connecting all the ground wires together, all the neutral wires together, and then connecting the hot wires to their respective destinations (e.g., to switches, outlets, or other devices). Use appropriate wire connectors such as wire nuts, push-in connectors, or terminal blocks to create secure electrical and mechanical bonds. Ensure no bare wire is exposed outside the connectors.
Step 7: Organize Wires and Install the Cover
After all the wire connections are made, carefully organize the wires inside the junction box, ensuring they are neatly tucked in and not overcrowded. Avoid putting excessive strain on the connections or the wires themselves. Position the wires so that the junction box cover can be installed without pinching or damaging them. Finally, securely fasten the appropriate cover onto the junction box using the provided screws or snap-fit mechanisms. The cover provides physical protection for the connections and is a crucial safety component of the installation.
How Much Does a Junction Box Cost
The cost of a junction box itself can vary significantly based on several factors. Simple plastic boxes for basic indoor use might range from a few dollars to around $15. More robust metal boxes, especially those designed for outdoor or industrial applications, can range from $20 to upwards of $100 or more depending on size and material quality. Specialized boxes with features like waterproofing or specific mounting options will also command a higher price point.
The overall cost of installing a junction box includes not only the price of the box but also additional materials and labor. Wiring connectors, conduit fittings (if applicable), and the cost of an electrician’s time will all contribute to the final expense. Installation costs can vary widely depending on the complexity of the job, the location of the installation, and local labor rates, typically ranging from $100 to $300 for a standard installation.
Here are some factors influencing the cost of a junction box:
- Material: Plastic boxes are generally cheaper than metal (steel, aluminum) ones.
- Size: Larger boxes with more capacity cost more than smaller ones.
- Type: Weatherproof, fire-rated, or specialized boxes have higher prices.
- Brand: Reputable brands might have slightly higher costs than generic options.
- Features: Boxes with integrated terminals or specific mounting solutions can be more expensive.
Here is the table about the cost of junction box for your reference:
| Feature | Typical Cost Range (USD) | Notes |
| Simple Plastic Box | $2 – $15 | Basic indoor use |
| Standard Metal Box | $5 – $30 | Indoor, more durable |
| Weatherproof Metal Box | $20 – $100+ | Outdoor or wet locations |
| Large Capacity Box | $15 – $80+ | Accommodates more wires |
| Installation Labor (Simple) | $80 – $150 | Basic replacement or straightforward new installation |
| Installation Labor (Complex) | $150 – $300+ | Multiple circuits, difficult access, or extensive wiring |
| Permits & Inspections | $30 – $150+ | Varies by location and project scope |
Note: These are estimated ranges and actual costs can vary based on location, specific product features, and the complexity of the installation. It’s always best to get a quote from a qualified electrician for accurate pricing.
Cost to Install Electrical Junction Box
The cost to install an electrical junction box can vary significantly based on several key factors.
For a basic installation involving a simple plastic box in an easily accessible location with minimal wiring, the cost might range from $100 to $300, encompassing both the materials and the labor. However, this price can increase substantially depending on the complexity of the wiring required, the type and size of the junction box needed, and whether the installation is indoors or outdoors.
More intricate installations, such as those requiring weatherproof metal boxes for outdoor use or larger boxes to accommodate numerous connections, will naturally involve higher material costs. Additionally, labor charges can escalate if the installation location is difficult to access, if extensive new wiring needs to be run, or if the project requires adherence to specific electrical codes and inspections. Electrician hourly rates typically range from $50 to $130, and many have a minimum service call fee, which will influence the overall cost.
Ultimately, the final cost to install an electrical junction box is a combination of the price of the materials (the box itself, connectors, wiring, etc.) and the electrician’s labor fees. For a more accurate estimate, it’s advisable to obtain quotes from local, qualified electricians who can assess the specific requirements of your project. Factors such as permits and the need for any additional electrical work should also be considered when budgeting for this type of installation.
How to Save Junction Box Installation Cost
Saving money on junction box installation involves careful planning and understanding the factors that influence cost. While it’s crucial to prioritize safety and adhere to electrical codes, there are strategies to minimize expenses.
Here’s how to approach the project cost-effectively for your junction box installation project:
1. Choose the Right Materials
Selecting the appropriate junction box for the task is essential. Opt for cost-effective materials like plastic for indoor, dry locations, rather than more expensive metal boxes.
2. Plan the Location Carefully
Strategic placement minimizes the amount of wiring and labor needed. Consider accessibility and proximity to existing circuits to reduce installation time.
3. Prepare the Work Area
Clear the area around the installation site. This allows the electrician to work efficiently, potentially reducing the labor hours required for the job.
4. Obtain Multiple Quotes
Compare estimates from several qualified electricians. This helps ensure you’re getting a fair price and can identify the most competitive rates.
5. Consider DIY (with caution)
For very simple installations and if you have electrical experience, you might do it yourself. However, prioritize safety and code compliance, and consult an electrician if unsure.
Conclusion
The cost of junction box installation varies depending on factors like box type, material, size, and labor. Simple installations are relatively inexpensive, while complex setups or those requiring specialized boxes and extensive wiring will increase the overall cost. Understanding these elements helps in budgeting accurately for your electrical projects.
While the initial cost is a consideration, prioritizing quality and safety in junction box selection and installation is crucial for long-term reliability and preventing potential hazards. Investing in durable and code-compliant materials and professional installation ensures a safe and efficient electrical system.
Need high-quality junction boxes for your business or project? Linkwell Electronics offers a wide range of wholesale junction boxes at competitive prices. Contact us today to explore our catalog and find the perfect solutions for your electrical needs. Choose Linkwell for reliable and cost-effective electrical components.