
Connecting armoured cable, such as BX or ACWU, to a junction box is a common requirement in many electrical installations. This type of cable provides robust mechanical protection for the wires inside.
Properly terminating armoured cable at the junction box is critical for safety and compliance with electrical codes. It ensures the protective armour is handled correctly and the electrical connection is secure and reliable.
What is Armoured Cable
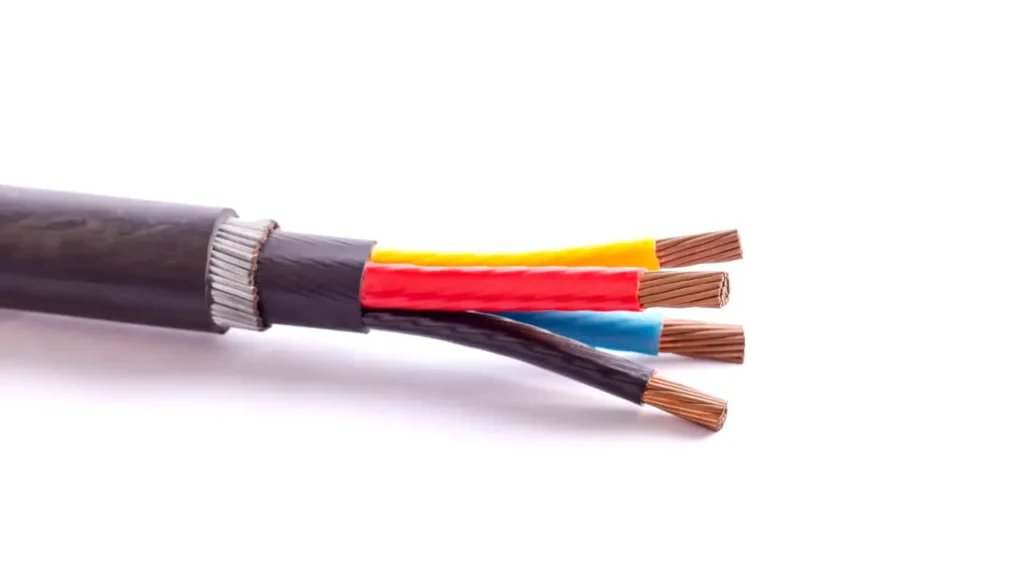
Armored cable is an electrical cable that has an added layer of mechanical protection. This outer layer, typically made of metal such as steel or aluminum, safeguards the inner conductors from damage due to abrasion, impact, and other physical stresses. This robust construction makes it suitable for more demanding applications compared to unarmored cables.
This extra protection also allows armored cable to be used in situations where it might be exposed to harsh environments or potential mechanical damage, such as direct burial underground, running through walls where nails or screws could penetrate, or in industrial settings. The metallic armor may also provide some level of electromagnetic shielding.
How to Connect Armoured Cable to a Junction Box
Connecting armored cable to a junction box is a crucial task that requires precision and adherence to safety standards to ensure a reliable electrical connection. This process involves several key steps, from preparing the cable to securing it within the box and making the necessary wire connections.
Proper technique not only guarantees functionality but also prevents potential hazards, making it essential to follow each step carefully.
Step 1: Turn Off the Power
Before initiating any work on the electrical system, the absolute priority is to ensure safety by completely disconnecting the power supply to the circuit you intend to modify. Locate the corresponding circuit breaker in your electrical panel and switch it firmly to the “off” position. This action interrupts the flow of electricity, significantly reducing the risk of electrical shock or injury during the wiring process.
As a crucial safety verification, always double-check that the power is indeed off. Utilize a non-contact voltage tester or a multimeter to confirm the absence of voltage at the wires within the junction box area.
This confirmation is vital and should never be skipped, as it provides the necessary assurance for a safe working environment before proceeding with any physical manipulation of the electrical components.
Step 2: Prepare the Cable
Begin the cable preparation by carefully measuring and cutting the armored cable to the required length for your specific installation, ensuring adequate slack for comfortable work inside the junction box. Following the cut, the next essential task is to carefully remove a section of the outer metallic armor to expose the insulated wires underneath.
Employ a cable ripper or a hacksaw (used with caution) to score and then break away the armor without damaging the insulation of the inner conductors. Remember that the cut armor can have sharp edges, so handle it with care.
Inside the removed armor, you will typically find a bonding strip or wire. This component is crucial for grounding the cable effectively. Ensure that this bonding strip remains intact and is of sufficient length to be properly connected to the grounding system within the junction box. Avoid damaging or shortening this strip during the armor removal process to maintain a reliable ground path.
Step 3: Insert the Cable into the Junction Box
With the armored cable prepared, the next phase involves inserting it into the junction box. Identify an appropriate knockout opening on the box that corresponds to the size of your cable and chosen connector. If the knockout is still intact, remove it carefully using a screwdriver and pliers.
Gently push the prepared end of the armored cable through the opened knockout and into the interior of the junction box. Ensure that a reasonable length of the cable extends inside the box to allow for secure connection and wiring. Take care not to kink or sharply bend the cable during this insertion, as this could potentially damage the internal wiring or the cable’s integrity.
Step 4: Install Cable Connector
To securely attach the armored cable to the junction box and establish a reliable electrical bond, especially for grounding, install a suitable cable connector. Common connector types for armored cable include AC connectors and BX connectors.
Slide the appropriate connector over the end of the armored cable that extends into the junction box. Ensure that the connector grips the metallic armor of the cable firmly. Tighten the screws or nuts on the connector securely. This will create a strong mechanical connection and a vital electrical connection between the cable’s armor and the junction box, which is essential for effective grounding.
Step 5: Strip the Insulation
After the cable is secured to the box, prepare the individual wires for connection by stripping off a portion of their insulation. Use a wire stripper tool to carefully remove approximately one-half to three-quarters of an inch of insulation from the ends of the black (hot), white (neutral), and any other colored wires.
Exercise caution while stripping the insulation to avoid nicking or damaging the underlying copper conductor. A clean strip is necessary for a good electrical contact. If a wire is accidentally nicked, it’s best to cut the damaged part and strip it again to ensure a reliable connection.
Step 6: Connect the Wires
With the wires stripped, proceed to make the electrical connections inside the junction box. Connect the wires according to your circuit’s requirements, typically matching black (hot) to black, and white (neutral) to white. For other colored wires, refer to your wiring diagram or consult with an electrician.
Use appropriate wire connectors, such as wire nuts or terminal blocks, to securely join the corresponding wires together. Twist the bare ends of the wires tightly before applying a wire nut, or firmly insert them into the terminals of a terminal block and tighten the screws. Ensure all connections are tight and that no bare wire is exposed outside the connectors.
Step 7: Secure the Cable
While the cable connector holds the cable at the entry point to the box, providing additional security inside can help prevent strain on the wire connections. Depending on the box design and local electrical codes, there might be provisions for further securing the cable.
If your junction box has internal clamps or strain relief mechanisms, utilize them to provide extra support to the armored cable where it enters the box. This helps to keep the cable stable and reduces the likelihood of the wire connections becoming loose due to movement or tension on the cable.
Step 8: Grounding
Ensure proper grounding of the armored cable and the junction box for safety. Connect the bonding strip or bare ground wire from the armored cable to the designated green grounding screw or grounding terminal inside the metal junction box.
Wrap the exposed end of the bonding strip or ground wire clockwise around the grounding screw, ensuring good metal-to-metal contact. Tighten the screw securely. This grounding path is crucial for safely carrying fault currents and preventing electrical hazards.
Step 9: Close the Junction Box
Before finalizing the installation, conduct a thorough inspection of all connections. Double-check that all wires are securely connected, grounding is properly established, and there are no loose strands or exposed wires. Ensure the cable connector is firmly tightened to the junction box and that the cable itself is not under undue strain.
Once you are confident that everything is correctly wired and safe, carefully arrange the wires inside the junction box to allow the cover to be fitted properly without pinching any conductors. Secure the cover to the junction box using the provided screws or fasteners, ensuring it is firmly in place to protect the connections from dust, moisture, and accidental contact.
Step 10: Turn On Power
With the junction box securely closed, you can now safely restore power to the circuit at the main electrical panel. Locate the circuit breaker you switched off in Step 1 and flip it back to the “on” position.
After turning the power on, test the functionality of the circuit to ensure that all connections have been made correctly and the system is operating as intended. If any issues arise, immediately turn off the power again and carefully re-examine your wiring for any errors.
Waterproof Junction Box for Armoured Cable
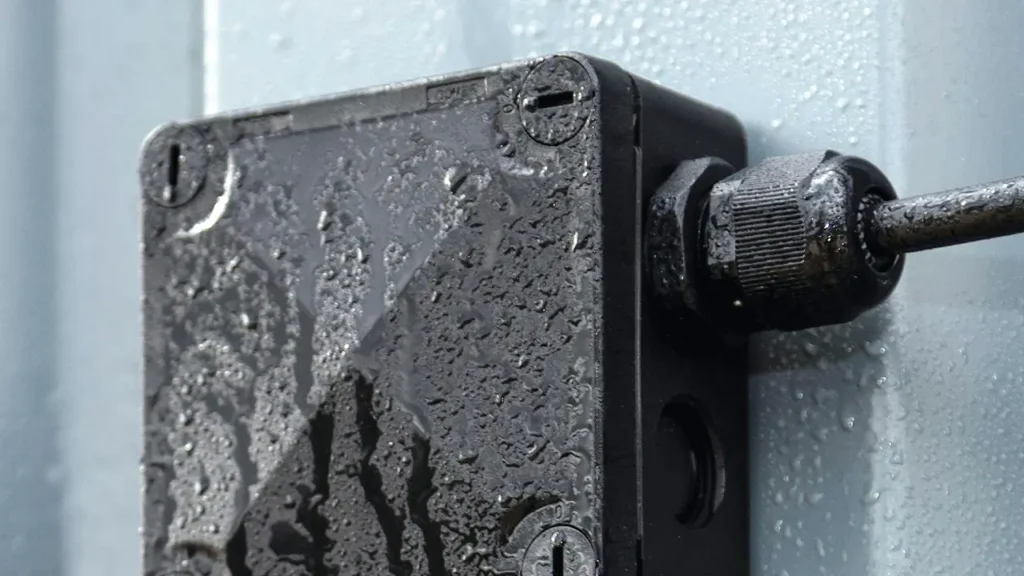
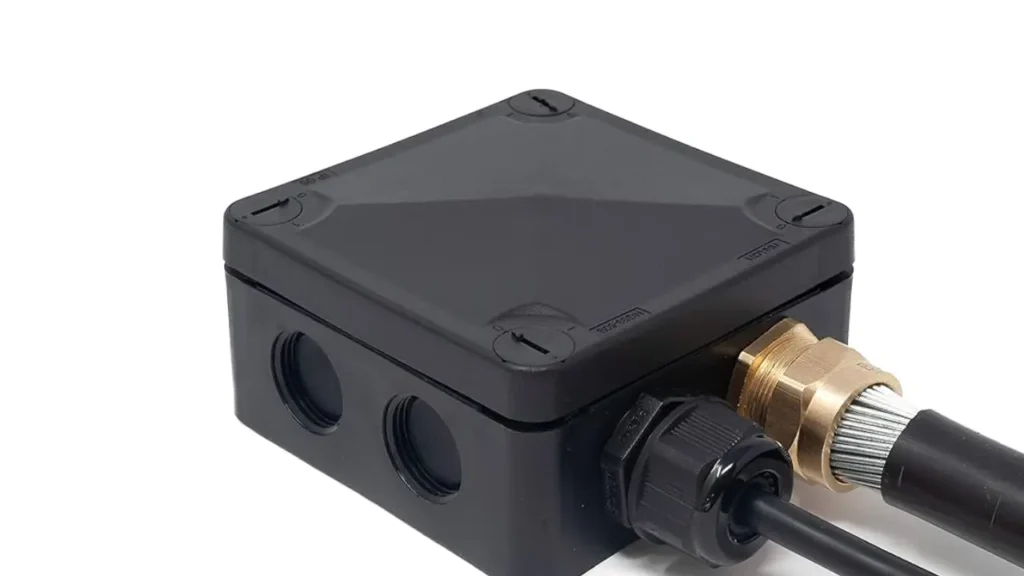
Waterproof junction boxes designed for armored cables provide a crucial layer of protection in environments where moisture or water ingress is a concern. These specialized junction boxes are constructed with seals, gaskets, and robust materials that prevent water from entering the enclosure, thereby safeguarding the electrical connections within. Using a waterproof junction box with armored cable ensures the longevity and safety of the electrical system, preventing corrosion, short circuits, and potential hazards associated with water exposure.
The integration of armored cable with a waterproof junction box offers a durable and reliable wiring solution for outdoor applications, damp locations, or industrial environments where washdowns are common. The armored sheath of the cable provides mechanical protection against physical damage, while the waterproof box protects the terminations from moisture. This combination is essential for maintaining the integrity of electrical circuits in challenging conditions.
When selecting a waterproof junction box for armored cable, consider factors such as the IP rating (Ingress Protection), which indicates the level of protection against dust and water. Look for boxes made from durable, non-corrosive materials like fiberglass or specific grades of plastic or metal designed for wet environments. Ensure the box has appropriate entry points and fittings that maintain the waterproof seal around the armored cable.
Conclusion
Connecting armored cable to a junction box involves careful preparation. Begin by selecting the appropriate cable size and junction box for your wiring needs. Secure the cable firmly to the box using the correct type and size of connector, ensuring a proper fit.
The next crucial step is making the electrical connections within the box. Remember to properly ground the armored cable and securely connect the individual wires to their corresponding terminals, adhering to electrical codes and safety standards for a reliable connection.
Finally, always double-check your connections for tightness and safety before closing the junction box. For your wholesale junction box needs, consider high-quality options available from a trusted supplier like Linkwell.


