In any electrical installation, whether residential, commercial, or industrial, effective cable management is not just about neatness; it’s a critical component of safety, efficiency, and system longevity. Disorganized wiring can lead to a myriad of problems, from fire hazards and electrical interference to frustrating troubleshooting and costly downtime.
This essential guide will walk you through the systematic process of how to do cable management for electrical installations. We’ll cover everything from initial planning and selecting the right tools to step-by-step installation techniques and crucial considerations, ensuring your wiring is safe, organized, and optimized for peak performance.
What is a Cable Management System?
A cable management system is a structured approach to organizing, routing, and protecting electrical, data, and communication cables within any environment, from residential homes to large industrial complexes.
It encompasses a variety of components like cable trays, trunking, conduits, ties, and labels, all working together to ensure that cables are neatly arranged, safely secured, and easily accessible. The primary goals are to prevent hazards like tangling and damage, optimize system performance by reducing interference and improving airflow, and simplify maintenance, troubleshooting, and future upgrades.
What You Need for Cable Management
Recommended Cable Management

Achieving professional cable management demands more than just tidiness; it requires a specific set of tools and components designed to organize, protect, and optimize wiring pathways for safety and efficiency. The exact items will vary based on the scale and complexity of the installation.
Essential items for effective cable management typically include:
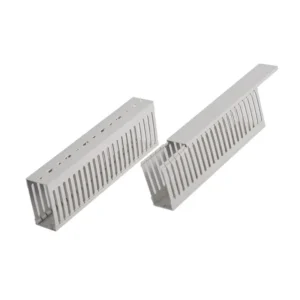
- Cable Raceway Systems: These provide enclosed channels to route and protect cables, such as PVC trunking for surface mounting or metal conduits for more robust applications.
- Cable Support Structures: Open systems like ladder-type or perforated cable trays offer robust support for heavy cable loads, allowing for excellent ventilation and easy access for additions or changes.
- Fasteners and Ties: Reusable Velcro straps or durable zip ties are crucial for bundling cables neatly together, preventing tangles and maintaining organization within pathways or behind equipment.
- Mounting Hardware: Various clips, clamps, and adhesive mounts are used to secure cable runs to walls, ceilings, or under desks, ensuring they remain in place and out of harm’s way.
- Identification Tools: Cable labels, markers, or color-coded ties are indispensable for clear identification of individual cables or bundles, vastly simplifying troubleshooting and future modifications.
- Wire Protection: Components like heat shrink tubing, cable sleeves, or grommets protect cable insulation from abrasion, sharp edges, and environmental factors at entry/exit points.
- Cutting and Stripping Tools: Specialized cutters and wire strippers are necessary for precise preparation of cable ends, ensuring clean connections and efficient installation.
- Routing Aids: Items like fish tape help pull cables through conduits or confined spaces, while cable organizers or clips guide individual wires to their respective destinations.
- Power Distribution Solutions: Surge protectors, power strips, and cable management boxes help consolidate power connections and hide unsightly adapters, contributing to overall neatness and safety.
How to Do Cable Management?

Beyond these primary containment systems, a variety of Fasteners and Ties are indispensable for maintaining internal organization and securing cables within their pathways:
- Cable Ties (Zip Ties): Available in various lengths and materials, these are widely used for bundling cables neatly. Both releasable and non-releasable versions offer flexibility for temporary or permanent securing.
- Velcro Straps: These reusable and adjustable straps are excellent for situations requiring frequent changes or additions to cable bundles, offering a gentler alternative to plastic ties.
- Cable Clips and Clamps: Designed to fasten cables securely to surfaces, ensuring that runs remain straight, tidy, and safely positioned along their designated route, preventing sagging or displacement.
Identification and Organization tools are paramount for long-term manageability:
- Cable Labels and Markers: Clearly identifying each cable or bundle at both ends is a non-negotiable step. Durable, legible labels drastically simplify troubleshooting, maintenance, and future modifications, preventing costly guesswork and errors.
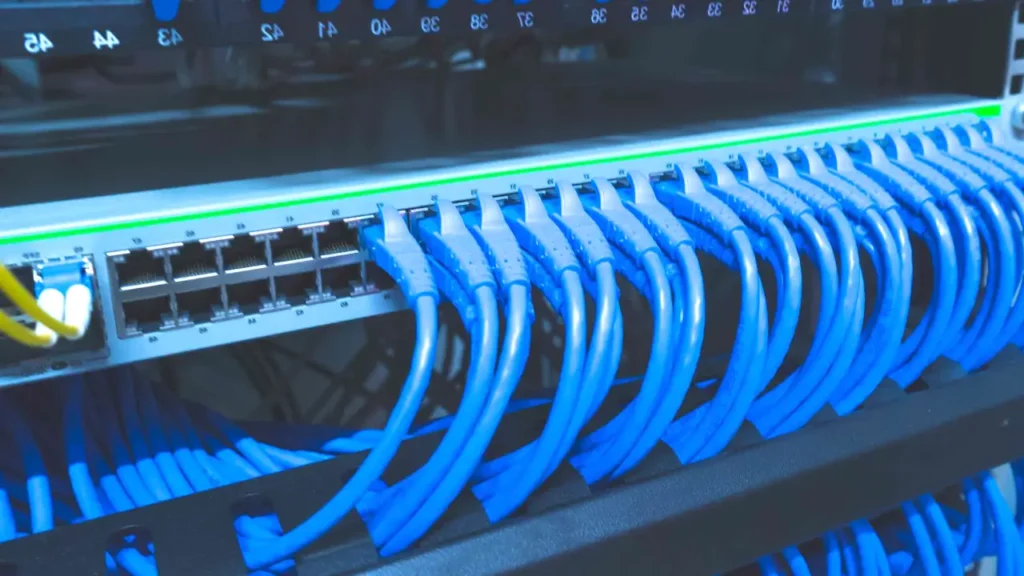
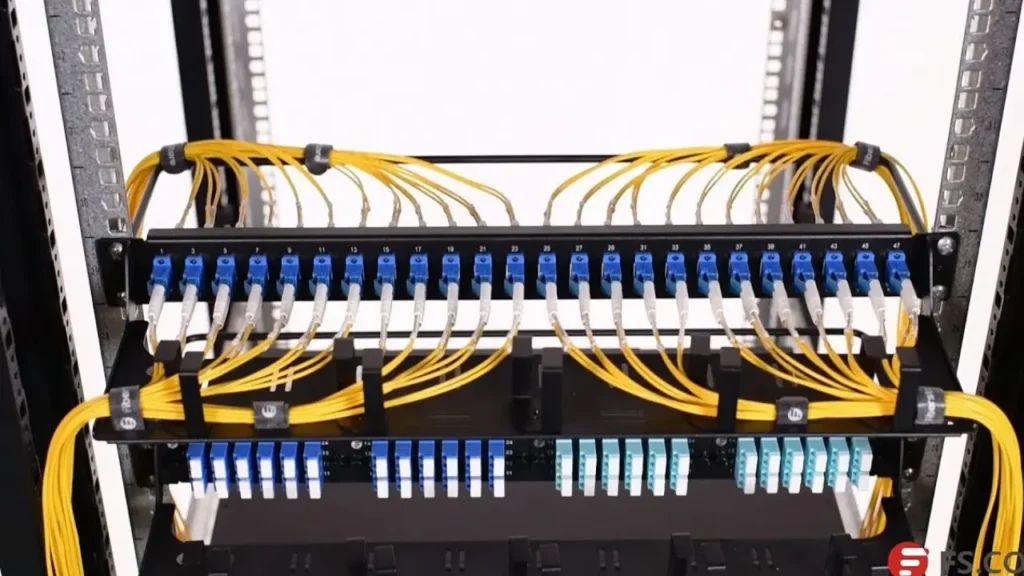
- Cable Management Panels and Rings: Commonly used within network cabinets and server racks, these accessories provide dedicated points for routing patch cords and organizing bundles, maintaining airflow and reducing clutter within enclosed spaces.
To further safeguard cables, Protection Accessories are vital:
- Grommets: These protective rings are inserted into holes through which cables pass, preventing the sharp edges of the opening from abrading and damaging the cable’s insulation.
- Sleeving and Wraps: Flexible sheathing or spiral wraps can bundle multiple cables together, offering an additional layer of physical protection while consolidating wires for a cleaner appearance.
Finally, a set of fundamental Tools is necessary for any cable management undertaking:
- Wire Cutters and Strippers: Essential for accurately cutting cables to length and removing insulation for termination.
- Measuring Tape: Crucial for precise planning and measurement of cable runs and the components of the management system.
- Drill and Fasteners: For securely mounting cable trays, trunking, and other containment systems to walls, ceilings, or other surfaces.
- Safety Gear: Depending on the environment, personal protective equipment (PPE) such as gloves, safety glasses, and hard hats are often necessary to ensure installer safety.
How to Do Good Cable Management?

Executing effective cable management is a systematic process that moves from conceptualization to meticulous execution and ongoing maintenance. Adhering to a structured approach ensures not only a visually appealing result but also a robust and reliable cabling infrastructure.
Step 1: Plan Your Layout
The foundation of any successful cable management project lies in exhaustive planning. Begin by meticulously identifying all the devices, power sources, and network connection points within the area.
This initial mapping allows you to visualize and determine the most direct and efficient pathways for your cables, aiming to minimize unnecessary length, sharp bends, and potential points of conflict. Crucially, this planning phase should also anticipate future requirements, ensuring that the chosen system has sufficient capacity for potential expansions or additional cabling, thereby avoiding costly re-installations later.
During this critical assessment, it’s imperative to evaluate the specific environmental conditions of the installation area. Consider factors such as temperature fluctuations, humidity levels, presence of dust or corrosive agents, and the potential for physical impact or foot traffic.
This environmental assessment directly informs the selection of appropriate cable management solutions – for instance, opting for enclosed trunking in dusty environments to protect sensitive cables, or utilizing open cable trays where superior ventilation is paramount for heat dissipation, especially with high-density power cables.
Step 2: Gather Your Tools and Materials
Before commencing any physical work, a thorough inventory of all necessary tools and materials is paramount. This preparation phase is crucial for ensuring a smooth and efficient installation process, ultimately contributing to a professional and enduring finish.
Ensure you have the right types and quantities of cable trays, trunking, conduits, and various fasteners such as cable ties and Velcro straps. Do not overlook essential tools like wire cutters, strippers, and a reliable measuring tape.
The selection of materials must align with the demands of the installation and environmental conditions identified in Step 1. For instance, in areas with strict fire safety regulations, utilizing fire-rated trunking or low-smoke, zero-halogen (LSZH) materials for conduits is essential.
Similarly, in outdoor or corrosive industrial settings, galvanized steel or fiberglass (GRP) cable trays would be more appropriate than standard PVC. Investing in high-quality, fit-for-purpose materials is a direct investment in the long-term reliability and safety of your cable management system.
Step 3: Install Management Systems
With planning complete and materials gathered, the physical installation of your chosen cable management systems begins. Whether you are mounting cable trays along overhead structures, securing trunking pathways along walls, or embedding conduits within building elements, meticulous attention to detail is key.
Always adhere strictly to the manufacturer’s installation guidelines to ensure proper functionality and safety. Components must be level, securely fastened using appropriate anchors, and correctly aligned to provide consistent and robust support for the cables they will house.
Special consideration must be given to bends, junctions, and transitions within the system. Utilize purpose-designed fittings such as bends, tees, reducers, and risers to create smooth cable pathways.
Avoiding sharp angles is crucial, as tight bends can damage cable insulation, compromise performance, or even lead to signal degradation, particularly for fiber optic cables. Furthermore, ensure that the chosen system has adequate internal space to accommodate all current cables without overcrowding, allowing for necessary airflow and providing room for any anticipated future additions without compromising the system’s integrity.
Step 4: Route and Secure Cables
Once the physical containment systems are firmly in place, the meticulous process of routing and securing the cables begins. Care is paramount here; avoid haphazardly stuffing cables into pathways. Instead, gently lay cables, preventing unnecessary tangling, twisting, or sharp crossings.
Employ cable ties or reusable Velcro straps to bundle cables neatly together within the trays or trunking. While securing, ensure that ties are firm enough to hold bundles in place but not overtightened, as excessive pressure can deform cable insulation and impair performance, especially for data cables.
A crucial practice during this step is the segregation of different cable types. Separate power cables from data and communication cables to minimize electromagnetic interference (EMI), which can degrade signal quality.
Additionally, incorporate “service loops” where appropriate – small, deliberate coils of extra cable length. These loops provide valuable slack for future adjustments, repairs, or reconfigurations, eliminating the need to pull new cable runs for minor changes. This methodical approach ensures both immediate organization and long-term flexibility.
Step 5: Label and Document
The final, yet critically important, step in effective cable management is comprehensive labeling and thorough documentation. Once all cables are routed and securely fastened, clearly label each cable at both its origin and termination points.
Use durable, high-contrast labels that are resistant to fading, moisture, and abrasion, ensuring readability over time. This clear identification is invaluable for rapid troubleshooting, simplifying maintenance procedures, and expediting future upgrades, significantly reducing diagnostic time and the potential for errors.
Beyond individual cable labeling, create comprehensive documentation of your entire cable management layout. This should include detailed diagrams or schematics illustrating cable routes, connection points, labeling conventions, and the types of cables used in specific pathways.
This documentation serves as an invaluable reference for any future work on the system, whether it’s routine maintenance, fault finding, or expanding the infrastructure. Proper documentation ensures consistency and efficiency, making the system manageable for years to come.
How to Manage Cables?
Managing cables effectively is crucial for safety, performance, and longevity in any setup. It involves a systematic process to keep wires organized, protected, and accessible, turning cluttered chaos into an efficient system.
Step 1: Assess and Plan Your Needs
Begin by thoroughly assessing your current cable situation and identifying all devices and connection points. Sketch out a plan for optimal cable routing, considering factors like power sources, data ports, and potential future additions. This initial assessment helps in determining the necessary length and types of cables and management solutions.
During this planning phase, also consider the environment where the cables will be located. Are there any heat sources, areas of high traffic, or potential for moisture? These environmental factors will dictate the specific types of cable management products and materials that will be most suitable for ensuring safety and durability.
Step 2: Gather Appropriate Materials
Once your plan is solidified, collect all the necessary tools and cable management products. This includes various containment options like cable trays, trunking, or conduits, depending on your needs for protection, ventilation, and aesthetics. Ensure you have ample cable ties or Velcro straps, labels, and mounting hardware.
Selecting the right materials is critical. Opt for durable, high-quality products that match the environment and the types of cables you are managing. For example, use fire-rated materials where safety is paramount, or robust metal options for industrial settings. Having everything on hand before you start will streamline the process.
Step 3: Route and Secure Cables
Begin the actual process of routing cables according to your plan. Lay cables neatly within the chosen management systems, avoiding kinks or sharp bends that could damage them. Use cable ties or Velcro straps to bundle cables together, ensuring they are secure but not overly tight, which could cause strain.
When routing, try to separate power cables from data cables to minimize electromagnetic interference. Leave a small amount of slack, known as a service loop, at connection points to allow for future adjustments or repairs without needing to re-pull entire cable runs.
Step 4: Label and Document
After cables are routed and secured, the final, crucial step is labeling. Clearly mark each cable at both ends with durable, easy-to-read labels. This makes troubleshooting, maintenance, and future modifications significantly quicker and less prone to errors, saving valuable time and effort.
Beyond individual cable labels, it’s highly beneficial to create a simple diagram or document outlining your cable management layout. This visual reference helps anyone working on the system understand the connections and routing, ensuring consistency and efficiency for ongoing management.
Conclusion
Implementing effective cable management is more than just tidying up; it’s a critical investment in the safety, efficiency, and longevity of your electrical installations. By following systematic steps from planning to labeling, you create a robust infrastructure that prevents hazards and simplifies future maintenance.
Ultimately, well-managed cables minimize downtime, reduce troubleshooting complexities, and contribute to a more professional and compliant environment. This proactive approach ensures your electrical systems operate at peak performance, safeguarding both equipment and personnel.
For all your cable management needs, including wholesale cable trunking, trays, and accessories, Linkwell Electrics offers a comprehensive range of high-quality solutions designed for professional electrical installations.