
Ensuring the secure mounting of junction boxes is paramount for the safety and longevity of any electrical installation. A properly affixed junction box provides a stable and protected enclosure for wire connections, preventing strain, damage, and potential hazards. This comprehensive guide will explore various methods and best practices for mounting junction boxes effectively, catering to different wall and ceiling types and project requirements.
Whether you’re working on residential renovations or commercial builds, understanding the correct techniques for junction box mounting is crucial for code compliance and the overall integrity of the electrical system.
This guide will delve into the selection of appropriate hardware and methods to ensure a robust and reliable installation, contributing to a safe and functional electrical environment.
What Is Junction Box Mounting
Junction box mounting refers to the process of securely attaching an electrical junction box to a building’s structure or surface. This is a critical step in any electrical installation as it ensures the box, which houses and protects wire connections, remains stable and accessible. Proper mounting prevents stress on the wiring, maintains the integrity of the electrical system, and complies with safety regulations and electrical codes.
The method of junction box mounting varies depending on the type of box, its intended use, and the surface to which it is being attached. Common methods include securing the box directly to wall studs or ceiling joists using screws or nails, utilizing mounting brackets for adjustable positioning, or employing specialized mounting hardware for specific situations like old work installations in existing walls or mounting to concrete or masonry surfaces. The goal is always to create a firm and reliable attachment that can withstand the weight of the wiring and any connected devices.
How to Mount Junction Box on Wall
Mounting a junction box securely to a wall is a fundamental skill in electrical work, whether for new installations or renovations. The process involves selecting the appropriate box and mounting method based on the wall type (drywall, plaster, wood, etc.) and the intended use of the junction box.
A properly mounted box provides a stable and safe enclosure for electrical connections, ensuring compliance with electrical codes and preventing potential hazards. Always ensure the power to the circuit is off before starting any electrical work.
Step 1: Locate the Desired Mounting Position
Begin by identifying the exact location on the wall where you need to mount the junction box. Consider factors such as the reach of the wiring, the placement of any associated devices (like outlets or switches), and accessibility for future maintenance.
If you’re installing a new box, ensure there’s no existing wiring or plumbing within the wall cavity at that location. Use a stud finder to determine the location of wall studs. Mounting directly to a stud provides the most secure support, especially for heavier applications. Mark the desired position on the wall with a pencil.
Step 2: Select the Appropriate Junction Box and Mounting Method
Choose a junction box of the correct size and type for your application. For standard wiring in finished walls, plastic or metal boxes with mounting ears are common. If you’re mounting directly to a stud, a box with side mounting holes is suitable.
For “old work” installations in existing walls where you can’t access studs, you’ll need an old work box with clamps that grip the back of the drywall. Ensure the box has sufficient volume for the number of wires it will contain. Gather the necessary mounting hardware, such as screws of the appropriate length and type for the wall material.
Step 3: Prepare the Wall for Mounting (If Necessary)
If you’re installing a new junction box in an existing wall, you’ll need to cut an opening for it. Once you’ve marked the desired location, use a drywall saw or a utility knife to carefully cut out the rectangular or round opening that matches the size and shape of your junction box.
Be cautious not to cut into any wires or pipes hidden within the wall. For old work boxes, ensure the opening is the correct size for the box’s outer flange and that the internal clamps will have enough drywall to grip. Clean any debris from the opening.
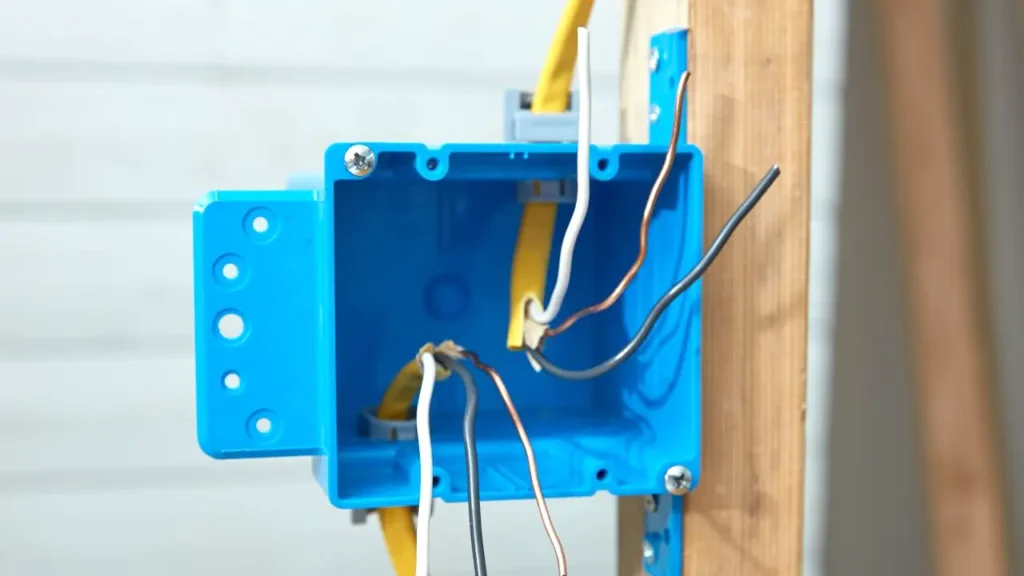
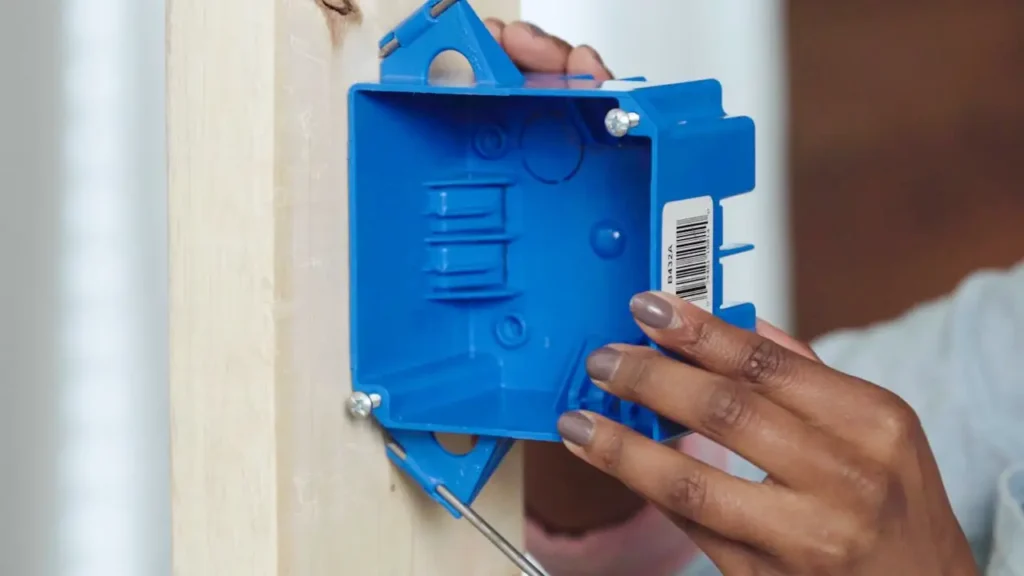
Step 4: Position and Secure the Junction Box
Position the junction box within the prepared opening or against the wall surface at your marked location. For boxes with mounting ears, align the ears flat against the wall and drive screws through the pre-drilled holes into the wall stud or drywall (using appropriate anchors if not hitting a stud).
For old work boxes, insert the box into the opening and then tighten the screws on the side of the box. This will cause the internal clamps to rotate and grip the back of the drywall, securing the box in place. Ensure the box is flush with the wall surface and securely fastened so it won’t move.
Step 5: Verify Stability and Install Wiring
Once the junction box is mounted, gently tug on it to ensure it is firmly attached to the wall and doesn’t wobble. A secure mounting is essential for the safety and longevity of the electrical connections.
You can now proceed with running the electrical wires into the box through the appropriate knockouts or cable clamps and making the necessary connections. Remember to leave sufficient wire length inside the box for easy manipulation and connection. After wiring, install the appropriate cover onto the junction box to protect the connections.
How to Attach Mounting Bracket to Junction Box
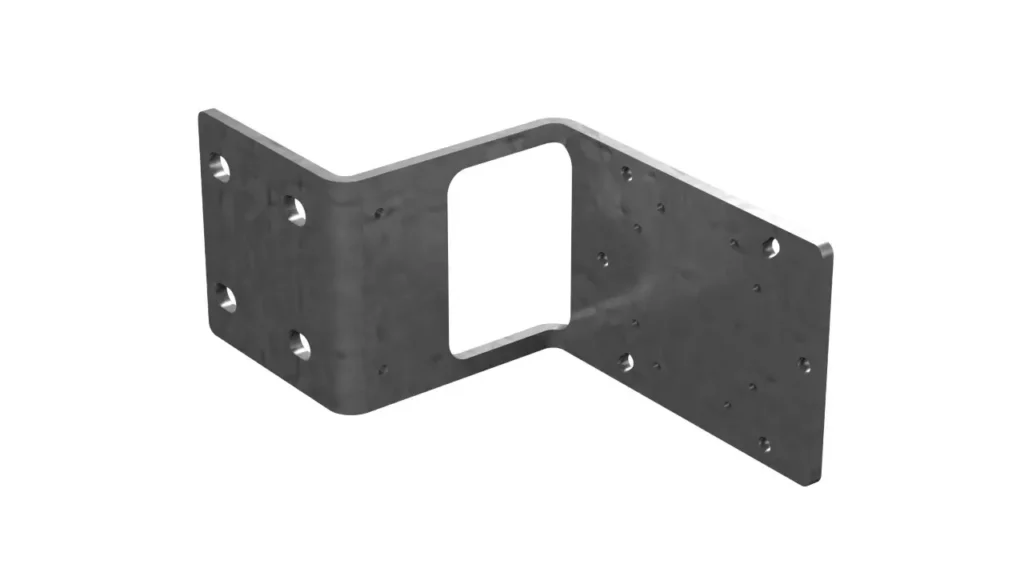
Attaching a mounting bracket to a junction box is a common step when installing light fixtures, ceiling fans, or other electrical devices. The bracket provides a secure interface between the junction box and the fixture. The specific method will vary depending on the type of bracket and junction box you are using, but the general principles remain the same. Always ensure the power to the circuit is off before starting any work.
Step 1: Identify the Bracket and Junction Box Compatibility
First, ensure that the mounting bracket you have is compatible with the junction box installed in your wall or ceiling. Most standard junction boxes have pre-drilled holes or threaded openings designed to accept mounting screws from a variety of brackets.
Examine both the bracket and the junction box to understand how they are intended to connect. Some brackets may have a center hole for a threaded nipple, while others have screw holes that align with those on the box.
Step 2: Align the Bracket with the Junction Box
Position the mounting bracket against the junction box, aligning the screw holes on the bracket with the corresponding holes or threaded openings on the box. You may need to rotate or adjust the bracket to find the correct orientation. For brackets with a center threaded nipple, ensure the nipple can pass through the center hole of the junction box. Some brackets might have adjustable arms or slots to accommodate different junction box sizes or screw hole spacings.
Step 3: Secure the Bracket to the Junction Box
Once the bracket is properly aligned, use the appropriate screws or fasteners to attach it securely to the junction box. For standard screw-on brackets, insert screws through the holes in the bracket and tighten them into the corresponding holes or threaded openings in the junction box. Ensure the screws are the correct length so they don’t protrude too far into the box and interfere with wiring. For brackets with a threaded nipple, screw the bracket onto the nipple until it is snug against the junction box.
Step 4: Ensure the Bracket is Level and Stable
After attaching the bracket, check that it is level and securely fastened to the junction box. A level bracket will ensure that the light fixture or fan you install will also hang straight. Gently try to wiggle the bracket to confirm it is stable and won’t move or rotate once the weight of the fixture is added. A loose bracket can be a safety hazard. If necessary, tighten the screws or adjust the mounting hardware to achieve a secure and level platform for your fixture.
Mounting Bracket Doesn’t Fit Junction Box
It’s a common frustration when a mounting bracket doesn’t align correctly with the screw holes or mounting features of an installed junction box. This can occur due to variations in manufacturing standards between different brands or if the junction box was not initially intended for the specific type of fixture you are trying to install.
Before resorting to modifications, double-check that you are using the correct type of bracket for the fixture and that you haven’t overlooked any adjustable components on the bracket itself, such as sliding arms or rotating crossbars, which are designed to accommodate different box configurations.
If, after careful inspection and adjustment, the bracket still doesn’t fit, you have a few options. One approach is to try a different mounting bracket that is known to be compatible with your type of fixture or junction box.
Alternatively, depending on the specific mismatch and local electrical codes, you might be able to carefully drill new mounting holes in the bracket itself, ensuring you don’t compromise its structural integrity or interfere with the electrical connections within the box. As a last resort, if the existing junction box is not suitable, you might need to replace it with one that is compatible with your desired fixture and its mounting bracket. Always prioritize safety and consult with a qualified electrician if you are unsure about the best or safest course of action.
Junction Box With Mounting Plate
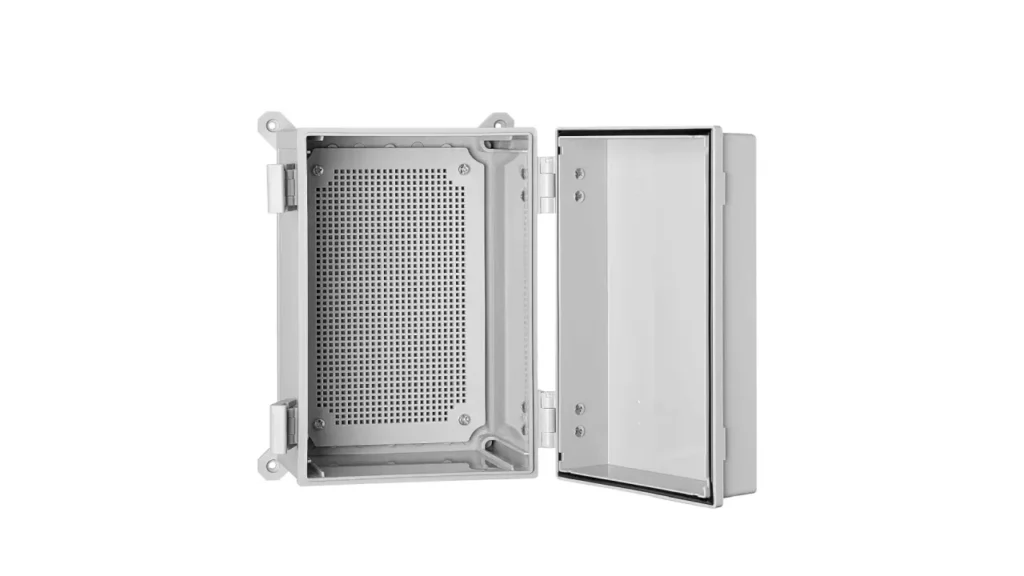
A junction box with a mounting plate is an electrical enclosure that comes equipped with an integrated or detachable plate inside, designed for easy installation of electrical components.
This plate provides a stable and convenient surface to mount items such as terminal blocks, DIN rails, power supplies, or other control devices within the junction box. The mounting plate simplifies the process of securing these components, offering a more organized and efficient layout compared to directly mounting to the box walls.
Key aspects of a junction box with a mounting plate include:
- Simplified Installation: The plate allows for pre-assembly of components before installing the entire box.
- Organized Layout: Provides a structured surface for arranging and securing electrical devices.
- Versatility: Accommodates a variety of components using screws, clips, or other fasteners.
- Accessibility: Components mounted on the plate are generally easier to access for wiring and maintenance.
Conclusion
In conclusion, secure junction box mounting is paramount for electrical safety and system longevity. Proper techniques ensure stability, prevent strain on wiring, and maintain code compliance. Considering the mounting surface, box type, and load are crucial for a reliable installation.
Mastering various mounting methods, from surface to flush and specialized techniques, allows for adaptability across diverse projects. A correctly mounted junction box provides a safe and accessible enclosure for electrical connections, contributing to the overall integrity of the electrical system.
For projects requiring tailored solutions, Linkwell Electronics offers custom junction box manufacturing. Contact us to discuss your specific mounting needs and ensure a perfect fit for your electrical installations. Choose Linkwell for reliable and customized enclosures.


