Wondering how to replace a thermostat in your electrical cabinet enclosure? You need to focus on safety first and grab the right tools for the job. Linkwell thermostats make the process simple and reliable. With the right steps, you can swap out your thermostat quickly and keep your equipment protected.
Key Takeaways
- Always turn off the power before starting any work on the thermostat to ensure your safety.
- Label all wires before disconnecting them to avoid confusion during reinstallation.
- Choose a Linkwell thermostat for reliable performance and safety in your electrical cabinet.
Preparation & Safety
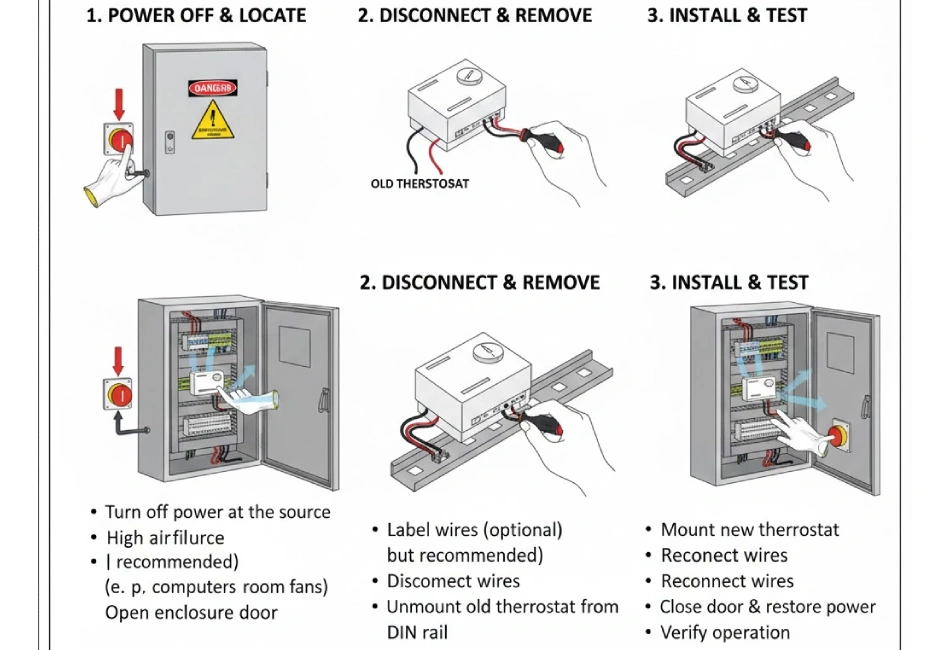
Before you start replacing a thermostat in your electrical cabinet enclosure, you need to focus on safety. Always turn off the power to the cabinet. This step protects you from electrical shock and keeps your equipment safe. Never skip this step, even if you feel confident.
Gather Tools & Linkwell Parts
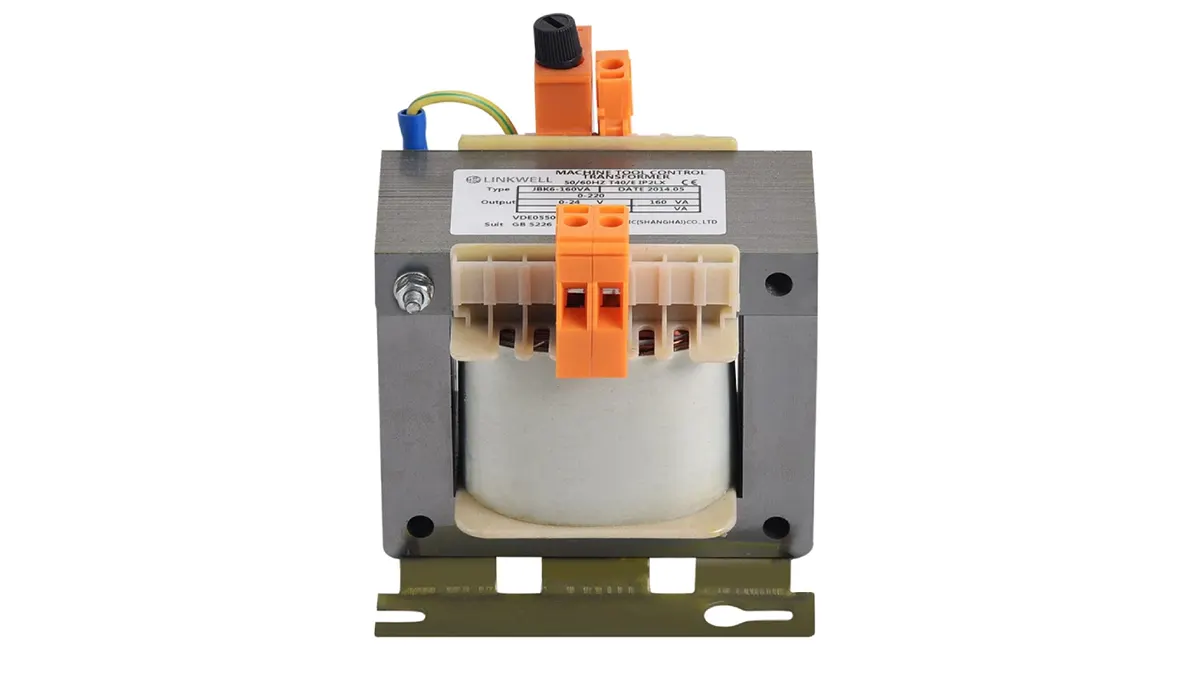
You want to make sure you have everything ready before you open the enclosure. Grab a screwdriver, wire cutters, and a voltage tester. You may also need wire labels and a flashlight. For the replacement, use a Linkwell thermostat and any Linkwell-certified accessories. These products meet strict safety standards and work well with most industrial cabinets.
Tip: Linkwell thermostats carry CE, RoHS, and UL certifications. These marks show that the products meet international safety and environmental standards.
- CE certified
- RoHS compliant
- UL listed
Power Off & Safety Gear
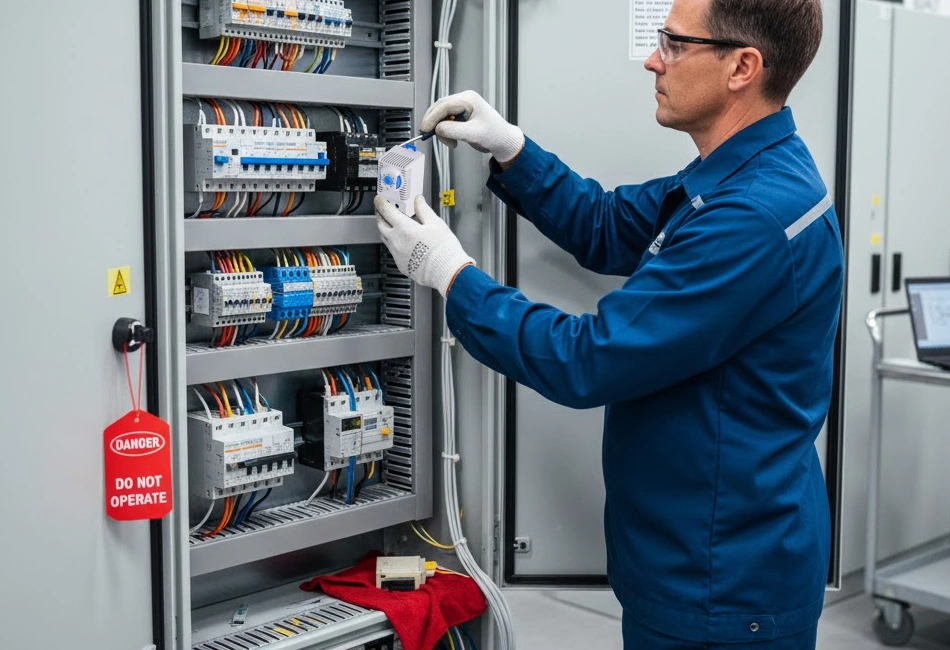
Put on insulated gloves and safety glasses. Check that the power is off using your voltage tester. If you work in a busy facility, let others know you are working on the cabinet. You can use a lockout tag to prevent someone from turning the power back on.
Here’s a quick look at enclosure types and their intended use:
| Enclosure Type | Intended Use |
|---|---|
| Types 1, 2, 5, 12, 12K, 13 | Indoor locations |
| Types 3, 3X, 3R, 3RX, 3S, 3SX, 4, 4X, 6, 6P | Indoor or outdoor locations |
| Types 7 and 9 | Hazardous (classified) locations |
When you use Linkwell-certified parts, you know your thermostat replacement will be safe and reliable. Now you’re ready to move on to the next step.
How to Replace a Thermostat: Step-by-Step
Open Enclosure & Locate Thermostat
Start by opening your electrical cabinet enclosure. Use your screwdriver to remove the panel or door. Shine your flashlight inside and look for the thermostat. You’ll usually find it mounted on a DIN rail or attached to the side wall. Take a moment to check the surrounding area for dust or signs of overheating. If you see discoloration or smell burning, stop and inspect for damage before you continue.
Label & Disconnect Wires
Before you disconnect wires, grab your wire labels or masking tape and a marker. Label each wire connected to the thermostat. This step saves you time and prevents confusion later. If you skip labeling, you might connect wires incorrectly, which can cause electrical problems, trip circuit breakers, or even create a fire risk. Once labeled, use your screwdriver to loosen the terminals and gently pull the wires free. Keep the wires separated so they don’t touch each other or any metal parts.
Safety Tip: Frayed insulation or exposed wires can cause shorts and electric shock. If you notice any damage, replace the wires before you install a thermostat.
Remove Old Thermostat
Now, remove the old thermostat from its mounting. If it’s on a DIN rail, press the release tab and slide it out. For screw-mounted models, unscrew the fasteners and lift the device away. Set the old thermostat aside for proper disposal. Take a quick look at the mounting area and clean away any dust or debris. A clean surface helps your new thermostat fit securely and work reliably.
Install New Linkwell Thermostat
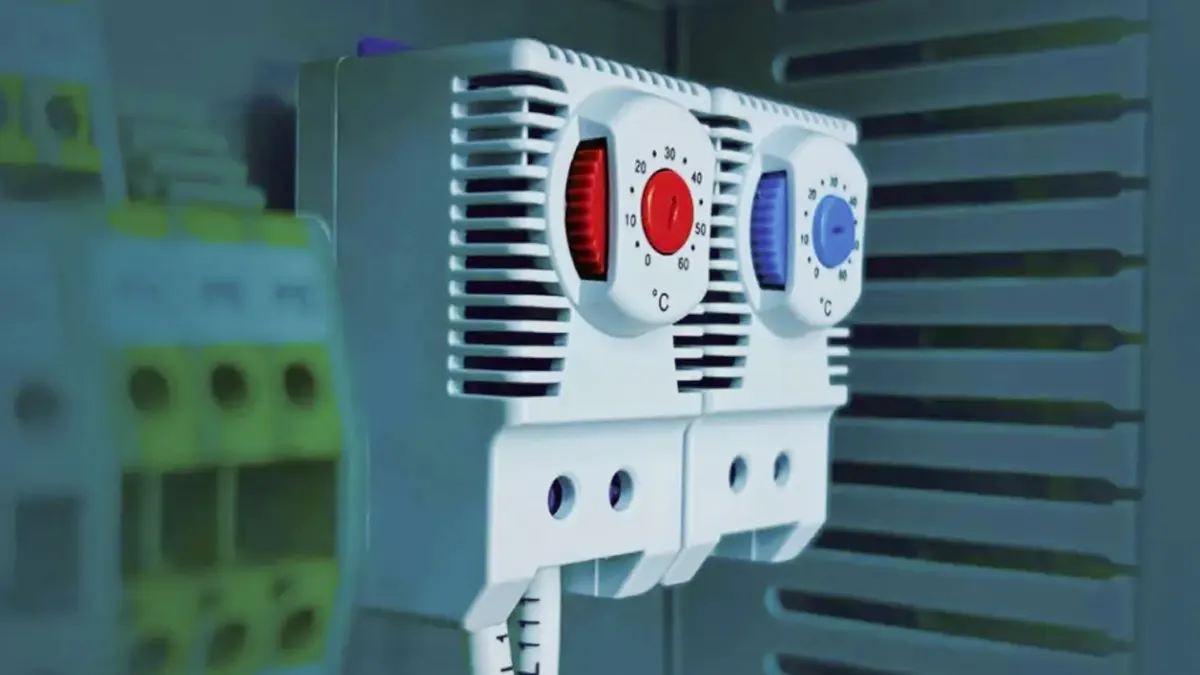
Take your new Linkwell thermostat out of the box. Check that the model matches your enclosure’s voltage and temperature range. Linkwell thermostats are designed for easy installation and work well with PTC heaters, which help maintain the right temperature inside your cabinet. If you use a heater, the thermostat will control when it turns on or off, protecting your equipment from temperature swings. Slide the thermostat onto the DIN rail or secure it with screws, depending on your enclosure’s setup.
Note: If your enclosure needs extra cooling, consider pairing your thermostat with a Linkwell Cabinet Air Conditioner or Electrical Enclosure Fan. These accessories help manage heat in demanding environments.
Reconnect Wires & Secure
Reconnect the wires to the new thermostat, matching each one to the label you made earlier. Tighten the terminal screws so the connections are snug but not over-tightened. Double-check that no bare wires are exposed and that all connections look clean. Secure the thermostat in place and tidy up any loose wires with cable ties. Close the enclosure door or panel, but don’t lock it yet.
Restore Power & Test
Turn the power back on at the main switch. Watch the thermostat display or indicator light. Set the desired temperature and listen for the heater or fan to activate. If you use a smart thermostat installation, check the system display to make sure everything responds as expected. Test the system by adjusting the setpoint and confirming that the heater or fan turns on and off at the right temperature.
Troubleshooting & Tips
If your new thermostat doesn’t work as expected, try these steps:
- Restart or power cycle your smart WiFi networking equipment if you use remote monitoring.
- Adjust or reorient your smart router or gateway antennas for better connectivity.
- Make sure your router or gateway has the latest updates.
- Watch the display to confirm the heater or fan activates at the correct temperature.
- If the system still doesn’t work, double-check your wiring and labels.
Here are some common mistakes to avoid when you replace a thermostat:
- Using incorrect starting data, like wrong temperature or humidity readings.
- Choosing a thermostat that’s too large or too small for your enclosure.
- Picking a model that doesn’t fit your cabinet’s mounting system.
- Selecting the wrong thermal solution for your application.
- Exceeding the enclosure’s internal temperature limits, which can cause condensation.
- Forgetting to keep spare parts for maintenance.
For best results, follow these maintenance tips:
- Inspect your thermostat every three to six months for dust or damage.
- Clean the device with a soft brush or low-pressure air after turning off the power.
- Check terminal connections once a year for tightness and corrosion.
- Test the sensor calibration annually to ensure accurate temperature control.
Linkwell thermostats come with a one-year warranty, so you have peace of mind after installation. These devices meet industry standards like CE, cUR, and UL Recognized (UR), which means they’re safe and reliable for industrial use.
| Standard | Description |
|---|---|
| CE | Conformité Européenne, indicating compliance with European safety standards. |
| cUR | Canadian Underwriters Laboratories, ensuring safety standards in Canada. |
| UL Recognized (UR) | Underwriters Laboratories recognition for safety in the United States. |
By choosing an energy-efficient Linkwell thermostat, you help reduce heat and power consumption in your facility. This lowers your operational costs and supports a more sustainable future.
If you ever need to configure new thermostat features or upgrade your system, consult your Linkwell installation guide or reach out to their support team for help.
Conclusion
You’ve made it through the process of replacing a thermostat in your electrical cabinet enclosure. Let’s recap the essentials so you can feel confident about your work and keep your equipment running smoothly.
Safety always comes first. Never skip these steps when working with a thermostat:
- Turn off the power before you start.
- Disconnect and label wires carefully.
- Install the new thermostat following the instructions.
- Mount the device securely.
- Restore power and test everything.
Choosing a Linkwell thermostat gives you several advantages over other brands. Here’s a quick look:
| Feature | Advantage |
|---|---|
| Precise Hysteresis Control | Stable temperature buffer zone |
| Wide Temperature Control Range | Versatility for different climates |
| Robust and Durable Design | Reliable in harsh environments |
| International Certifications | Safety and reliability worldwide |
| High Protection Ratings | Dust and water resistance for tough locations |
To keep your thermostat working for years, follow these best practices:
- Maintain temperatures below 40°C.
- Use heating elements to prevent condensation.
- Install ventilation or air conditioning for steady control.
- Monitor with sensors and set alerts.
- Stick to a regular maintenance schedule.
If you ever feel unsure, you can reach out to professional resources like consulting engineers, contractors, or system integrators. You’ll find support and guidance for any industrial thermostat project.
Remember, Linkwell thermostats meet top safety certifications, including IEC 60950-1 and IEC 61010-1. You get peace of mind knowing your enclosure is protected.
Replacing a thermostat isn’t just about swapping parts. You’re investing in the safety and reliability of your entire system. If you need help, Linkwell’s support team is ready to assist you.
You’ve learned how to replace a thermostat in your electrical cabinet enclosure. Here’s a quick recap:
- Always turn off power before touching the thermostat.
- Label wires and install the new thermostat securely.
- Test the thermostat after installation.
FAQ
When should an enclosure thermostat be replaced?
Replace the thermostat if temperature control becomes unstable, contacts fail to switch, visible damage appears, or condensation and overheating issues persist despite correct cabinet ventilation.
What tools are needed to replace a cabinet thermostat?
Basic tools include a screwdriver, voltage tester, wire stripper, and mounting hardware, ensuring safe removal and accurate installation inside electrical cabinet enclosures.
Should power be disconnected before replacement?
Yes, always disconnect and lock out power before replacing an enclosure thermostat to prevent electrical shock, accidental short circuits, or equipment damage.
How do you remove the old thermostat safely?
Label wiring connections, loosen terminal screws, detach the thermostat from the DIN rail or mounting surface, and remove it carefully without stressing adjacent components.