Installing terminal blocks correctly is fundamental for ensuring the safety and reliability of any electrical system. Proper installation prevents wiring faults, reduces troubleshooting time, and ensures compliance with electrical standards. This guide will walk you through the essential steps.
Mastering terminal block installation techniques is crucial for both beginners and experienced professionals. It streamlines projects, enhances wire management, and ultimately contributes to the robust performance of your electrical circuits.
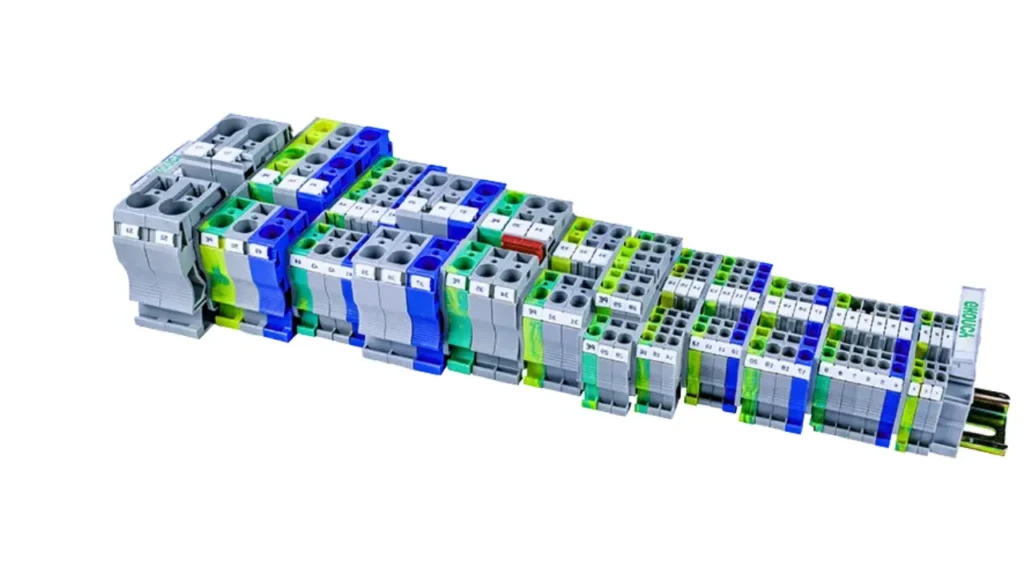
Recommended Terminal Blocks


How to Install a Terminal Block?
Installing a terminal block correctly is crucial for ensuring the safety, reliability, and long-term performance of your electrical systems. It involves more than just connecting wires; it’s about creating an organized and secure electrical interface. Following a meticulous, step-by-step approach will ensure optimal results and compliance with safety standards for any project.
Step 1: Preparation
Effective preparation is the foundational step for any successful terminal block installation. This includes thoroughly reviewing the specific installation manual for your terminal block type, as each manufacturer may have unique guidelines regarding wire stripping lengths, torque values for screws, and specific accessories. Simultaneously, assemble all necessary tools, such as screwdrivers (appropriate sizes and types for the terminal blocks), wire strippers, crimpers (if using ferrules), and a multimeter for testing.
Furthermore, ensure your workspace is clear, well-lit, and free from any potential hazards or distractions. A clean and organized environment allows for unstressed operation, reduces the risk of errors, and contributes to overall efficiency and safety during the installation process. Proper preparation minimizes surprises and ensures a smoother, more secure installation.
Step 2: Mounting the Terminal Block
With proper preparation complete, the next critical step is to securely mount the terminal block or the entire assembly onto its designated surface, often a DIN rail within a control cabinet. It is paramount to fix it in a secure, sturdy, and enclosed area that is sufficiently protected from external shocks and vibrations that could loosen connections over time.
Refer to the manufacturer’s manual prescriptions for the correct orientation and spacing of the terminal blocks, as proper alignment ensures maximum efficiency, safe operation, and compatibility with accessories like jumpers and end plates.
Ensuring the terminal block is mounted correctly prevents physical stress on the wires and connections. For DIN rail mounted blocks, confirm they are fully clicked onto the rail and use appropriate end clamps to prevent any lateral movement. This stability is vital for maintaining the integrity of the electrical connections, especially in dynamic industrial environments where machinery vibrations are common.
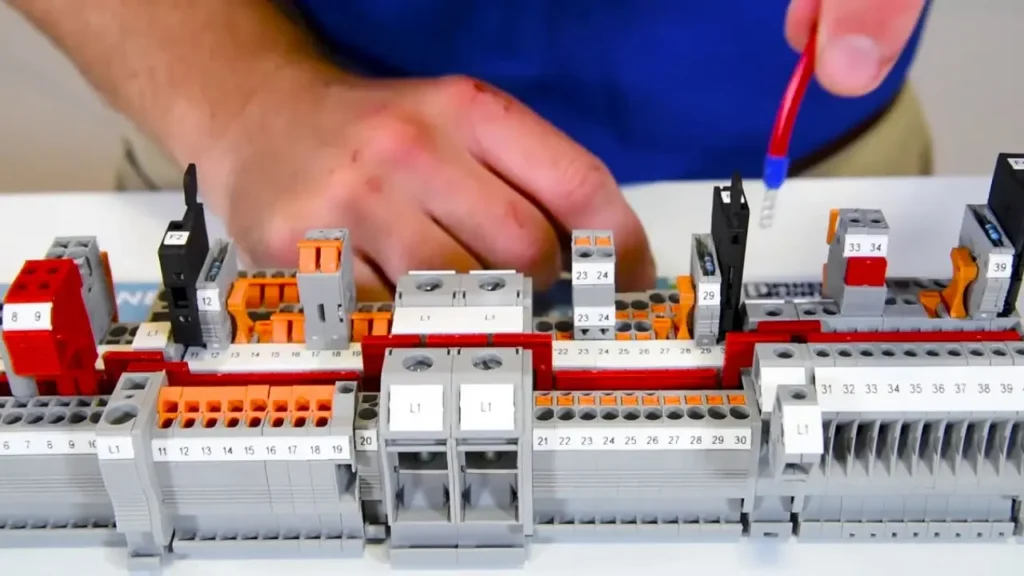
Step 3: Wiring Connections
This is where the actual electrical connections are made. It’s imperative that all connections are tied correctly, precisely following the terminal markings and the overall circuit diagram. Carefully strip the insulation from each wire to the exact length specified by the terminal block manufacturer to ensure full contact with the conductive element without exposing excess bare wire. For stranded wires, twisting the strands or using ferrules before insertion is highly recommended to prevent fraying and ensure a robust, consistent connection.
Exercise extreme caution during this step, as any faults or misconnections here can significantly affect the functionality and safety of the entire system. Double-check that each wire is inserted into the correct terminal point as per your wiring schematic. This meticulous attention to detail at the wiring stage is crucial for preventing short circuits, open circuits, or incorrect signal routing, which can lead to system malfunction or even damage.
Step 4: Securing the Connections
Once you’ve made sure that all the individual wires are well-connected electrically, the next vital step is to secure these connections physically and protect them from environmental factors. This protection is critical to ensure they remain devoid of moisture, dust, debris, or corrosive agents, which might degrade their performance or lead to electrical failures over time. Depending on the terminal block type and application, this might involve snapping on end covers, using partition plates, or installing protective housings.
Utilize sturdy materials that are non-reactive and also provide the best possible insulation levels around the connections. For example, using appropriate cable glands when wires enter and exit enclosures can prevent dust and moisture ingress. Properly securing connections ensures their long-term reliability and physical integrity, especially in harsh operating environments, thereby significantly enhancing the overall safety and longevity of the electrical system.
Step 5: Testing and Troubleshooting
Finally, with everything physically in place and secured, it’s time for the critical phase of testing the system and troubleshooting any possible issues. This final stride involves carefully powering up the system, often in stages if it’s complex, to verify if it functions precisely as intended according to your design specifications. Observe all indicators, check all functionalities, and monitor for any unusual behavior or unexpected readings.
Should any glitches, malfunctions, or abnormalities arise, promptly deal with them by systematically troubleshooting the connections and circuits. Use a multimeter to check for continuity, resistance, voltage, and current at various points. This thorough testing and troubleshooting process is indispensable for identifying and rectifying any installation errors or component failures before the system is put into full operation, ensuring maximum safety, efficiency, and reliability. You now have a step-by-step guide for your installation process. Be sure to follow each step meticulously for the best results.
Terminal Block Mounting Methods
Terminal blocks, crucial for organized and safe electrical wiring, come with various mounting options to suit different application requirements and installation environments. The choice of mounting method significantly impacts ease of installation, durability, and accessibility.
DIN Rail Mounting
This is perhaps the most common method, utilizing a standardized metal rail (DIN rail) onto which terminal blocks simply snap or slide into place. This offers quick, tool-free installation and easy modification or expansion of wiring systems, making it highly versatile for industrial control panels.
Panel Mounting (Screw/Direct Mounting)
Terminal blocks designed for panel mounting are directly screwed onto a flat surface, such as the back panel of an enclosure. This method provides a highly secure and robust connection, ideal for applications where vibration is a concern or a permanent, fixed installation is required.
PCB Mounting (Printed Circuit Board)
These PCB terminal blocks are soldered directly onto a printed circuit board, creating a compact and integrated connection point for external wiring. This method is prevalent in electronics, consumer devices, and other applications where space is limited and an integrated solution is desired.
Chassis Mounting
Similar to panel mounting but often implying a more heavy-duty or specialized attachment to a machine’s frame or chassis. This method ensures maximum stability and is typically used in industrial machinery or power distribution units where robust mechanical attachment is critical.
Free-Floating/Inline
Some terminal blocks are designed to connect wires directly in an inline fashion, without being fixed to a surface. These are often used for splicing wires in confined spaces or for temporary connections where a fixed mounting is not feasible or desired.
How to Connect Wire to Screw Terminal Block?
Connecting a wire to a screw terminal block is a fundamental skill in electrical wiring, ensuring a secure and reliable connection. This method is widely used due to its robust clamping force. Following these steps precisely will help prevent common issues like loose connections, short circuits, and poor conductivity.
Step 1: Prepare the Wire
Before making any connection, the wire must be properly prepared. This involves carefully stripping the insulation from the end of the wire using a wire stripper. The length of the bare wire exposed is critical; it should be just long enough to make full contact with the metal conductor inside the terminal block, typically indicated by a strip length guide on the block itself.
If the bare wire is too long, it risks touching an adjacent terminal or exposed components, leading to a short circuit. If it’s too short, it won’t make adequate contact, resulting in a poor connection or overheating. For stranded wires, it’s often recommended to gently twist the strands together or, even better, crimp a ferrule onto the end to prevent fraying and ensure a tidy, solid connection.
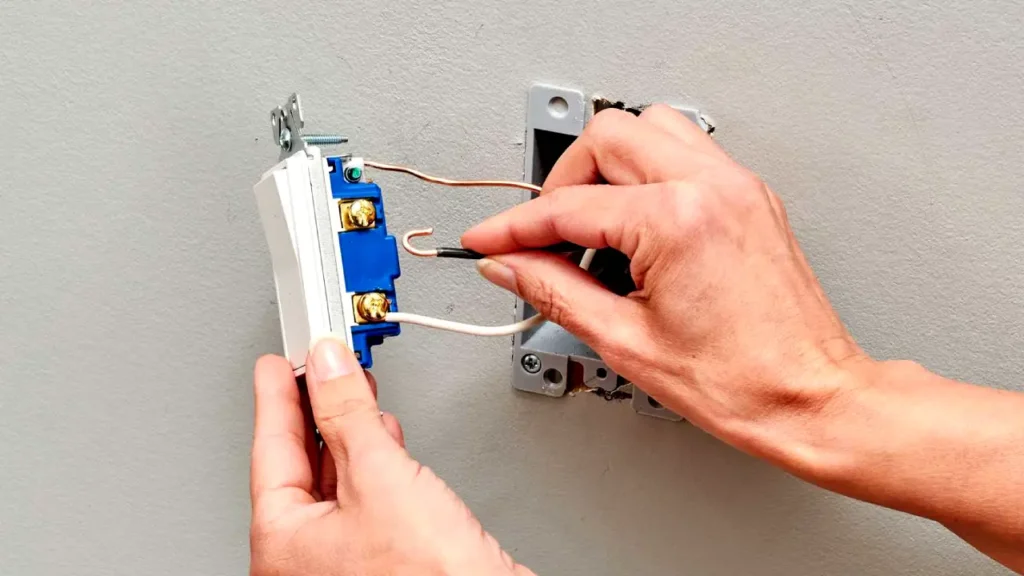
Step 2: Loosen the Screw and Insert the Wire
Once the wire is prepared, use the appropriately sized screwdriver to loosen the screw on the screw terminal block. You’ll typically need to turn it counter-clockwise until the clamping plate or yoke underneath the screw lifts or opens sufficiently to allow the wire to be inserted.
Insert the prepared, bare end of the wire fully into the opening beneath the screw or clamping plate. Ensure that all strands (if applicable) are neatly contained within the terminal and that the insulation abuts the entry point of the terminal block, leaving no bare wire exposed outside the terminal’s housing.
Step 3: Tighten the Screw
After the wire is correctly positioned, use the screwdriver to tighten the screw firmly in a clockwise direction. As you tighten, the screw will press down on the clamping plate or directly onto the wire, creating a secure mechanical and electrical connection.
It’s crucial to tighten until the wire is held firmly and cannot be easily pulled out with a gentle tug. However, avoid overtightening, as this can strip the screw threads, damage the wire (especially smaller gauges), or crack the terminal block’s housing. A properly tightened screw connection ensures low resistance and prevents loosening due to vibration or thermal cycling over time.
Step 4: Verify the Connection
The final and essential step is to verify the integrity of the connection. Gently pull on the wire to ensure it is securely clamped and cannot be easily dislodged. This mechanical check helps confirm that the screw has adequately gripped the wire.
For a more thorough check, if safe to do so with power off, use a multimeter in continuity mode to confirm a low-resistance electrical path between the newly connected wire and its corresponding point on the circuit. This double-check helps catch any poor connections before the system is powered up, ensuring safety and reliable operation.
Considerations about Terminal Block Installation
Proper terminal block installation goes beyond simply connecting wires; it involves a series of critical considerations that impact the long-term safety, reliability, and maintainability of an electrical system.
Overlooking these factors can lead to costly failures, downtime, and even hazardous conditions. Therefore, a comprehensive approach during planning and execution is paramount, ensuring that the chosen terminal blocks and installation methods are appropriate for the specific application and operating environment.
Paying close attention to details such as wire preparation, correct torque settings, environmental protection, and proper labeling not only guarantees immediate operational success but also simplifies future troubleshooting, upgrades, and routine maintenance. These considerations are vital for both new installations and modifications to existing systems, contributing significantly to overall system longevity and efficiency.
- Environmental Conditions: Assess temperature range, humidity, exposure to dust, moisture (IP rating), corrosive agents, and UV radiation. Choose blocks made from appropriate materials and with adequate sealing.
- Current and Voltage Ratings: Always select terminal blocks rated to safely exceed the maximum expected current and voltage of the circuit. Over-specifying by at least 125% is a common safety practice.
- Wire Gauge and Type Compatibility: Ensure the terminal block’s clamping mechanism is suitable for the specific wire gauge (AWG/mm²) and type (solid, stranded, fine-stranded) being used. Use ferrules for stranded wires where recommended.
- Wire Preparation: Proper stripping length is crucial. Too much bare wire risks short circuits; too little results in poor contact. Twisting stranded wires or using ferrules ensures secure and reliable connections.
- Torque Specifications (for Screw Types): Adhere strictly to the manufacturer’s recommended torque settings. Under-tightening leads to loose connections and overheating, while over-tightening can damage the wire or the block.
- Vibration and Shock Resistance: For applications with significant vibration (e.g., machinery, vehicles), opt for spring-clamp or other vibration-resistant terminal blocks over standard screw types.
- Mounting Method: Consider the available space and mounting surface (DIN rail, PCB, panel mount) and choose blocks designed for that specific method.
- Space Constraints and Density: Select terminal blocks that fit within the available enclosure space. Multi-level or compact designs can maximize wiring density.
- Circuit Protection and Isolation Needs: Determine if integrated features like fuses (fuse terminal blocks) or disconnect capabilities (disconnect terminal blocks) are required for easier maintenance and safety.
- Grounding Requirements: Plan for dedicated grounding terminal blocks where protective earth connections are necessary, ensuring a low-resistance path to ground.
- Labeling and Identification: Implement a clear and consistent labeling system for all terminal blocks and wires. This is critical for future troubleshooting, maintenance, and safety.
- Accessibility for Maintenance: Design the layout to allow easy access for wire insertion, tightening, testing, and future modifications or replacements.
- Regulatory Compliance: Ensure all selected terminal blocks and the installation method comply with relevant industry standards and local electrical codes (e.g., UL, IEC, CE).
Conclusion
Properly installing terminal blocks is absolutely essential for creating electrical systems that are not only safe and reliable but also impeccably organized and easy to maintain.
Adhering meticulously to every step—from the precise preparation of wires to their secure insertion and rigorous testing—is paramount. This diligence in installation directly translates to long-term operational performance, significantly reducing the likelihood of faults and simplifying any necessary future servicing or modifications.
For all your electrical installation requirements, ensuring you have access to the highest quality components that meet stringent industry standards, including a comprehensive range of durable and reliable terminal blocks, we encourage you to get your wholesale terminal blocks from us.