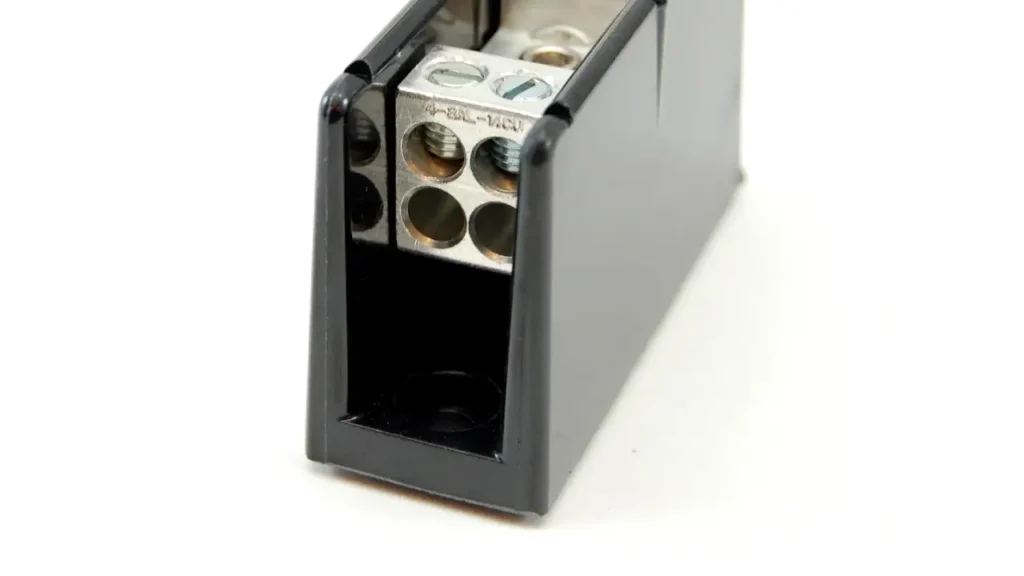
Are you looking to power multiple components in your car audio system efficiently and safely? A distribution block is your answer. This essential component allows you to split a single large power wire from your battery into several smaller wires, each dedicated to a different amplifier or accessory. It’s a cleaner and more secure way to manage your power connections.
Installing a distribution block helps prevent voltage drops and ensures that each of your car audio components receives consistent power. This leads to better sound quality and prolongs the life of your equipment. It also makes troubleshooting easier and keeps your wiring neat and organized.
Understanding the Role of a Distribution Block
Recommended Distribution Blocks

A distribution block serves as a central hub for your car’s electrical system, specifically for power delivery to your audio components. Imagine a main highway (your primary power wire from the battery) branching off into several smaller roads (individual power wires to your amps). The distribution block acts as that crucial interchange, efficiently directing power where it needs to go.
Why Use a Distribution Block?
Using a distribution block offers several significant advantages for your car audio setup. It streamlines your wiring, improves performance, and enhances safety. Let’s explore these benefits in more detail.
Improved Power Delivery
A distribution block ensures that each amplifier or accessory receives a stable and consistent power supply. This minimizes voltage drops, which can lead to reduced performance and distortion in your audio system. Clean power equals clear sound.
Simplified Wiring
Instead of running multiple heavy-gauge power wires directly from your car battery to each component, you only need to run one main power wire to the distribution block. This significantly simplifies your wiring scheme and makes your installation much tidier. It also reduces the amount of wire you need, saving you money and space.
Enhanced Safety
Many distribution blocks come with built-in fuse holders for each output. This provides crucial protection against short circuits and overloads for individual components. If a problem occurs with one component, only its dedicated fuse will blow, protecting the rest of your system and, more importantly, your vehicle from potential damage or fire.
Easier Troubleshooting
When you have a well-organized system with a distribution block, isolating and troubleshooting electrical issues becomes much simpler. If a component stops working, you can quickly check its specific fuse at the distribution block. This saves you time and effort compared to sifting through a tangled mess of wires.
Types of Distribution Blocks

When choosing a distribution block, you’ll encounter a few different types, each with its own advantages. Understanding these differences will help you select the best one for your specific car audio setup.
Fused Distribution Blocks
Fused distribution blocks are highly recommended for their enhanced safety features. Each output terminal on these blocks has a dedicated fuse holder. This means that every component connected to the block is individually protected. If a short circuit or overload occurs with one of your amplifiers, only the fuse protecting that specific amplifier will blow, leaving the rest of your system operational and preventing widespread damage.
Unfused Distribution Blocks
Unfused distribution blocks simply split the main power wire into multiple outputs without individual fuse protection at the block itself. While they offer a clean way to distribute power, you must ensure that each component connected to an unfused block has its own inline fuse installed as close to the component as possible. Failure to do so creates a significant fire hazard and can lead to serious damage to your equipment and vehicle.
Ground Distribution Blocks
Just as power distribution blocks handle the positive connections, ground distribution blocks manage the negative (ground) connections. These blocks allow you to consolidate multiple ground wires from your amplifiers and other components into a single, robust ground wire connected to the vehicle’s chassis or battery negative terminal. Using a ground distribution block helps minimize ground loop noise and ensures a solid, reliable ground for all your components.
Gathering Your Tools and Materials
Before you begin the installation process, it’s crucial to have all the necessary tools and materials readily available. This will ensure a smooth and efficient installation, preventing unnecessary delays and trips to the store.
Essential Tools
Having the right tools makes the installation safer and more precise. Make sure you have these on hand:
- Wire Strippers: For removing insulation from wires without damaging the copper strands.
- Crimping Tool: To securely attach terminals and connectors to your wires.
- Screwdrivers (Phillips and Flathead): For tightening the set screws on the distribution block and mounting hardware.
- Drill and Drill Bits: If you need to create new mounting holes for your distribution block.
- Multimeter: Essential for testing continuity, voltage, and checking for short circuits.
- Heat Gun (for Heat Shrink Tubing): If you plan to use heat shrink tubing for secure and insulated connections.
- Wire Cutters: For cleanly cutting wires to the correct length.
Necessary Materials
Beyond the tools, you’ll need the right components for your installation:
- Power Distribution Block (Fused or Unfused): Choose the type that best suits your system’s needs and safety requirements.
- Fuses (Appropriate Ratings): If using a fused distribution block, ensure you have fuses with the correct amperage ratings for each connected device.
- Main Power Wire: A heavy-gauge power wire (e.g., 0-gauge or 4-gauge) to run from your battery to the distribution block. The gauge should be sufficient for the total current draw of all connected components.
- Smaller Gauge Power Wires: Wires to run from the distribution block to each amplifier or accessory. The gauge should be appropriate for the individual component’s power needs.
- Ground Wire: A heavy-gauge ground wire to run from the distribution block to a solid chassis ground or battery negative terminal.
- Ring Terminals and Spade Connectors: For securing wires to the battery, distribution block, and amplifiers.
- Heat Shrink Tubing: For insulating and protecting electrical connections.
- Electrical Tape: For additional insulation and securing wires.
- Zip Ties: To keep your wiring neat and organized.
- Mounting Hardware (Screws, Bolts, Nuts): To securely fasten the distribution block in place.
How to Install a Distribution Block?
Installing a distribution block requires careful attention to detail and adherence to safety guidelines. Follow these steps to ensure a successful and secure installation.
Step 1: Preparation and Safety First
Before you start any wiring, prioritize safety. This step is critical to prevent electrical shocks and damage to your vehicle.
- Disconnect the Battery: Always disconnect the negative terminal of your car battery first. This eliminates any power to the electrical system and prevents accidental short circuits.
- Gather All Components: Lay out all your tools and materials in a clear, organized manner. This will make the installation process much smoother.
- Plan Your Layout: Decide where you will mount the distribution block. Consider accessibility for future maintenance, proximity to your amplifiers, and areas away from excessive heat or moving parts. Common locations include under the dashboard, in the trunk near the amplifiers, or sometimes in the engine bay if specifically designed for it.
Step 2: Selecting a Location
Choosing the right spot for your distribution block is essential for both performance and safety.
- Accessibility: Ensure the location allows for easy access to the block’s terminals for wiring and fuse replacement.
- Proximity to Amps: The closer the distribution block is to your amplifiers, the shorter the individual power runs will be, which minimizes voltage drop and improves efficiency.
- Environmental Factors: Avoid mounting the block in areas prone to excessive heat (like directly above an exhaust pipe) or moisture. If installing in a high-moisture area, ensure you use a waterproof distribution block.
- Security: Choose a sturdy surface where the block can be securely mounted to prevent it from rattling loose.
Step 3: Mounting the Distribution Block
Once you’ve chosen the perfect location, it’s time to secure the distribution block.
- Marking Holes: Place the distribution block in its chosen location. Use a marker or pencil to accurately mark the spots where the mounting screws or bolts will go.
- Drilling: Carefully drill pilot holes at the marked locations. Use a drill bit that is slightly smaller than your mounting screws to ensure a snug fit. Be extremely cautious not to drill into any existing wires, fuel lines, or other critical components behind the mounting surface.
- Securing the Block: Align the distribution block with the drilled holes and secure it firmly using screws or bolts. Ensure it is tightly fastened and doesn’t wobble. A loose distribution block can lead to vibration and potentially loose connections over time.
Step 4: Wiring the Main Power Source
This is where you connect the primary power wire from your battery to the distribution block.
- Route the Main Power Wire: Run your heavy-gauge power wire from the positive terminal of your car battery to the input terminal of your distribution block.
- Firewall Pass-Through: If routing the wire from the engine bay to the interior, find an existing grommet in the firewall to pass the wire through. If no suitable grommet exists, you may need to drill a new hole. Always use a rubber grommet to protect the wire from the sharp edges of the metal.
- Keep Separated: Route the power wire on the opposite side of the vehicle from any RCA (audio signal) cables to minimize potential noise interference.
- Connect to Battery: Attach a ring terminal to the battery end of the main power wire. Connect this to the positive terminal of your car battery.
- Inline Fuse: Crucially, install an inline fuse holder within 18 inches of the battery’s positive terminal. The fuse rating should be appropriate for the main power wire’s gauge and the total amperage draw of your system. This fuse protects the entire main power wire from the battery to the distribution block.
- Connect to Distribution Block: Strip a suitable amount of insulation from the other end of the main power wire. Insert the stripped wire into the main input terminal of the distribution block and tighten the set screw securely. Give the wire a gentle tug to ensure it’s firmly seated.
Step 5: Wiring the Accessories (Amps)
Now, connect each of your car audio components to the output terminals of the distribution block.
- Cut and Strip Wires: For each amplifier or accessory, cut a length of power wire to reach from the distribution block to the component. Strip a small amount of insulation from both ends of these wires.
- Connect to Distribution Block Outputs: Insert one end of each smaller power wire into an output terminal on the distribution block. If you’re using a fused distribution block, ensure you insert the correct fuse for that component into its respective holder. Tighten the set screw securely.
- Connect to Components: Attach the other end of each smaller power wire to the power input terminal of its respective amplifier or accessory. Use appropriate connectors (like spade terminals) if required by your component. Again, tighten all connections firmly.
- Grounding: Remember to also run a separate ground wire from each amplifier or accessory to a solid chassis ground point or to a ground distribution block. The ground wire should be the same gauge as the power wire for that component. Ensure the ground connection point on the chassis is clean, bare metal for optimal conductivity.
Step 6: Testing the Installation
Before fully powering up your system, perform thorough checks to ensure everything is wired correctly and safely.
- Double-Check All Connections: Visually inspect every power and ground connection. Ensure they are all tight, secure, and free of any loose strands that could cause a short.
- Multimeter Check:
- Set your multimeter to measure resistance (ohms). Place one probe on the main power wire’s input terminal on the distribution block and the other probe on the output terminal for each component. You should see very low resistance, indicating a good connection.
- Then, set your multimeter to measure voltage (DC Volts). Once you’ve reconnected the battery (in the next step), you can check the voltage at each output terminal to ensure it’s receiving power.
- Reconnecting the Battery: Once you are confident in all your connections, reconnect the negative terminal of your car battery.
- System Test: Turn on your car and then activate your audio system. Test each connected component individually to ensure it powers on and functions correctly. Listen for any unusual noises or signs of malfunction.
Step 7: Securing and Organizing Wires
A clean and organized wiring job not only looks professional but also prevents issues like chafing, short circuits, and rattles.
- Zip Ties: Use zip ties to bundle wires together neatly and secure them to existing vehicle structures. This prevents wires from dangling or getting snagged.
- Heat Shrink Tubing: Apply heat shrink tubing over any exposed wire connections to provide excellent insulation and protection. Use a heat gun to shrink the tubing tightly around the connection.
- Electrical Tape: Use electrical tape for additional insulation or to secure smaller bundles of wires.
- Final Inspection: Do a final visual check of your entire installation. Ensure all wires are routed away from sharp edges, moving parts, and heat sources. Confirm there are no loose wires or exposed conductors.
Troubleshooting Common Issues about Distribution Block Installation
Even with careful installation, you might encounter some issues. Knowing how to troubleshoot common problems can save you time and frustration.
No Power to Components
If your amplifiers or accessories aren’t receiving power, start by checking the most obvious culprits.
- Blown Fuses: The most common reason for no power. Check the main inline fuse near the battery first. If it’s blown, there might be a significant short. Next, check the individual fuses in your fused distribution block (if applicable) or any inline fuses for each component. Replace any blown fuses with new ones of the exact same amperage rating.
- Loose Connections: Power can’t flow without a solid connection. Recheck all terminals on the distribution block, battery, and components. Ensure set screws are tight and wires are not pulling out.
- Faulty Ground: A poor ground connection can mimic a power issue. Ensure your main ground wire from the distribution block (or individual component grounds) is securely fastened to a clean, bare metal chassis point. Sand away any paint or rust to ensure good contact.
Dimming Lights / Voltage Drop
If your car’s lights dim when your bass hits hard, or your system sounds weak, you might be experiencing voltage drop.
- Undersized Wires: Your main power wire from the battery to the distribution block might be too thin for the total power draw of your system. Consult a wire gauge chart to ensure you have the appropriate size.
- Weak Battery/Alternator: Your vehicle’s charging system might not be able to keep up with the demands of your audio system. Consider upgrading your battery or alternator if voltage drops persist.
- Poor Connections: Even small amounts of resistance at connection points can cause voltage drop. Recheck all terminals and ensure they are clean and tight.
Engine Noise or Whining
If you hear a high-pitched whine that changes with engine RPM, it’s usually a sign of electrical interference.
- RCA and Power Wire Proximity: The most common cause is running your RCA (audio signal) cables too close to your power wires. Power cables can create electromagnetic interference. Reroute your RCA cables on the opposite side of the vehicle from your power wires.
- Poor Grounding: Inconsistent or multiple ground points can create ground loops, leading to noise. Ensure all grounds are terminated at a single, clean, common point or use a ground distribution block for all components.
- Damaged RCA Cables: Inspect your RCA cables for any kinks, cuts, or damaged shielding. Replace them if necessary.
- Faulty Head Unit/Amplifier: In rare cases, the noise might be coming from a faulty head unit or amplifier. Try isolating components to pinpoint the source.
Safety Guidelines for Car Audio Wiring
Working with car electrical systems carries inherent risks. Always prioritize safety to protect yourself and your vehicle.
Disconnect the Battery
This cannot be stressed enough. Always disconnect the negative terminal of your car battery before working on any electrical components. This prevents accidental short circuits, sparks, and potential injury.
Use Appropriate Wire Gauges
Using wires that are too thin for the current they carry can lead to overheating, voltage drop, and even fire. Always use the appropriate wire gauge as recommended by your amplifier manufacturers and for the total current draw of your system. A general rule of thumb: larger gauge number means thinner wire (e.g., 8-gauge is thinner than 4-gauge).
Install Fuses Correctly
Fuses are your system’s primary protection against overloads and short circuits.
- Near the Battery: Always install a main inline fuse within 18 inches of the battery’s positive terminal.
- Component Specific: If using an unfused distribution block, ensure each component has its own inline fuse. If using a fused distribution block, ensure the correct fuse rating is used for each output.
- Correct Rating: Never use a fuse with a higher amperage rating than specified. This defeats the purpose of the fuse and can lead to damage or fire.
Proper Grounding
A solid ground connection is just as important as a good power connection.
- Clean Surface: Always connect ground wires to a clean, bare metal surface on the vehicle’s chassis. Sand away any paint, rust, or grime.
- Short and Thick: Keep ground wires as short as possible and use the same gauge as your power wire for that component.
- Avoid Paint/Bolts: Do not rely on bolts that are painted or coated for your ground connection. Seatbelt bolts are also often not ideal grounding points due to paint or other coatings.
Insulate All Connections
Any exposed wire or connection is a potential short circuit waiting to happen. Use heat shrink tubing, electrical tape, or crimp connectors with built-in insulation to cover all exposed conductors.
Route Wires Carefully
Plan your wire routing to avoid hazards.
- Away from Moving Parts: Keep wires away from pedals, seat tracks, windows, and any other moving components.
- Avoid Sharp Edges: Route wires through grommets or use wire loom where they pass through metal panels to prevent chafing and damage to the insulation.
- Separate Power and Signal: As mentioned, run power wires and RCA cables on opposite sides of the vehicle to prevent noise interference.
Test Before Finalizing
Always perform a thorough test of your system before buttoning everything up. This allows you to catch and fix any issues before they become bigger problems.
Conclusion
Installing a distribution block is a fundamental step in building a robust and high-performing car audio system. It simplifies your wiring, ensures consistent power delivery, and most importantly, enhances the safety of your vehicle’s electrical system. By carefully following the steps outlined in this guide and prioritizing safety, you can achieve a clean, efficient, and reliable power distribution setup for all your audio components.
Taking the time to properly install your distribution block will undoubtedly lead to a more enjoyable listening experience and give you peace of mind knowing your system is well-protected. If you’re looking to upgrade your car audio system or need reliable power distribution solutions, explore our wide range of wholesale distribution blocks and wiring accessories.
We offer distribution blocks designed to meet the demands of any car audio enthusiast. Contact us today to learn more about our wholesale offerings and how we can help you power your passion for sound!