Wondering how to ground an electrical panel? The process involves connecting all metal parts of the electrical panel to a grounding rod using a proper copper wire, then securely fastening that wire inside the panel. Key steps include driving a ground rod deep into the soil, attaching the grounding wire, connecting it to the panel’s grounding lug, and testing to ensure a solid, reliable connection.
Safety is paramount—always use certified components and adhere to local electrical codes. Linkewell provides high-quality electrical control panels and power distribution boxes designed to make grounding safe, simple, and dependable.
How to Ground an Electrical Panel Key Takeaways
- Grounding your electrical panel protects you and your home by safely directing stray electricity into the earth, preventing shocks, fires, and damage to devices.
- Use the right tools and materials, like copper ground rods and wires, grounding clamps, and a ground bus bar, to ensure a strong and code-compliant grounding system.
- Follow a clear step-by-step process: install the ground rod deeply, connect the grounding wire securely, attach it to the panel’s ground bus bar, and test the system with proper equipment.
- Avoid common mistakes such as improper bonding, using wrong materials, skipping tests, and ignoring electrical codes to keep your grounding safe and effective.
- Regularly inspect and test your grounding system, and call a licensed electrician if you notice damage or feel unsure, to maintain safety and compliance over time.
Why Electrical Panel Grounding Matters
Safety and Code Compliance
When you ground your circuit breaker panel, you protect yourself, your family, and your property. Grounding gives stray electricity a safe path to the earth. If a fault happens, like a short circuit or a surge, grounding directs the extra current away from you and your devices. This simple step can prevent shocks, fires, and damage to electronics.
Here are some of the main risks if you skip proper grounding:
- You face a higher risk of electrical shock because stray current may travel through your body.
- Electrical fires become more likely since faults can cause overheating without a proper ground source.
- Modern appliances and electronics may get damaged or stop working.
- Power surges can destroy wiring and devices if grounding is missing.
- You might run into trouble with insurance or home sales due to non-compliance with electrical codes.
You must also follow nec guidelines and local rules for electrical panel grounding. The National Electrical Code (NEC) sets strict standards for grounding and bonding. For example, NEC Article 250 requires you to connect your panel to a proper ground source, like a ground rod or metal water pipe. NEC guidelines also say you need to separate neutral and ground bars in sub-panels and bond them in main panels. Inspections and permits help make sure your work meets these rules and keeps your electrical system safe.
Role in Linkewell Panels
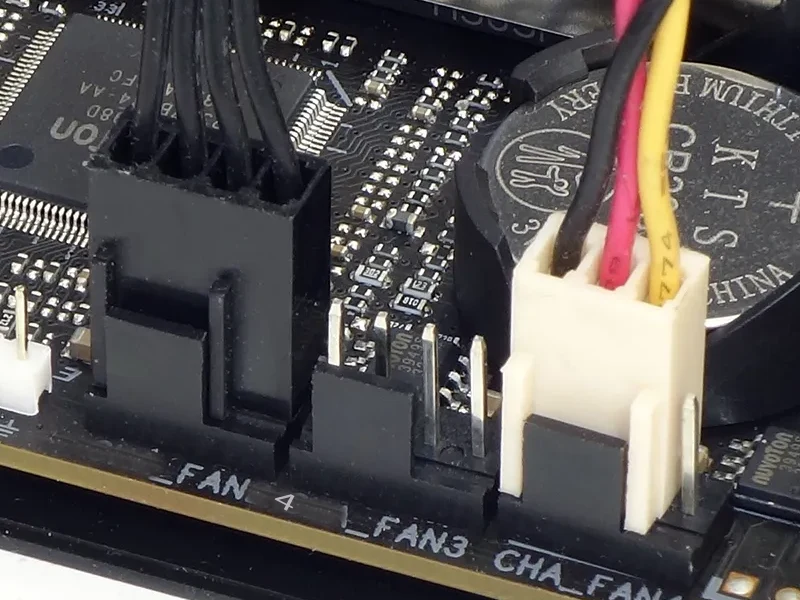
Linkewell panels make grounding easy and reliable. Each electrical control panel and power distribution box from Linkewell comes with features that support safe and effective grounding. For example, the LK80A terminal ground distribution block uses flame-retardant materials and supports a wide range of conductor sizes. You can mount it on a DIN rail or directly on the panel, which gives you flexibility during installation.
These panels meet UL, CE, and ROHS certifications, so you know they follow international safety standards. Linkewell designs every circuit breaker panel to help you achieve compliance with electrical codes and nec guidelines. With these features, you can trust your electrical panel grounding to protect your equipment and keep your electrical system safety at the highest level.
Tools and Materials for Grounding
Essential Tools
You want your grounding setup to be safe and reliable. To do that, you need the right tools. Here’s what you should have on hand:
- Electrical ground clamp: This tool gives you a secure connection between the grounding wire and the ground rod. It helps prevent electric shock and protects your equipment.
- Grounding rod: You’ll need a copper or galvanized steel rod. This rod goes deep into the earth and safely redirects extra current away from your circuit breaker panel.
- Grounding wire: Use copper wire for the best conductivity. This wire connects your panel to the ground rod.
- Grounding clamps: These clamps hold the grounding wire tightly to the rod and other metal parts.
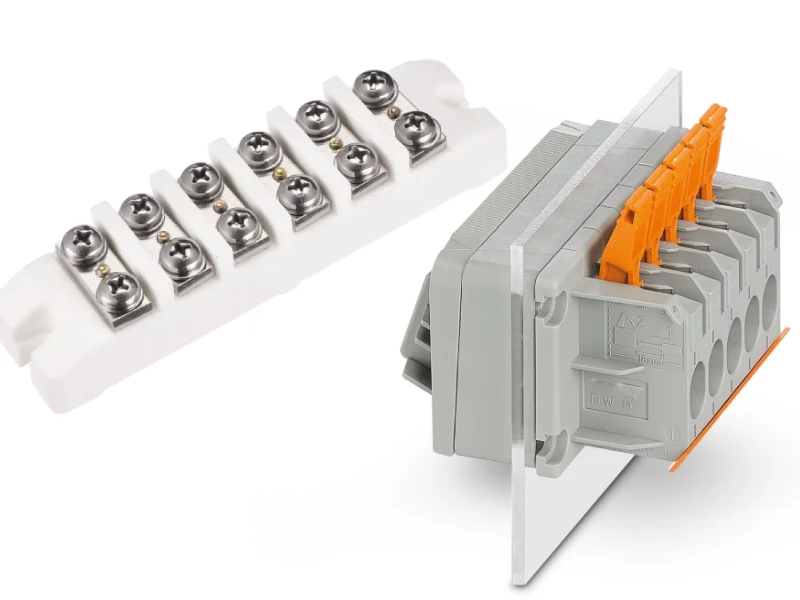
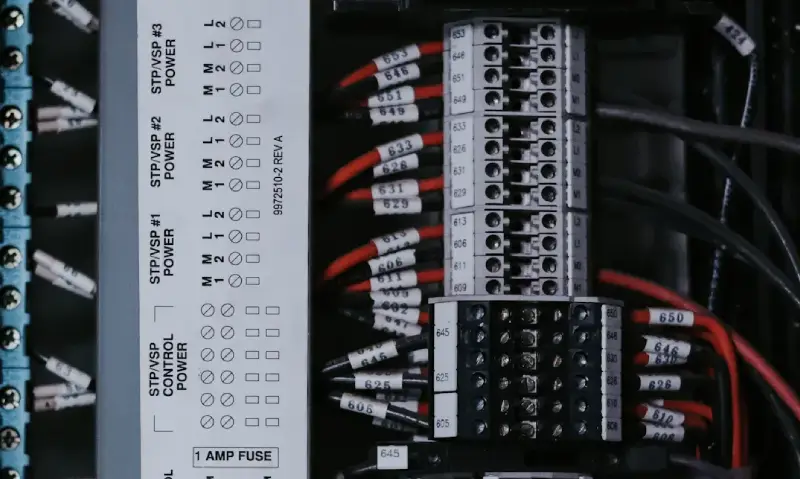
- Ground bus bar: Inside your panel, this bar acts as the main point for connecting grounding conductors.
- Hammer or sledgehammer: You’ll use this to install the ground rod.
- Wire stripper and screwdriver: These help you prepare and attach the grounding wire.
- electrical panel grounding diagram
- grounding breaker
Tip: Always use tools that meet safety standards. This ensures your grounding system works as it should.Most grounding in electrical systems will use the above estimates.
Materials List
You need more than just tools for proper grounding. Here’s a quick checklist:
- One or more ground rods (at least 8 feet long)
- Enough grounding wire to reach from your panel to the rod
- Grounding clamps for secure connections
- Ground bus bar for connecting grounding conductors inside the panel
- Main grounding wire for the primary connection
- Fasteners and screws for mounting
When you install the ground rod, make sure it sits deep enough in the soil. After installing the ground rod, connect the ground wire using grounding clamps. Always keep the grounding wire straight and avoid sharp bends. When connecting grounding conductors, attach them to the ground bus bar inside your circuit breaker panel.
Linkewell Product Compatibility
Linkewell makes it easy to build a safe grounding system. The KE Terminal Series uses a yellow terminal for ground (PE), gray for live, and blue for neutral. This color coding helps you avoid wiring mistakes and ensures a solid connection. The terminals work with both copper and aluminum conductors, so you get flexibility for your grounding needs. The flame-retardant housing and multiple certifications mean you can trust these products for safe and reliable grounding.
| Product Name | Grounding Features | Compatibility | Usage |
|---|---|---|---|
| KE Terminal Series | Yellow terminal for ground (PE), flame-retardant, certified | Supports copper/aluminum conductors, standard grounding methods | Reliable grounding in panels |
| Dome Type 5 Port FOSC(144B) | Grounding wire included, optional grounding device | Connects with standard grounding devices | Grounds metallic components |
| Inline Type 4 Port FOSC(48A) | Grounding wire included, optional grounding device | Standard grounding compatibility | Grounds metallic parts in closures |
With Linkewell’s certified products, you can confidently ground your circuit breaker panel and keep your electrical system safe.
Step-by-Step Electrical Panel Grounding
Grounding your electrical panel is a job you can tackle with the right tools, a little patience, and a clear plan. Let’s walk through the step-by-step grounding process so you can feel confident about how to ground an electrical panel and keep your system safe.
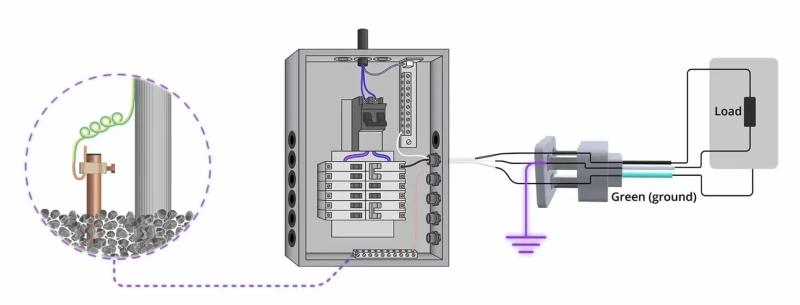
Drive the Ground Rod
The first thing you need to do is install the ground rod. This rod is the heart of your grounding system. It sends stray electricity safely into the earth. Here’s what you need to know:
| Aspect | NEC 2020 Requirement / Guidance |
|---|---|
| Minimum Depth | Ground rod must be driven to a depth of at least 8 feet (2.44 m) with at least 8 feet in contact with soil. |
| If Rock is Encountered | Rod may be driven at an oblique angle not exceeding 45° or buried in a trench at least 30 inches (750 mm) deep. |
| Spacing Between Multiple Rods | Minimum 6 feet apart; spacing twice the rod length (e.g., 16 feet for an 8-foot rod) is best for efficiency. |
| Rod Placement | Top of rod should be flush with or below ground level unless protected against damage. |
| Supplemental Electrode | Needed unless single rod has resistance to earth of 25 ohms or less. |
| Grounding Electrode Conductor (GEC) | Must be continuous to the first electrode; bonding jumpers allowed between multiple rods. |
When installing the ground rod, pick a spot close to your Linkewell electrical control panel or distribution box. This keeps the grounding wire short and reduces resistance. If you hit rock, you can angle the rod up to 45 degrees or bury it in a trench. In tough soil, you might need a ground plate instead. For most homes, a copper-clad ground rod works best because it resists corrosion and lasts a long time. In salty or wet areas, stainless steel rods are a good choice, but they cost more.
Tip: Clay or loamy soil is ideal for grounding rods. Sandy or rocky soil may need longer rods or extra rods spaced apart.
Connect the Ground Wire
Now it’s time to connect the ground wire. This wire links your ground rod to your electrical panel. For most homes, use a bare copper #6 wire. If you have a 200-amp service, bump up to #4 copper. In commercial setups, you may need even thicker wire. Always check your local code or ask your inspector if you’re not sure.
- Strip the end of the grounding wire.
- Use grounding clamps to attach the wire securely to the ground rod.
- Make sure the connection is tight and free of corrosion.
- Run the wire in a straight line with no sharp bends.
If you need to connect more than one ground rod, use a continuous wire or a bonding jumper between rods. Keep the wire protected from sharp edges and weather. Linkewell panels make it easy to route and secure your main grounding wire with labeled terminals and pre-cut cable entries.
Attach to the Panel
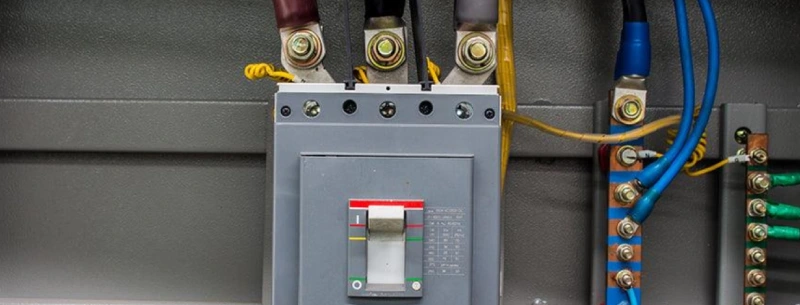
You’re almost done with grounding a circuit breaker box. Now you need to bond the ground wire to the panel. Open your Linkewell electrical control panel or distribution box. Look for the ground bus bar. This is where all grounding conductors come together.
- Insert the stripped end of the grounding wire into the ground bus bar.
- Tighten the screw firmly. Don’t just loop the wire under the screw—insert it fully for a solid connection.
- If you use stranded wire, crimp a ring connector on the end before attaching it.
- Only bond the ground wire to the panel in the main service panel. In sub-panels, keep ground and neutral separate.
Note: Never put more than one wire in a single terminal. This can cause loose connections and arcing. Always match the wire gauge to your panel’s amperage.
Linkewell panels are designed for easy, code-compliant connections. Their labeled bus bars and flame-retardant terminals help you avoid common mistakes.
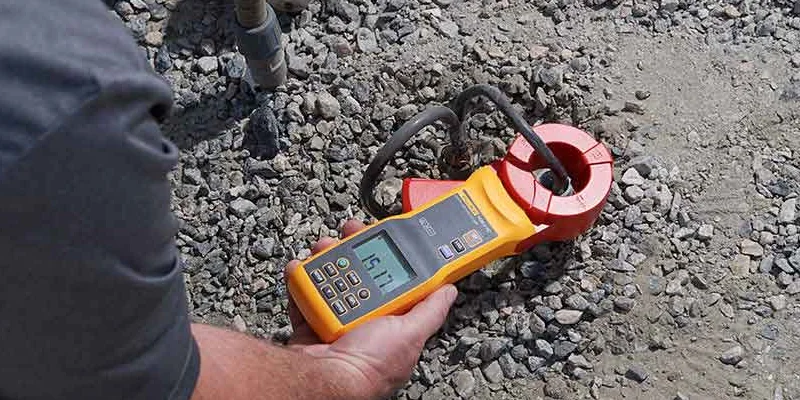
Test the Ground
You’ve finished the physical work, but you still need to test the ground connection. This step makes sure your electrical panel grounding is effective and safe.
- Use a clamp-on ground resistance tester. Clamp it around the grounding wire near the ground rod.
- Check the resistance reading. For most homes and small businesses, you want 25 ohms or less. For best results, aim for 10 ohms or lower.
- If the resistance is too high, you may need to add another ground rod or improve the soil around the rod.
| Standard / Code | Application Area | Recommended Grounding Resistance Value |
|---|---|---|
| IEEE 42 “The Green Book” | Commercial and Industrial Power | 0.5 to 5 ohms |
| NEC NFPA 70, Article 250 | Low Voltage (LV) Systems | 25 ohms |
| IEC 62305 | Lightning Protection Systems | Maximum 10 ohms |
| IEEE 80-2013 | AC Substation Grounding | 0.5 to 1 ohm |
Alert: Regular multimeters can’t measure ground resistance. Always use a specialized tester for this job.
Final Safety Checks
Before you close up your panel and call it a day, run through these essential steps:
- Visually inspect all grounding connections for corrosion, damage, or loose wires.
- Make sure the ground rod is flush with the soil and protected from damage.
- Test all GFCI outlets by pressing their test and reset buttons.
- Use a voltage tester to check for correct voltage between hot, neutral, and ground wires.
- Confirm that all circuits are de-energized before you touch anything inside the panel.
- Wear insulated gloves and safety goggles during all checks.
If you followed this step-by-step electrical panel grounding guide, you’ve created a safe, code-compliant system. Linkewell’s certified panels and distribution boxes make every step easier, from installing the ground rod to connecting grounding conductors and testing the ground connection. Always use certified components and follow local codes for every part of the process.
Common Grounding Mistakes
Even if you follow a step-by-step guide, it’s easy to make mistakes when grounding a circuit breaker box. Let’s look at the most common errors so you can avoid them and keep your system safe.
Improper Bonding
Improper bonding is one of the biggest risks in grounding. If you don’t bond the neutral and ground at the main panel, the grounding system can carry current during a fault. This increases resistance and makes it harder for breakers to trip. You might end up with energized equipment or even a fire. Always remember: bond neutral and ground only at the main panel, not in subpanels. If you bond them in the wrong place, you create multiple return paths for current. That can cause shock hazards, ground loops, and even noisy power in your building. You also risk corrosion of pipes and metal parts if stray current flows where it shouldn’t.
Tip: The ground wire must have a dedicated, uninterrupted path. Never let neutral current flow through your grounding wire.
Wrong Materials
Using the wrong materials can ruin your grounding. Some people choose a wire that’s too thin or use the wrong type of rod. If your ground wire is too small, it can’t handle fault current. That means your breakers might not trip when they should. Always match the wire size to your service amperage. Don’t use coiled or bunched wires, either. Coiling increases impedance and can cause dangerous voltages during a surge. Stick with straight, short runs and use copper or approved materials for all grounding connections.
Here’s a quick table of common mistakes and why they matter:
| Common Grounding Mistake | Why It’s a Problem |
|---|---|
| Using thin ground wire | Increases resistance, may not clear faults |
| Coiling or bundling wires | Raises impedance, causes high voltages |
| Wrong rod material | Corrodes or fails over time |
Skipping Tests
You might think your grounding is good just because everything looks right. That’s a big mistake. If you skip testing, you could miss a loose connection or a rod that doesn’t reach the right depth. Always measure ground resistance after installation. You want a reading of 25 ohms or less for most homes. If you don’t test, you risk hidden problems that could lead to shock or fire later. Use a proper ground resistance tester, not just a regular multimeter.
- Failing to measure resistance can leave you with a weak ground.
- Not reattaching ground paths after equipment changes can break the grounding circuit.
- Forgetting to check for corrosion or loose wires can cause faults.
Ignoring Codes
Electrical codes exist for a reason. If you ignore them, you put yourself and your property at risk. Some common code violations include using undersized wires, not driving the ground rod deep enough, or bonding neutral and ground in subpanels. You also need to bond metallic pipes and make sure all connections are tight and free from corrosion. The NEC requires a minimum 8-foot ground rod and proper isolation of neutral and ground in subpanels. Skipping these steps can cause shock hazards, equipment damage, or even electrical fires.
Alert: Always check the latest code requirements before starting any grounding work on your circuit breaker panel.
Ensuring Effective Grounding
Code Checklist
You want your electrical panel grounding to meet every safety standard. A simple checklist helps you stay on track and avoid costly mistakes. Here’s a quick table you can use when inspecting your grounding setup:
| Checklist Item | Description/Requirement |
|---|---|
| Main bonding jumper | Must be installed and securely fastened |
| Equipment grounding bus bar | Should be secure and properly connected |
| Equipment grounds | All must be properly connected |
| Neutral-ground bond | Must exist only at the service entrance |
| Corrosion on grounding connections | No signs of corrosion allowed |
| Ground conductor size | Must meet applicable code requirements |
| Metallic conduit and enclosure bonding | Must be properly bonded |
| Ground resistance testing | Results must be within specified limits |
Proper grounding and bonding keep stray currents away from you and your equipment. Always check for missing rods, loose wires, or corrosion. Linkewell’s electrical control panels and distribution boxes come with UL and CE certifications, so you know you’re starting with safe, code-compliant products. If you ever feel unsure, their support team can help you review your grounding checklist.
Verifying the Ground
You need to make sure your grounding system actually works. Here’s how you can check your electrical panel grounding step by step:
- Set your multimeter to continuity mode.
- Touch the probes to different grounding points to confirm a continuous path.
- Remember, this only checks if the path exists, not how good it is.
- For a deeper check, use a ground resistance tester. This tool measures how well your grounding system can carry away stray current.
- Inspect all metal pipes and subpanels to make sure they are bonded and grounded.
A multimeter helps with basic checks, but only a specialized tester gives you the full picture. If you use Linkewell panels, you’ll find labeled terminals and clear layouts that make these tests easier.
When to Call a Pro
Sometimes, grounding problems go beyond a simple fix. If your system looks outdated, damaged, or you see signs of corrosion, call a licensed electrician. Electrical panel grounding that fails can lead to shock or fire. Professionals know how to spot hidden issues, test resistance, and make sure every connection meets code. If you ever feel unsafe or see sparks, don’t wait—get expert help right away. Linkewell’s certified products and support team can guide you, but some jobs need a pro’s touch to guarantee safe grounding.
Proper grounding keeps you and your equipment safe. When you follow each step, you prevent shocks, fires, and costly damage. Using Linkewell electrical control panels and distribution boxes, which meet strict grounding standards, gives you peace of mind. Here’s why grounding matters:
- Prevents electrical shocks and fires
- Protects devices from surges
- Stabilizes voltage and extends equipment life
- Meets code for building safety
Always double-check your grounding work. If you’re unsure, talk to a pro. Want to learn more? Check out Linkewell’s guides and resources on electrical safety and grounding solutions.
FAQ
How often should you check your electrical panel grounding?
You should inspect your grounding system every 6 to 12 months. Look for loose wires, corrosion, or damage. Regular checks help you catch problems early and keep your system safe.
Can you use aluminum wire for grounding?
You can use aluminum wire if your local code allows it. Copper works best for most homes, but Linkewell panels accept both. Always check the wire size and follow code requirements.
What if your ground resistance is too high?
If your test shows high resistance, try these steps:
- Add another ground rod.
- Water the soil around the rod.
- Check all connections for tightness.
A lower resistance means better safety.
Are Linkewell panels certified for code-compliant grounding?
| Certification | Description |
|---|---|
| UL | North American safety standard |
| CE | European safety standard |
Linkewell panels meet UL and CE standards. You can trust them for safe, code-compliant grounding.
Conclusion
Grounding your electrical panel is essential for protecting your home, equipment, and personal safety. By following a clear step-by-step guide, using certified tools and materials, and avoiding common mistakes, you can create a reliable and code-compliant system.
Linkewell panels simplify grounding with built-in features and safety certifications. Always follow NEC guidelines and test your system to ensure long-term safety and performance.