To get started with how to install a digital thermostat in an electrical cabinet, just follow a few simple steps. Gather your tools, turn off the power, and remove the old thermostat if there is one. Mount and wire your new Linkwell digital thermostat, set up the controls, and then test everything to make sure it works. Always pick a reliable product like Linkwell for steady performance. Watch out for compatibility issues—some thermostats may not work with every system. Here are a few common problems you might see:
- Some thermostats do not fit all HVAC systems and may cause malfunctions.
- Single-stage models might not handle multi-stage systems well.
- Older systems may not support smart thermostats that need Wi-Fi or a C-wire.
Safety comes first. Make sure the thermostat you choose matches your cabinet and system.
Key Takeaways
- Always turn off the power before starting any installation. This ensures your safety and prevents electrical shocks.
- Label each wire as you disconnect it. This helps you remember where each wire goes when connecting the new thermostat.
- Choose the right mounting location for your thermostat. Avoid areas with direct sunlight, drafts, or heat sources to ensure accurate temperature readings.
- Use a reliable product like Linkwell for your thermostat. Their models are durable and designed for various environments.
- Test your system after installation. Make sure the thermostat operates correctly to keep your equipment safe and efficient.
Tools and Materials
What You Need
Before you start, make sure you have the right tools and materials on hand. Having everything ready will help you finish the job smoothly and safely. Here’s a handy checklist to guide you:
- Screwdriver with both Phillips and flathead heads
- Pliers for gripping and bending wires
- Wire strippers to remove insulation from wires
- Level to keep your thermostat straight
- Smartphone for checking wiring diagrams or taking photos
- Wall putty for filling any gaps after installation
- Masking tape or wire labels to mark wires
Tip: Take a quick photo of your panel wiring before you disconnect anything. This makes it easier to remember where each wire goes when you install the new thermostat.
You might also want to keep a flashlight nearby if your panel is in a dim spot. Good lighting helps you see small details and avoid mistakes.
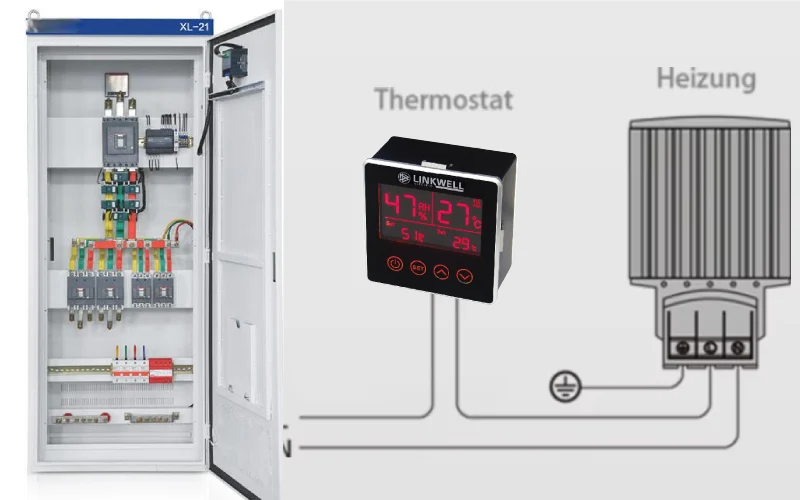
Linkwell Digital Thermostat Options
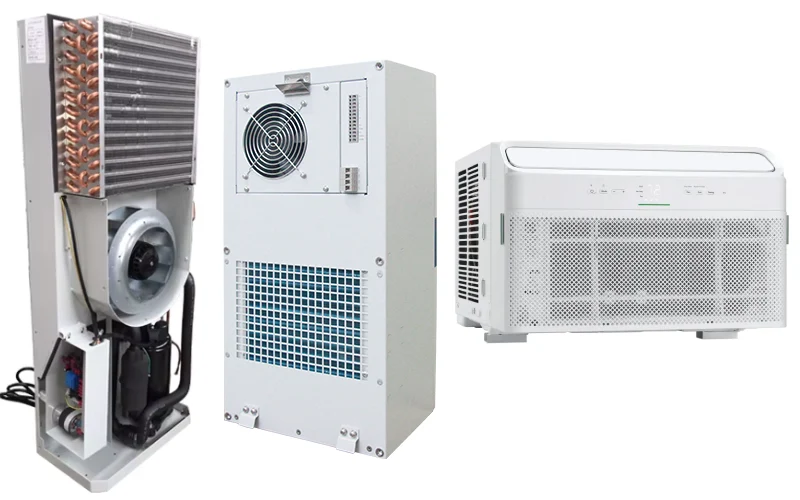
When you choose a digital thermostat for your electrical panel, you want something reliable and easy to use. Linkwell offers several digital thermostat models that fit different needs. You can pick from a range of voltage options, including 12 V, 24 V, 48 V, 110 V, and 220 V. These thermostats work well in many types of panels, from small control boxes to large industrial enclosures.
Linkwell digital thermostats come with a fast-reacting sensor, a clear digital display, and simple buttons for easy setup. The sturdy, flame-retardant housing keeps your panel safe, even in tough environments. You can also find models with waterproof ratings up to IP67, which is great for outdoor or dusty locations.
If you need a custom solution, Linkwell can adjust temperature ranges or output types to match your project. With these options, you get a thermostat that fits your panel perfectly and keeps your equipment running smoothly.
Safety Steps
Power Off and Prepare
Before you do anything else, you need to make sure your workspace is safe. Working inside an electrical cabinet can be risky if you skip this step. Here’s how you can protect yourself and your equipment:
- Turn off power at the circuit breaker. This is the most important step before you start to install a c-wire or remove any old thermostat.
- Check that the power is really off. Try adjusting your old thermostat to see if anything happens. If nothing turns on, you’re on the right track.
- Use a voltage tester on the exposed wires. This tool helps you confirm there is no electricity running through the wires. Safety always comes first.
Tip: Never skip these steps, even if you feel confident. Double-checking can save you from shocks or damage.
If you plan to install a c-wire for your new digital thermostat, now is the time to identify where it will go. Some smart thermostats need this wire for power, so it’s best to get it ready before you move on.
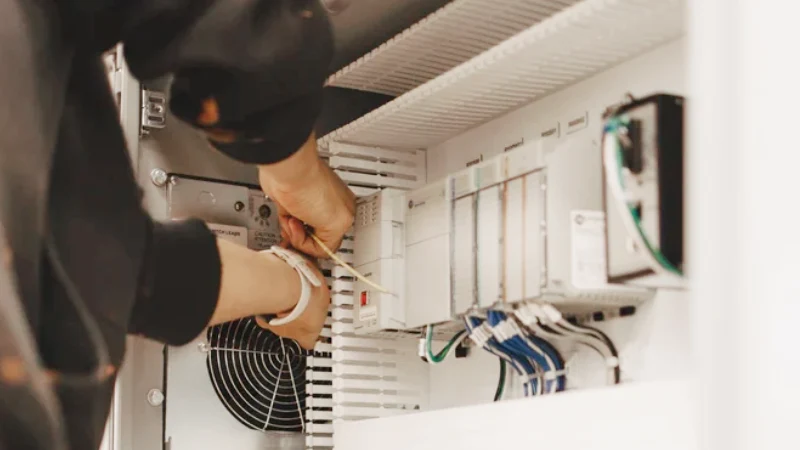
Label and Check Wires
Once you have a safe workspace, focus on the wires. Good wire management makes your job easier and safer. Messy wiring or missing labels can cause big headaches later.
Start by labeling each wire as you disconnect it. Use masking tape or wire labels. Write down what each wire does. This step helps you remember where everything goes when you restore power and test your new thermostat.
According to experts, following basic standards for wiring and labeling is key to avoiding mistakes. Always double-check your connections before you restore power. Circuit testers can help you spot problems like reversed wires or loose connections.
Standardizing wire color codes, as recommended by the NEC, makes it easier to distinguish neutral, hot, and ground conductors, reducing the risk of miswiring.
After you finish wiring, compare your work to the wiring diagram. Do a final inspection to make sure everything matches. Careful labeling and checking now will make future maintenance much easier.
How to Install a Digital Thermostat
Recommended products


Installing a digital thermostat in your electrical cabinet might sound tricky, but you can handle it with the right steps. Let’s walk through how to install a digital thermostat, from picking the best spot to wiring everything up. You’ll see how Linkwell’s features make the job easier and more reliable.
Choose Mounting Location
Picking the right place to install a thermostat inside your cabinet is more important than you might think. The spot you choose affects how well your thermostat reads the temperature and controls your equipment. If you put it in the wrong place, you might get false readings or even damage your system.
Here’s a quick table to help you decide where to mount your thermostat:
| Factor | Description |
|---|---|
| Direct Sunlight | Avoid areas where sunlight hits the thermostat. Sunlight can cause it to read higher than the real temperature. |
| Drafts and Air Leaks | Stay away from spots with drafts or air leaks. These can make the thermostat think it’s colder than it is. |
| Heat Sources | Don’t mount near heaters, transformers, or other hot devices. This can trick the thermostat into cooling too much. |
| Air Vents | Keep away from vents or fans. Airflow can mess with the readings. |
You should also:
- Mount the thermostat at least 5 feet above the floor of the cabinet.
- Avoid placing it behind shelves or where wires might block the sensor.
- Stay away from radiators, heaters, or any device that gives off heat.
- Don’t put it near windows, doors, or places where outside air can sneak in.
- Make sure nothing blocks the digital display so you can see and adjust settings easily.
If you follow these tips, you’ll get the most accurate readings and better control over your cabinet’s temperature.
Tip: Always check your cabinet’s layout before you start. Think about airflow and where your equipment generates heat.
Install the New Thermostat
Now you’re ready to install the new thermostat. If you need to remove existing thermostat hardware, do that first. Take your time and keep track of any screws or mounting brackets. If you’re replacing an existing thermostat panel, snap a photo of the wiring before you disconnect anything. This makes it easier to reconnect wires later.
Here’s how to install a digital thermostat step by step:
- Hold the Linkwell digital thermostat against the chosen spot. Use a level to make sure it’s straight.
- Mark the screw holes with a pencil.
- Drill pilot holes if needed. This helps prevent cracking or splitting.
- Attach the mounting plate or bracket using the screws provided.
- Snap or screw the thermostat onto the mounting plate.
If you’re working with a new cabinet, you might need to drill fresh holes. For a replacement, use the existing holes if they line up. Linkwell thermostats come with sturdy, flame-retardant housings, so you don’t have to worry about durability.
Note: Don’t overtighten the screws. You want the thermostat secure, but not so tight that you crack the housing.
Wiring the Thermostat
Wiring the thermostat is the most important part of the installation. If you get this right, your system will run smoothly. If you rush or skip steps, you could damage your equipment or cause safety issues.
Here’s how to install a digital thermostat and wire it correctly:
- Double-check that the power is off. Use a voltage tester to make sure there’s no electricity running to the wires.
- Label each wire as you disconnect it from the old thermostat. This helps you avoid confusion when you connect the new one.
- Check the voltage and current requirements for your Linkwell thermostat. Most models support 12 V, 24 V, 48 V, 110 V, or 220 V. Use a multimeter to confirm the voltage matches your new thermostat.
- Set your multimeter to the right voltage range.
- Connect the red probe to the R terminal and the black probe to another terminal.
- The reading should match your thermostat’s rating.
- If you need to check resistance, switch the meter and look for about 200 ohms.
- Connect the wires to the correct terminals on the new thermostat. Use the wiring diagram that comes with your Linkwell product. If you’re not sure, check the manual or take a photo for reference.
- Secure the wires tightly. Loose connections can cause the thermostat to malfunction.
- Double-check your work. Compare your wiring to the diagram and make sure everything matches.
Callout: Many people make mistakes during installation by not labeling wires or skipping voltage checks. Take your time and follow each step.
If you need to install a thermostat that supports both heating and cooling, Linkwell offers dual-output models. These can control fans and heaters at the same time, giving you more flexibility. If you ever need to replace a thermostat in the future, these steps will help you avoid common mistakes.
After you finish wiring the thermostat, you’re almost done. Just reattach the cover, restore power, and get ready to program your settings. You’ve just learned how to install a digital thermostat the right way!
Smart Thermostat Installation
Configure Settings
You have finished the wiring, so now it is time to set up your smart thermostat. When you install a smart thermostat from Linkwell, you get a digital display and simple buttons that make programming easy. Start by turning on the power and watching the smart screen light up. Use the menu to set your temperature thresholds. Most electrical cabinets work best if you keep the temperature below 40°C (104°F). If you let it get hotter, you risk damaging your equipment. Every time the temperature rises by 10°C, the average lifespan of your components gets cut in half. About 80% of failures happen because of temperature extremes. Here is a quick guide:
| Recommended Temperature Range | Implications |
|---|---|
| Below 40°C (104°F) | Optimal performance and longevity of components |
| Above 40°C (104°F) | Increased risk of failure and reduced lifespan |
| Every 10°C rise | Cuts average lifespan by half |
| 80% of failures | Caused by temperature extremes |
Set your smart thermostat to turn on cooling fans or heaters at the right temperature. You can also program alarms or notifications if your smart system supports them. If you install a smart thermostat with dual outputs, you can control both heating and cooling at the same time. This gives you more flexibility and keeps your cabinet safe.
Test and Troubleshoot
After you install a smart thermostat and set your preferences, you need to test the system. Watch the smart display and check if the fans or heaters turn on at the right temperature. If something does not work, try these steps:
- Restart or power cycle your smart WiFi networking equipment.
- Adjust or reorient the smart router or gateway antennas.
- Confirm your smart router or gateway uses the latest system updates.
If you still have trouble after you install a smart thermostat, Linkwell offers strong support. You get a warranty that covers manufacturing defects for 12–24 months. For large projects, you can negotiate for longer coverage. Here is what you get:
| Warranty Duration | Coverage Details |
|---|---|
| 12–24 months | Covers manufacturing defects |
| Negotiable | Extended warranty for large contracts |
| Support Type | Details |
|---|---|
| Warranty Duration | One year |
| Technical Support | Lifetime support, spare parts, training materials |
| Replacement Policy | Replace or refund if any component fails |
| Additional Support | Wiring diagrams, installation guidance, troubleshooting support |
If you ever feel stuck during your smart thermostat installation, reach out to Linkwell’s team. They can help you install a smart thermostat the right way and keep your smart cabinet running smoothly.
Linkwell Product Benefits
Why Choose Linkwell
When you pick a Linkwell digital thermostat, you get more than just temperature control. You get a product built for durability and accuracy. Linkwell thermostats use industrial-grade materials, so they last longer and handle tough environments. You can trust the readings because each unit is calibrated for precision. Many users say their cabinets run smoother and safer after switching to Linkwell.
You also get peace of mind with Linkwell’s certifications. These digital thermostats meet strict international standards. Here’s what you can expect:
- UL, CE, and RoHS certifications
- Compliance with global safety and quality rules
- Reliable performance in regulated industries
Customers often share positive experiences. For example, Alex Li has used Linkwell products in over 300 projects and loves the fast shipping and strong support. Karen Müller saw an 80% drop in failures after installing Linkwell heaters in railway cabinets. She highlights the reliability and weatherproof design.
| User | Experience |
|---|---|
| Alex Li | Praises fast shipping, quality testing, and great support, having integrated products into 300+ projects. |
| Karen Müller | Reports an 80% drop in failures after using heaters in railway cabinets, emphasizing reliability and weatherproofing. |
Customization and Support
You might need a thermostat that fits a special cabinet or matches a unique voltage. Linkwell offers plenty of customization options. You can choose different sizes, colors, and even request specific designs. The company makes it easy to get exactly what you need.
| Product Name | Customization Options |
|---|---|
| Small Size Dual Thermostat | Available |
| LINKWELL JTO/JTS 011 Series | Different size, voltage, color, and specified designs |
If you ever run into trouble or have questions, Linkwell’s support team is ready to help. You get access to:
- Installation manuals
- Firmware updates
- App downloads
- How-to videos
- FAQs
- Return request forms
- Authorized dealer order forms
You never have to feel stuck. With Linkwell, you get reliable products, flexible choices, and support that keeps your project moving forward.
Conclusion
You’ve just learned how to install a digital thermostat in your electrical cabinet. This process might seem tough at first, but you can handle it step by step. Let’s quickly review what you did:
- Gathered all the right tools and materials.
- Turned off the power and checked for safety.
- Labeled and checked each wire before making any changes.
- Chose the best spot for your new thermostat.
- Mounted and wired your Linkwell digital thermostat.
- Set up the controls and tested everything to make sure it worked.
Remember: Safety always comes first. Double-check your wiring and never rush through the steps.
When you pick a Linkwell digital thermostat, you get more than just a temperature controller. You get a product that stands up to tough environments and keeps your equipment safe. You also enjoy energy efficiency, which helps lower your operating costs and protects your devices from overheating or condensation.
If you ever feel unsure about any step, don’t hesitate to check the Linkwell installation guide or reach out to their support team. Sometimes, calling a professional is the best move—especially if you’re working with high voltages or complex systems.
You now have the knowledge to keep your electrical cabinets running smoothly and safely. Take pride in your work and enjoy the peace of mind that comes with a job well done!
You can install a digital thermostat in your electrical cabinet by following these steps:
- Gather your tools and turn off the power.
- Remove the old thermostat and label each wire.
- Connect the wires to your new Linkwell thermostat.
- Mount the base securely and finish setup.
- Test your system for proper operation.
Tip: Always double-check your wiring. Incorrect connections can cause fire hazards or power surges.
If you feel unsure, check Linkwell’s product guide or contact support. For complex systems, a professional can help you avoid costly mistakes and keep your equipment safe.
FAQ
How do I know if my cabinet needs a digital thermostat?
If your cabinet gets hot or cold, or you see condensation, you probably need a digital thermostat. It helps keep your equipment safe and running smoothly.
Can I install a Linkwell digital thermostat myself?
Yes, you can! Just follow the steps in this guide. Always turn off the power first. If you feel unsure, ask a professional for help.
What voltage options do Linkwell thermostats support?
Linkwell offers models for 12 V, 24 V, 48 V, 110 V, and 220 V. You can pick the one that matches your cabinet’s power supply.
What should I do if my thermostat display is blank?
First, check the power supply and wiring connections. Make sure everything is secure. If the display stays blank, contact Linkwell support for help.