You want to troubleshoot electrical industrial cabinets safely and efficiently. Start with a systematic approach to troubleshooting electrical industrial cabinets. Use proven troubleshooting steps to cut downtime and avoid hazards. Safety matters most. Common hazards include exposed wires, overloaded circuits, faulty tools, and wet conditions.
| Hazard Type | Description |
|---|---|
| Exposed Wires and Cables | Shocks, fires, and burns from damaged insulation. |
| Overloaded Circuits and Outlets | Overheating and fire risk from too many high-wattage devices. |
| Faulty Equipment and Tools | Energized metal parts causing shocks and fire hazards. |
| Wet Conditions and Electrical Equipment | Increased shock risks; avoid wet environments. |
Follow a 5-step troubleshooting approach. This troubleshooting approach helps you spot issues fast and keeps your team safe while working on electrical industrial cabinets.
Key Takeaways
- Always prioritize safety by using Lockout/Tagout procedures. Disconnect power before opening cabinets to prevent accidents.
- Conduct regular visual inspections to catch issues early. Look for damage, loose connections, and signs of overheating.
- Use a multimeter to check voltage levels and ensure the cabinet is safe before starting repairs. This helps prevent electrical shocks.
- Document all findings and repairs meticulously. Good records help identify patterns and improve future troubleshooting efforts.
- Perform root cause analysis after repairs. Understanding the underlying issues prevents future problems and enhances equipment reliability.
Safety First

Before you start troubleshooting, you need to put safety first. Electrical cabinets hold high levels of power. Even a small mistake can lead to serious injury or equipment damage. You must follow a troubleshooting plan that keeps you and your team safe every step of the way.
Lockout/Tagout
Lockout/Tagout is your first line of defense. Always disconnect power before opening any cabinet. Use lockout devices and tags to make sure no one accidentally restores power while you work. This step is not optional. It protects you from live circuits and sudden surges of power.
Tip: Never trust that a cabinet is safe just because the switch is off. Always verify with a meter that power is truly disconnected.
You should follow OSHA standards like 29 CFR Part 1910, Subpart S, and NFPA 70E guidelines. These rules cover safe work practices around electrical equipment. They help you avoid unsafe work environments, poor maintenance, and live working conditions. Only licensed technicians should work inside cabinets. Inexperienced workers without proper training are a major cause of accidents.
PPE
Personal Protective Equipment (PPE) is essential. You need insulated gloves, safety glasses, and flame-resistant clothing. PPE protects you from shocks, burns, and arc flashes. Make sure your gear fits well and is in good condition. Never skip PPE, even for quick troubleshooting tasks.
- Insulated gloves shield your hands from power surges.
- Safety glasses guard your eyes against sparks and debris.
- Flame-resistant clothing reduces burn risks.
You should always check voltage levels before opening the cabinet. Use a reliable meter to confirm that power is off. Unsafe equipment, poor isolation, and unsuitable test tools often cause accidents. Continuous training and regular audits help you build strong troubleshooting skills and keep your troubleshooting plan effective. Training should go beyond the basics. Periodic reviews and updates keep your team ready for any power issue.
Note: Approach boundaries matter. Stay outside restricted zones unless you have the right training and PPE.
The 5-step troubleshooting approach starts with safety. If you follow these steps, you protect yourself and your team while restoring power and solving problems.
Initial Inspection
You’ve put safety first. Now, it’s time to start your initial inspection. A systematic approach helps you catch problems early and keeps your troubleshooting process smooth. You want to spot issues before they become major headaches.
Visual Check
Start with a visual inspection. This step lets you find obvious problems fast. Look for anything that seems out of place or damaged. Here’s a simple checklist you can follow:
- Check for physical damage on conductors, breakers, and busbars.
- Inspect the electrical meter for proper operation.
- Verify circuit breaker capacity matches the electrical load.
- Tighten any loose connections to prevent overheating.
- Look for frayed wires or damaged insulation.
- Make sure indication lamps work as expected.
- Examine busbars for corrosion or loose connections.
- Confirm the grounding system is intact.
- Watch for signs of overloading, like hot components.
- Ensure all parts are labeled correctly.
- Check that the cabinet is easy to access and has enough clearance.
A systematic approach to inspection means you don’t miss anything. You build a habit of catching problems early, which saves you time and money.
Voltage Check
After your visual inspection, you need to check voltage levels. This step confirms that your cabinet is safe and working as it should. Use a reliable meter for these tests. Here’s how the industry recommends you do it:
| Procedure | Description |
|---|---|
| Measurement of Insulation Resistance | Use a megohmmeter at 500 VDC with the switchgear off. Measure between each circuit and exposed metal. Minimum value: 1000 Ω/V. Target: at least 0.5 MΩ for 230/400 V assemblies. |
| Dielectric Test | If insulation resistance isn’t measured, apply test voltage as specified. Voltage depends on insulation rating. |
| Continuity Check | Make sure all exposed metal parts connect to the protective conductor. Use DC or AC at 6–24 V, with 25 A for 1 minute. |
You should always include voltage checks in your inspection routine. This step helps you catch insulation breakdowns, faulty connections, or overloading before they cause trouble.
Note: If your equipment is in poor condition, you need more frequent inspections. Stick to daily visual checks and annual thorough inspections as recommended by NFPA 70B.
Gather Information
You need to gather information before you dive into the troubleshooting process. This step helps you avoid guesswork and saves you time. When you collect the right details, you can pinpoint the source of power problems faster and boost your troubleshooting skills.
System Symptoms
Start by looking at the symptoms your system shows. Ask yourself questions like, “What’s not working?” or “When did the issue start?” Write down any alarms, error codes, or unusual sounds. You might notice flickering lights, tripped breakers, or equipment that won’t start. These clues help you narrow down the problem area.
Here’s a quick checklist to guide your troubleshooting:
- Verify the status of all fuses or circuit breakers. Test the voltage to ground for both input and output terminals.
- Check all three fuses in a 3-phase system. Sometimes, only one fuse blows while the others keep working.
- Review the current draw on the circuit. Make sure you use the correct size fuse or circuit breaker.
- Always use proper personal protection equipment while troubleshooting.
You should also check reliable sources for up-to-date troubleshooting procedures. Some trusted references include:
- NFPA 70, which covers safe wiring and grounding methods.
- UL 943, which requires GFCIs in high-risk areas to prevent electrical shocks.
- NFPA 73, which gives guidelines for inspecting and maintaining electrical installations.
Maintenance Logs
Don’t skip the maintenance logs. These records give you a history of repairs, upgrades, and past issues. When you review them, you spot patterns and recurring problems. Maintenance logs help you make smart decisions about repairs and upgrades. They also improve your troubleshooting approach and keep your 5-step troubleshooting approach on track.
Regularly serviced equipment is less likely to fail unexpectedly. Maintenance logs show you when parts were replaced and what actions were taken. This information boosts reliability and safety. You can avoid project delays and keep your team safe by checking these logs before you start troubleshooting.
Note: Good documentation makes your troubleshooting process smoother and helps you prevent future power problems.
Define Problem Area
When you troubleshoot an electrical industrial cabinet, you need to define the problem area before you can fix anything. This step helps you focus your efforts and avoid wasting time. You want to identify the source of the problem quickly and safely.
Identify Circuits
Start by figuring out which circuits might be causing trouble. You can use a few simple methods to narrow things down:
- Look for any visible issues, like burnt smells or damaged wires. Sometimes, you spot the problem right away.
- Check the wiring color codes. These codes help you trace connections and separate power circuits from control wiring.
- Make sure power circuits and control wiring are not mixed together. Keeping them apart helps you avoid interference and confusion.
- Measure voltages at different points. If you see unexpected readings, you know where to look next.
- Tighten all control wiring terminations. Loose connections can cause electromagnetic interference and strange system behavior.
You should always pay close attention to control wiring. If you see loose control wiring, fix it before you move on. Control wiring can cause problems that look like equipment failures, but really come from poor connections. When you separate power circuits from control wiring, you make troubleshooting much easier. Control wiring should follow the right color codes and be clearly labeled. If you see control wiring bundled with power wires, you might get interference. Always check control wiring for tightness and proper routing. Control wiring that runs near high-voltage lines can pick up noise and cause false signals. You want control wiring to be neat, secure, and easy to trace.
Use Schematics
Electrical schematics are your best friend when you need to define the problem area. These diagrams show you every connection and component inside the cabinet. You can use schematics to:
- See how control wiring connects to relays, switches, and sensors.
- Trace the flow of power and control signals through the system.
- Understand how different devices interact with each other.
- Spot potential faults by following the path of control wiring.
When you use schematics, you make sense of complex systems. You can follow control wiring from the power source to the end device. If you see a break or a wrong connection, you know where to focus your repairs. Schematics help you avoid guesswork and save time. You should always keep updated schematics in your maintenance logs. If you change any control wiring, update the diagram right away. This habit keeps your troubleshooting process smooth and reliable.
Tip: If you get stuck, ask a teammate to help you trace control wiring on the schematic. Two sets of eyes catch mistakes faster.
Identify Causes
Common Electrical Cabinet Problems
You want to get to the root of electrical cabinet problems quickly. When you troubleshoot, you need to understand the malfunction before you can fix it. Many issues come from aging components, faulty connections, or poor maintenance. Here are some common causes you should watch for:
- Aging components lose their ability to handle power over time. Old breakers, relays, and wires can fail without warning.
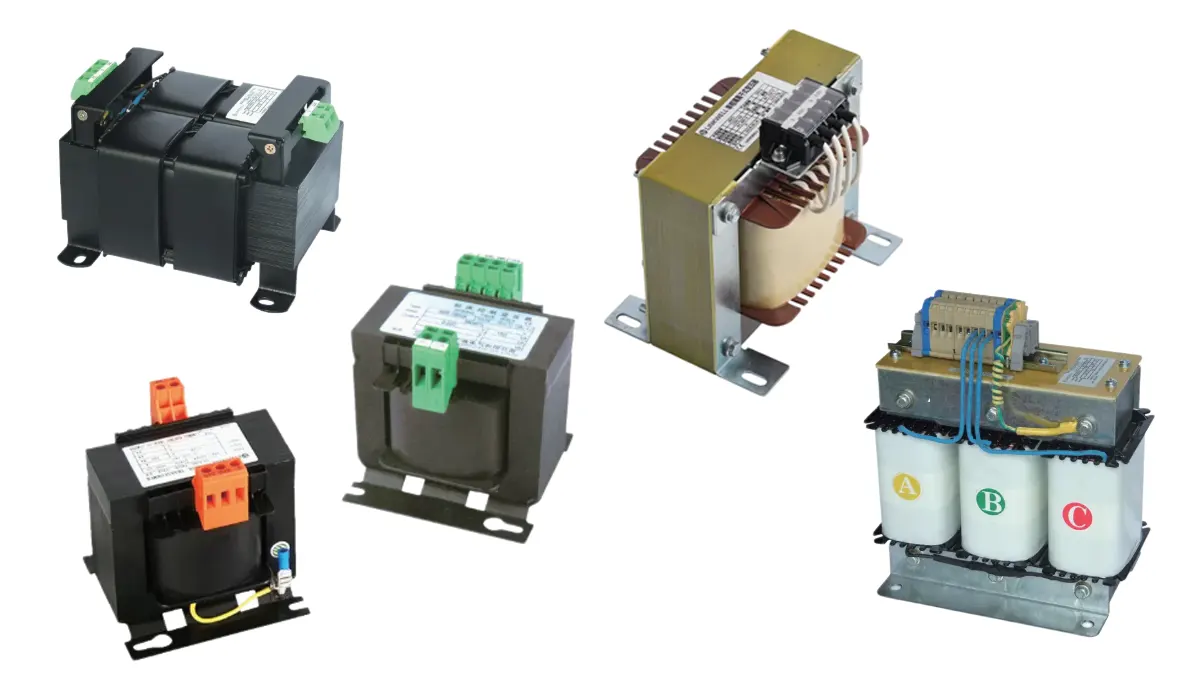
- Overvoltage happens when transformers are sized wrong or circuits are overloaded. This can cause motors and lighting systems to overheat and malfunction.
- Mechanical faults in motors and transformers often come from heat and vibration. Moisture speeds up wear and tear, leading to more frequent breakdowns.
- Blown fuses point to deeper electrical cabinet problems. If you see a fuse blow, you need to do a full troubleshooting check to find the real issue.
- Faulty connections, like corroded or loose wires, increase resistance. This leads to overheating and sometimes dangerous arcing.
- Deteriorated insulation can result from heat, moisture, or mechanical stress. When insulation breaks down, resistance goes up and failures happen.
- Poor maintenance lets dust and contaminants build up. Loose connections become more likely, and the risk of power failure rises.
Environmental Factors
Environmental conditions play a huge role in how your electrical cabinet performs. You need to keep an eye on temperature, humidity, and dust. These factors can cause power issues and make troubleshooting harder.
| Environmental Factor | Impact on Temperature Inside Enclosures |
|---|---|
| Temperature Extremes | Overheating or condensation risks |
| Humidity | Condensation, corrosion, shorts |
| Dust and Pollution | Blocks heat dissipation, overheating |
| UV Radiation | Raises internal temperature |
Warm, humid air inside a cabinet can meet a cold surface and form water droplets. This moisture can lead to short circuits or corrosion. If the temperature swings too much, components may overheat or become brittle. Dust blocks heat from escaping, which raises the risk of power loss and malfunction. UV rays can also heat up the inside, making it harder for your cabinet to stay cool.
You should always check the environment around your cabinet. If you see signs of condensation or dust buildup, take action right away. Good troubleshooting means you look beyond the obvious and consider every possible cause of power problems.
Electrical Troubleshooting and Testing
When you need to expertly troubleshoot electrical equipment, the right tools make all the difference. You want to find the problem fast and keep everyone safe. Let’s look at some of the best diagnostic tools you can use in electrical troubleshooting:
| Tool | Description |
|---|---|
| Thermal Camera | Identifies overheating issues in panels and motors without needing to open covers. |
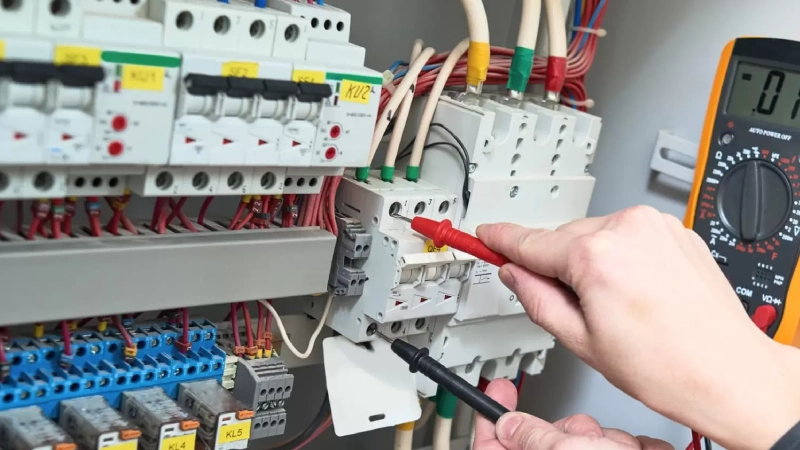
| Electrical Tester | Helps determine where power issues occur in electrical panels, identifying defective breakers or incoming power problems. |
| Vibration Sensor | Monitors motors and drives for vibrations that can indicate issues like shaft imbalance or bearing wear. |
| Visual Fault Locator | Aids in diagnosing simple fiber link problems quickly, reducing the need for specialist intervention. |
Multimeter Use
A multimeter is your go-to tool for checking voltage, current, and resistance. You need to know how to use it the right way. Here are some best practices to follow:
- Pick the right meter for the job.
- Learn how to get the most out of your multimeter.
- Understand features like True-RMS, accuracy, precision, resolution, and range.
- Know that some meters, like Fluke, are tested for tough conditions.
You should always double-check your settings before you start. If you use the wrong setting, you might get a false reading or damage the meter. Take your time and follow each step. This habit helps you spot faulty components and avoid mistakes.
Thermal Imaging
Thermal imaging gives you a safe way to spot heat problems inside electrical cabinets. You can scan for hot spots without touching anything. This keeps you safe and lets you work faster. You don’t have to shut down the equipment, so you save time and avoid production losses. Thermal cameras show you where things get too hot, which helps you find loose connections or overloaded parts. You can also use the images to document problems and support repair requests. This technology makes inspections safer and helps you catch issues early.
Repair Steps
Component Replacement
When you find a faulty part inside an electrical cabinet, you need to replace it safely. You want to avoid accidents and make sure your repair leads to a permanent solution. Always treat every part as if it could be live. Never rush this step. Here’s a quick table to help you remember the most important safety precautions:
| Safety Precautions | Description |
|---|---|
| Ensure de-energized | Disconnect the cabinet from the power supply before you start any work. |
| Wear PPE | Put on insulated gloves, safety goggles, and protective clothing. |
| Use insulated tools | Choose tools with insulated handles to lower the risk of electric shock. |
| Notify personnel | Let others know about your work and use signs to show maintenance is active. |
You should also check for exposed circuit parts, corrosion, or signs of poor installation. If you see anything unusual, stop and fix it before you continue. Always wear PPE like safety glasses, face shields, and insulated gloves. These steps keep you safe and help you avoid costly mistakes.
Tip: Double-check that the cabinet is truly de-energized before you touch anything. Use a meter to confirm.
System Adjustment
After you replace a component, you need to adjust the system settings. This step helps you make sure everything works as it should. Follow these steps for a smooth adjustment:
- Verify electrical connections. Use a multimeter to test voltage and current at each point. Make sure the readings match what you expect.
- Perform functional tests. Power on the cabinet and watch for anything unusual. Test each part one by one.
- Debug common issues. Tighten any loose connections and swap out faulty parts. Adjust settings if something seems off.
- Do a final system check. Run a last test to confirm the cabinet works well and stays stable.
You want your repair to be more than a quick fix. A good adjustment gives you a reliable solution that lasts. If you follow these steps, you can avoid repeat problems and keep your cabinet running smoothly.
Note: Careful adjustment after repairs helps you spot hidden issues and prevents future breakdowns.
Verify and Document
Retest System
You finished your repairs, but your job isn’t done yet. You need to retest the system to make sure everything works as it should. Start by powering up the electrical cabinet and watching for any warning signs. Listen for strange noises and check indicator lights. Use your multimeter to confirm voltage and current levels match the expected values. If you see anything unusual, stop and review your troubleshooting steps.
You want to verify the repair before you call the job complete. Run a functional test on each component you replaced or adjusted. Try to simulate normal operating conditions. If the system passes every test, you know your electrical troubleshooting worked. If not, go back and check your connections or settings. Sometimes, a small mistake can cause big problems later.
Tip: Always retest after every repair. This habit helps you catch issues early and keeps your equipment running smoothly.
Record Findings
After you finish troubleshooting, you need to document your findings. Good records help you and your team solve problems faster next time. Write down what you fixed, how you fixed it, and any symptoms you noticed. Keep a systematic method for logging repairs and adjustments. This way, you can address issues before they get worse.
- Document your findings meticulously for future reference.
- Maintain a systematic method to effectively address issues before they escalate.
Don’t forget to perform root cause analysis. This step helps you pinpoint the exact reason for equipment failures or performance issues. When you understand the root cause, you prevent future occurrences of the same problems. You also enhance efficiency and longevity of your equipment. Root cause analysis leads to more reliable operations and reduces downtime. It saves costs in the long run and increases customer satisfaction rates.
- Helps identify potential issues early, preventing them from becoming larger problems.
- Pinpoints exact reasons for equipment failures or performance issues.
- Prevents future occurrences of the same problems.
- Enhances efficiency and longevity of equipment.
- Leads to more reliable operations and reduces downtime.
- Saves costs in the long run.
- Ensures smoother and more predictable operations.
- Increases customer satisfaction rates.
When you follow the right steps for troubleshooting electrical industrial cabinet issues, you keep your team safe and your equipment running. A systematic approach helps you spot hidden problems fast, which means less downtime and fewer costly surprises. You avoid accidents and keep operations smooth by sticking to proven troubleshooting electrical industrial cabinet methods. Consistent documentation and root cause analysis bring long-term benefits like better reliability, lower costs, and safer workspaces. Make troubleshooting electrical industrial cabinet tasks a habit, and you’ll see more uptime and fewer headaches.
FAQ
What tools do you need for troubleshooting electrical cabinets?
You need a multimeter, insulated screwdrivers, thermal camera, and safety gloves. These tools help you check voltage, find hot spots, and fix loose connections. Always pick tools rated for electrical work.
How often should you inspect electrical cabinets?
You should do a quick visual check every day. Plan a deeper inspection with thermal imaging once a month. Schedule a full inspection every year to keep your cabinet safe and reliable.
Can you troubleshoot without shutting off power?
No, you should always disconnect power before you open the cabinet. Lockout/Tagout keeps you safe from electric shock. Never trust that the power is off until you test it with a meter.
What signs show your cabinet needs urgent attention?
Look for burning smells, hot surfaces, flickering lights, or tripped breakers. These signs mean you need to act fast. If you see any of these, stop and check the cabinet right away.
230v Electrical Cabinet Fan Troubleshooting
Check Power Supply – Verify the cabinet receives 230V and inspect fuses or breakers.
Inspect Connections – Ensure all terminals, wires, and plugs are tight and undamaged.
Test Capacitor – A weak or failed capacitor often prevents the fan from starting.
Clean the Fan – Remove dust, dirt, or obstructions blocking blades or airflow.
Check Motor Health – Listen for noise, overheating, or worn bearings; replace if faulty.