
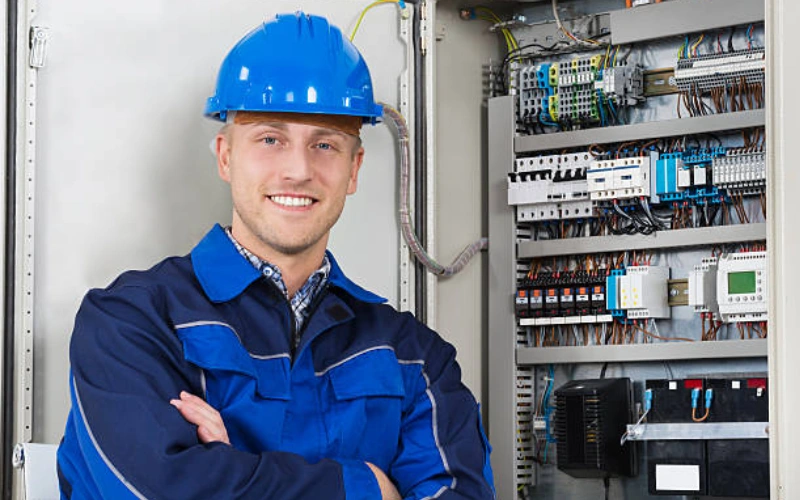
Safety is the most important factor in any Outdoor Electrical Panel Installation. You protect yourself and your home by using the right tools and following proper procedures. While installing an outdoor electrical panel may seem challenging, you can complete the installation safely by adhering to the correct steps. Always choose products that comply with safety standards, such as Linkewell’s electrical power distribution box. Local codes are designed to ensure your safety, so be sure to review them before starting your Outdoor Electrical Panel Installation. If you ever feel uncertain, don’t hesitate to consult a licensed electrician for assistance.
Outdoor Electrical Panel Installation Key Takeaways
- Always turn off the main power first. Use a voltage tester before you start any work. This helps you stay safe from electrical shocks.
- Pick a weatherproof outdoor electrical panel and enclosure. Linkewell’s power distribution box is a good choice. It protects against rain, dust, and bad weather.
- Follow your local electrical codes. Get the permits you need. This makes sure your installation is legal and safe.
- Use the right tools for the job. Wear personal protective equipment like insulated gloves. Wear arc flash-rated clothing to stay safe and work well.
- Check your outdoor electrical panel often. Keep it maintained to stop problems. This helps it work well for many years.
Safety and Compliance
You need to think about safety and rules from the start. This keeps you, your things, and others safe. Use a weatherproof product like Linkewell’s electrical power distribution box. It helps your work meet safety and waterproof rules.
Power Shutoff and Lockout
Turn off the main power before you do anything. This keeps you safe from getting shocked. Here are the steps for lockout:
- Learn about the energy type and dangers first.
- Turn off the equipment the right way.
- Use all energy isolating devices to block power.
- Put lockout or tagout devices on each isolating device.
- Make sure any stored energy is gone or held back.
- Check that the equipment has no power before you start.
- When you finish, look around and take off lockout devices if you put them on.
Tip: Use switches or breakers that can be locked to stop power. If your panel has live parts showing, use covers that do not conduct electricity to stay safe.
Personal Protective Equipment
Wear the right personal protective equipment (PPE) to stay safe. The PPE you need depends on the voltage and arc flash risk. Always turn off equipment if you can. If you must work on live parts, use this PPE:
| PPE Type | Requirements Summary |
|---|---|
| Rubber insulating gloves | Must be seamless, marked by class, and checked every day for damage |
| Rubber insulating sleeves | Same as gloves, check before you use them |
| Arc flash-rated clothing | Wear if there is a chance of arc flash |
| Insulating blankets/matting | Must meet voltage rules and be checked before use |
Check all PPE for holes, rips, or damage before you use it. This is very important for your safety.
Code and Permit Checks
Check local and national electrical codes before you start. Most places want you to get a permit for new work. Sometimes, you need to show your plans for big jobs or high-voltage systems. Always have an inspection after you finish to make sure you followed the rules.
A waterproof enclosure like Linkewell’s electrical power distribution box helps you follow outdoor code rules. These boxes keep out dust and water, so they are good for outdoor safety and following the rules.
Tools and Materials
Essential Tools
You must have the right tools for this job. Each tool helps you do something important. Using the correct tools keeps you safe and helps you work better. Here is a table that lists some key tools and what they do:
| Tool / Item | Purpose / Use |
|---|---|
| Wire Strippers | Take off wire insulation without hurting the copper |
| Voltage Tester | Make sure wires are not live before you start |
| Hammer | Nail the junction box in place |
| Lineman’s Pliers | Twist and cut wires |
| Wire Connectors | Join wires together safely (wire nuts) |
| Cable Clamps | Hold wires in metal boxes so they do not move |
| Wiring (e.g., Romex) | Pick the right cable for your project |
| Junction Box | Use a weatherproof box with good protection for outside |
| Multimeter | Check that no electricity is flowing before you begin |
| Power Shut-Off | Turn off the breaker and label it so no one turns it on |
You might also use a cordless cable cutter or a circuit breaker finder. A self-leveling laser can help you work more accurately. Keep your tools in a tool bag so you do not lose them.
Choosing the Right Outdoor Electrical Panel
Picking the best outdoor electrical panel is very important. You want a panel that works for you now and later. Follow these steps to help you choose:
- Choose the right amperage. Most homes need a 200-amp panel.
- Count how many circuits you need. More circuits stop overloads.
- Pick a panel that lets you add more later, like solar-ready panels.
- Make sure the panel fits the breaker types and brands you want.
- Put the panel in a dry, clean place. Stay away from water and damp spots.
- Leave enough space around the panel. You need 3 feet in front and 30 inches on each side.
- The panel door should open at least 90 degrees and be easy to reach.
Tip: Always pick a weatherproof outdoor electrical panel. This keeps out rain, snow, and wind.
Linkewell Electrical Power Distribution Box Features
If you pick Linkewell’s electrical power distribution box, you get many good things. The box is made from strong die-cast aluminum. It does not bend or break easily. Its weatherproof design keeps out rain, snow, and heat. The enclosure meets safety rules from around the world. You can trust it to work well. The box has many conduit openings, so you can install it in different ways. It is easy to mount, which saves you time. Linkewell’s box fits many conductor sizes. It also lets you use DIN rail or panel mounting. These features make it a great choice for any outdoor electrical panel job.
Outdoor Electrical Panel Installation Step-by-Step Installation Guide
Site Selection and Preparation
You must pick a good place for your outdoor electrical panel. The spot you choose matters for safety and how long it lasts. It also makes repairs easier later. Think about these things when picking a spot:
- Stay away from wet places or puddles.
- Do not put the panel in hot sun or freezing cold.
- Pick a place with fresh air so it does not get too hot.
- Use stainless steel or aluminum so the box does not rust.
- Make sure the panel can be locked to keep it safe.
- Leave enough room for wires and adding more later.
- Choose a spot where you can reach the panel easily.
- Always use a waterproof box to keep out rain, dust, and sun.
Tip: If you are not sure about the spot or box, ask someone who knows for help.
Here is a table to help you look at what matters most for picking a spot:
| Criteria | Description |
|---|---|
| Environmental Adaptations | Use heaters or fans if it gets too hot or cold. |
| Corrosion Prevention | Spray on zinc primer and other sprays to stop rust. |
| Regular Inspections | Check seals, hinges, and locks every 6 months. |
| Size and Expansion | Leave space for more circuits and do not squeeze seals. |
| Cable Routing | Use grommets and channels to keep wires neat and safe. |
| Material Choices | Stainless steel stops rust, aluminum is light, galvanized steel fights rust. |
| Weatherproofing | Use powder coating and sealing to stop scratches and water. |
Before you start, get the area ready by doing these steps:
- Learn the local rules and the National Electrical Code so your work is legal.
- Get all the permits you need from your city or town.
- Pick a dry, safe, and easy-to-reach spot.
- Think about what you might need later, like more wires or new things.
- Gather all your tools and safety gear, like screwdrivers, wire strippers, a multimeter, gloves, and goggles.
- Turn off the main power and use a voltage tester to check that no power is on.
- Always use tools with insulation and wear your safety gear.
Outdoor Electrical Panel Mounting
Mounting your outdoor electrical panel the right way keeps it steady and safe from weather. Follow these steps to make sure it is strong:
- Pick a hard, flat place that is not in the sun or where it gets wet.
- Use screws or bolts that fit your wall and the box.
- Make sure the panel is level before you tighten the screws.
- Seal all holes and cracks with weatherproof caulk to keep water out.
- Use weatherproof cable connectors for every wire that goes in.
- Check for cracks or loose parts before and after you put up the panel.
- Clean around the panel to keep out dirt and plants.
- Tighten all screws so nothing comes loose when it gets hot or cold.
Note: Linkewell’s electrical power distribution box has cable holes and labels, so mounting and wiring are faster and easier.
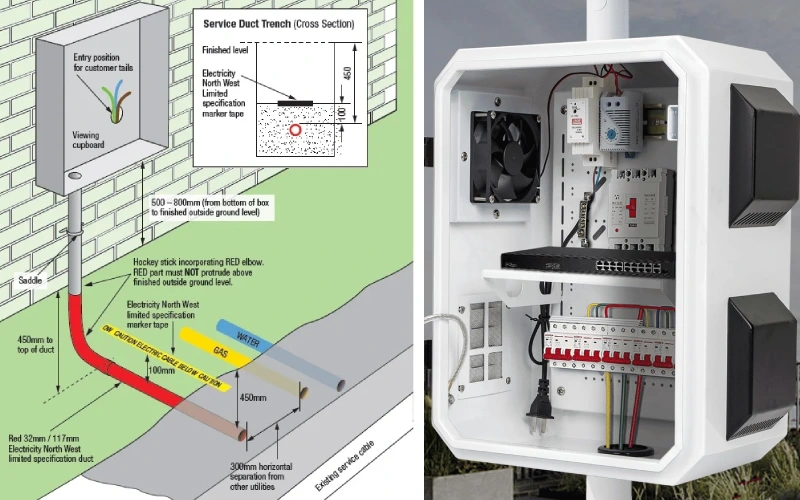
Wiring and Conduit
Running wires and conduit to your outdoor electrical panel takes planning. You must follow the rules to keep your work safe.
- Plan where your conduit will go and measure how much you need.
- Get all the permits you need before you dig or put in conduit.
- Pick conduit that is made for outside and underground, like RMC, IMC, or PVC.
- Dig trenches deep enough: 6 inches for RMC, 18 inches for PVC.
- Use LB conduit bodies when you go through walls.
- Bend and connect conduit pieces with tight fittings.
- Use weatherproof conduit bodies, connectors, and cable glands to keep water out.
- Put GFCI protection on every outdoor circuit.
- Call 811 before you dig to check for other wires or pipes.
- Fill trenches with smooth dirt, no rocks, to protect the wires.
Here are some conduit types you can use outside:
- Intermediate Metal Conduit (IMC): Strong and does not rust.
- PVC Conduit: Light, does not carry electricity, good for wet places.
- Electrical Metallic Tubing (EMT): Thin, needs watertight fittings.
- Rigid Nonmetallic Conduit (RNC): Smooth and bends for underground.
- Liquid-Tight Flexible Metal Conduit (LFMC): Bends and keeps water out.
Tip: Always use cables made for outside, like UF cable for burying, and dig to the right depth.
Main Power Connection
Connecting the main power is a very important step. You must be careful to avoid mistakes and danger.
- Turn off all power by flipping the main breaker.
- Take off the panel cover slowly so you do not break anything.
- Use a voltage tester on each breaker to make sure power is off.
- Knock out a hole in the panel for the new wire.
- Put in a plastic clamp and push the wire through it.
- Strip the wire jacket and cover the ends with tape.
- Push the wire into the clamp, leaving at least 1/4-inch of jacket inside.
- Hold the wire outside with an insulated staple.
- Snap the new breaker onto the bus bar.
- Strip the wires and connect them to the breaker screws.
- Attach ground and neutral wires to the neutral bar.
- Put the cover back on and turn the main breaker on.
- Test the new breaker to see if it works.
Note: Do not run a ground wire to the transformer unless you have to. Use the right size wires and conduit for your job.
Grounding and Bonding
Good grounding and bonding keep you safe from shocks. The National Electrical Code tells you how to do this step.
- Use rods, pipes, or plates for grounding. Take off any paint or coating first.
- Put rods or pipes at least 2.44 meters deep. If you hit rock, put them at an angle or lay them flat at least 0.75 meters deep.
- Keep extra rods at least 1.8 meters apart.
- Use ground rod clamps that are made for being buried.
- Every building with its own panel needs a grounding system connected to the equipment grounding wire.
- Do not connect the grounded wire to the ground rod at the building.
- Pick the grounding wire size based on the biggest wire you use.
- Use copper, aluminum, or copper-clad aluminum for grounding wires.
- Test the ground after you finish. Try for less than 25 ohms, but lower is better for big jobs.
Tip: Use ground rings and special welds for extra safety in big or important jobs.
Breaker and Circuit Setup
Setting up breakers and circuits takes planning. You must match the panel and breaker, figure out the load, and follow the rules.
- Use a NEMA 3R panel for outside.
- Run wires in conduit from the top of the panel to a box, then use THHN wire to the breakers.
- Hold all wires with plastic clamps.
- Do not touch live bus bars or lugs.
- Use the right tools, like wire strippers and testers.
- Find out who made your panel and what model it is. Only use breakers that fit.
- Turn off all power before you work inside the panel.
- Plan for lights, outlets, and big appliances. Do not use more than 80% of the panel’s power.
- Add up your total load. For example, a 10,800 VA load on a 240 V panel is 45 amps.
- Count all circuits, including lights, outlets, and special equipment.
Here is a sample load calculation table:
| Load Component | Calculation Basis | Approximate Load (VA) |
|---|---|---|
| General lighting and receptacles | Square footage x 3 VA/sq ft | 4,500 |
| Small appliance circuits | 2 x 1,500 VA | 3,000 |
| Laundry circuit | 1 x 1,500 VA | 1,500 |
| Gas furnace | 1 x 1,500 VA | 1,500 |
| Microwave oven | 1 x 1,500 VA | 1,500 |
| Electric water heater | 1 x 3,000 VA | 3,000 |
| Total existing load | 10,800 | |
| Convert to amperes | 10,800 VA / 240 V | 45 Amps |
Note: If you are not sure about any part, ask your city or a licensed electrician.
If you follow these steps, you can install your outdoor electrical panel safely and well. Using a good product like Linkewell’s electrical power distribution box gives you waterproofing, easy mounting, and long-lasting use for your project.
Installation and Maintenance
Testing and Inspection
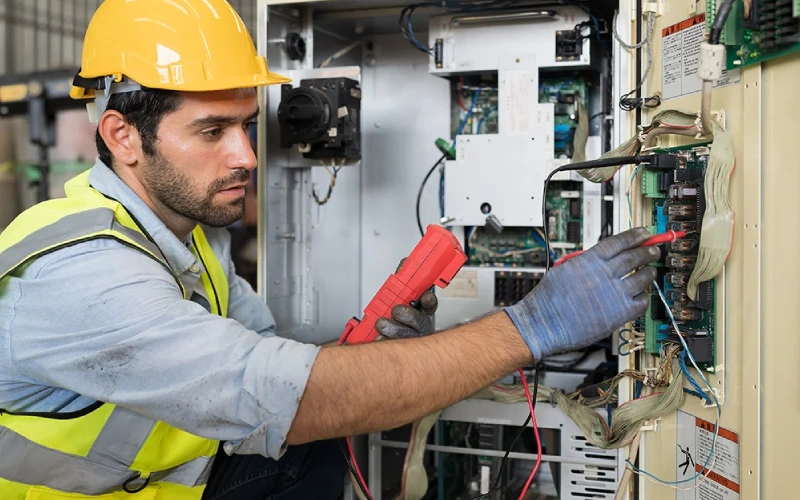
After you finish installing your outdoor electrical panel, you need to test and inspect it for safety and proper function. Always plan an escape path before you start, just in case something goes wrong. Wear gloves, safety glasses, and protective clothing. Start with a hazard check. Look for signs like missing grounding, wet spots, rust, or overheating. If you feel a shock or tingling, stop right away.
Follow these steps for a safe inspection:
- Use a non-contact voltage tester to check the panel and cover.
- Make sure the workspace is clear and well-lit.
- Read all labels on the panel and breakers.
- Inspect the panel cover and fasteners for damage.
- Look inside for rust, water, or foreign objects.
- Check all wires and connectors for tightness.
- Test GFCI and AFCI devices using their test buttons.
- Confirm that grounding and bonding are correct.
- Replace the cover as soon as you finish.
You can also use a thermal camera to spot hot spots that may signal a problem. Regular testing of safety devices like GFCIs helps prevent shocks.
Regular Maintenance Tips
Routine maintenance keeps your outdoor electrical panel working safely for years. You should check the panel at least once a year. Keep the area around the panel clear, with at least three feet of space. Clean the outside to remove dust and debris. Test each breaker by switching it off and on. Watch for signs of rust, corrosion, or burn marks.
Here is a simple maintenance schedule:
| Task | Frequency |
|---|---|
| Visual inspection | Once a year |
| Professional inspection | Every 10 years |
| Breaker testing | Every 6 months |
| Cleaning exterior | Every 3 months |
If you see any damage or have frequent breaker trips, call a licensed electrician. Leave repairs and upgrades to professionals. Linkewell offers support and custom solutions to help you keep your panel reliable.
Troubleshooting Common Issues
Sometimes, problems can happen with your outdoor electrical panel. Common issues include tripped breakers, flickering lights, or burning smells. If a breaker trips, turn off appliances and reset the breaker. For flickering lights, check for loose wires after turning off the power. If you see scorch marks or smell burning, stop using the panel and call an expert.
Follow these troubleshooting steps:
- Look for visible damage or rust.
- Check for tripped breakers and reset them.
- Test GFCI outlets and reset if needed.
- Use a voltage tester to check for power.
- Make sure the panel stays dry and sealed.
If you cannot fix the problem, contact a professional. Linkewell’s team can help with technical support and custom options for your installation and maintenance needs.
You can put in an outdoor electrical panel safely if you do these things: First, turn off the power and check with a voltage tester. Next, follow your local rules and leave space around the panel. Pick weatherproof products that are certified, like Linkewell’s electrical power distribution box, so your panel stays safe for a long time. Make sure all wires are tight and test the circuits when you finish. Plan to check and take care of your panel often.
Safety comes first every time. If you are not sure what to do, ask a licensed electrician or a professional installer for help. When you install and care for your panel the right way, it will work well for many years.
FAQ
What size outdoor electrical panel do you need?
You should check your home’s power needs. Most homes use a 200-amp panel. Count your circuits and plan for future needs. If you feel unsure, ask a licensed electrician for help.
How do you keep your outdoor electrical panel safe from weather?
Pick a weatherproof panel with an IP65 or IP66 rating. Seal all cable entries with waterproof connectors. Clean the panel area often. Use Linkewell’s electrical power distribution box for strong protection.
Can you install an outdoor electrical panel by yourself?
You can install it if you know electrical safety rules and local codes. Always turn off the main power. Wear safety gear. If you feel unsure at any step, call a licensed electrician.
What should you do if a breaker keeps tripping?
Unplug all devices on that circuit. Reset the breaker. If it trips again, check for damaged wires or overloaded circuits. Do not ignore burning smells or scorch marks. Call a professional if the problem continues.
How often should you inspect your outdoor electrical panel?
| Task | Frequency |
|---|---|
| Visual inspection | Once a year |
| Breaker testing | Every 6 months |
You should check your panel at least once a year. Test breakers every six months for safety.
Conclusion
Outdoor Electrical Panel Installation requires careful planning, the right tools, and code compliance. Using certified products like Linkewell’s power distribution box helps protect your system from weather and damage.
Always shut off the main power, wear proper PPE, and test all circuits before use. Regular inspection and maintenance extend the life of your setup. When in doubt, contact a licensed electrician to ensure your installation is safe and reliable.


