Do you want to learn how to perform an electrical panel installation step by step? First, make sure you stay safe. Always wear safety gear and check your local codes. If you are not sure, ask a licensed electrician for help. Installing an electrical panel means you work with live wires, so do not take chances. Linkwell provides you with high-quality control panels and distribution boxes. These products help keep your project safe and ensure it operates efficiently every time.
Key Takeaways
- Always stay safe by wearing safety gear and following rules. If you are not sure, ask a licensed electrician for help.
- Check if you need a permit before you start any electrical work. This helps you follow the rules and keeps you from getting fined.
- Use good materials and tools when you install things. Linkwell products are safe and make your electrical system work better.
- Label every circuit clearly and make a panel directory. This makes it easier to fix problems later and keeps everyone safe.
- Check and test everything carefully after you finish installing. This step is very important to make sure all parts work right and safely.
Safety and Compliance for Electrical Panel Installation
Safety is the most important thing when you start an electrical panel installation. You must protect yourself and follow all rules. Sometimes, you need to call an expert for help. Here is what you should know.
Electrical Hazards and PPE
Electricity can be very dangerous. You may face problems like bad wiring or too many devices on one circuit. Water near your work area can also be risky. Here are some common hazards:
| Hazard Type | Description |
|---|---|
| Faulty Wiring | Damaged or old wires can cause shocks or fires. |
| Overloaded Circuits | Too many devices on one circuit can overheat and start a fire. |
| Wet or Damp Environments | Water near electrical parts increases the risk of shock. |
| Damaged Extension Cords | Broken cords can spark or shock you. |
To stay safe, wear the right personal protective equipment. Use insulated gloves, safety glasses, and strong shoes. Make sure you learn basic NFPA 70E safety rules. Always use your safety gear. Never skip these steps, even if you think you know what to do.
Tip: Linkwell’s panels and boxes follow strict safety rules. This helps you feel safer during your project.
Permits and Local Codes
Check if you need a permit before you touch any wires. Most places want you to get one for big jobs. This includes replacing a main panel, adding circuits, or moving a panel. Here is a simple guide:
| Type of Work | Permit Requirement |
|---|---|
| Main panel replacement and upgrades | Needed when increasing service size (like 100-amp to 200-amp). |
| Sub-panel installations and relocations | Needed because it changes how power is distributed. |
| Service entrance modifications | Always needed, since it involves the utility company. |
| Panel relocations | Needed due to new wiring and grounding. |
| Addition of new circuits | Needed to make sure everything is safe and up to code. |
Following local codes keeps your home safe. It also helps you avoid fines. Linkwell’s products are certified to meet these codes. This makes your installation easier.
When to Hire a Professional
Sometimes, you need more than instructions. If you work with high voltage or feel unsure, call a licensed electrician. Professionals have special training for different voltage levels. They know how to handle emergencies. Electricians with NFPA 70E training can work on panels from 50 volts up to 15,000 volts. They also know how to use lockout/tagout procedures and the right PPE.
Note: If you ever feel unsure, it is always safer to get help from a pro. Your safety is the most important thing.
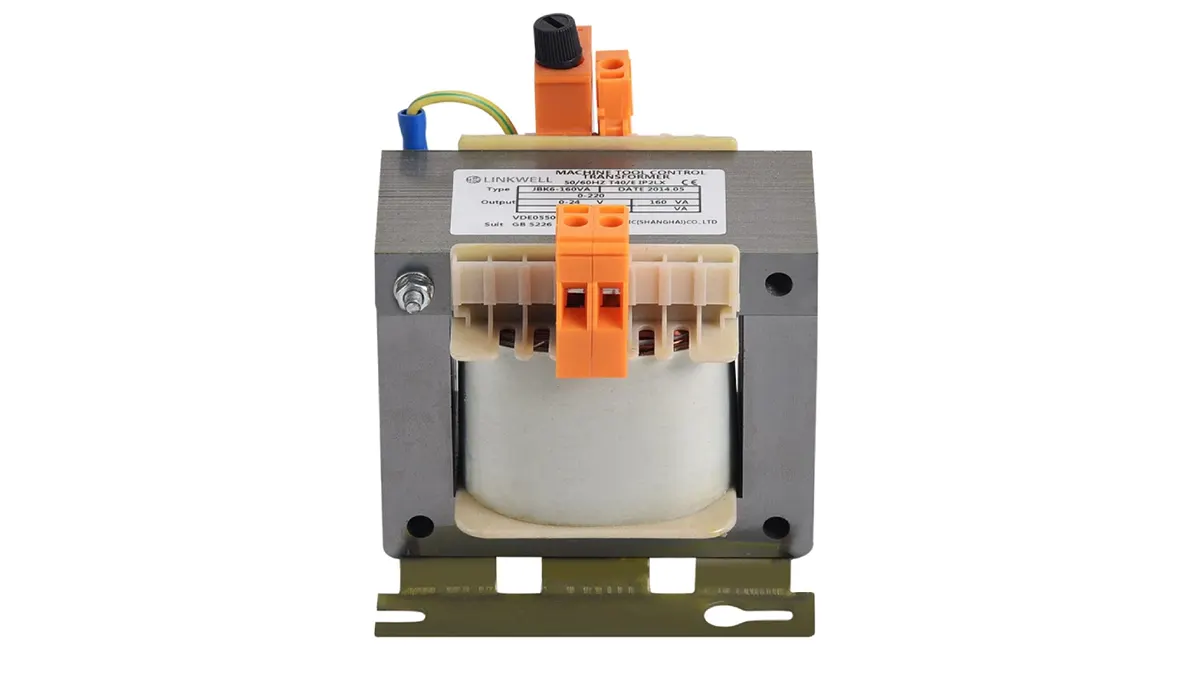
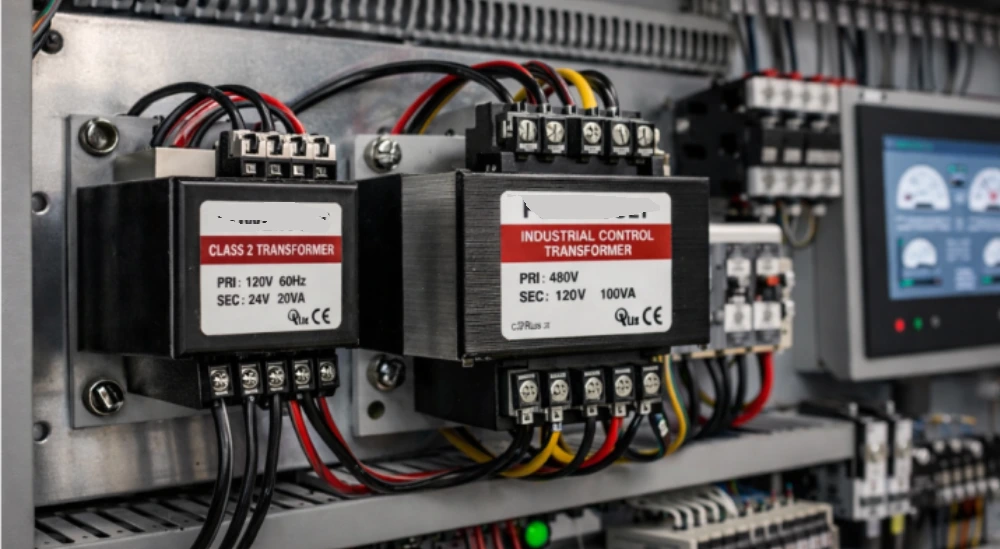
Electrical Panel Components
Modern electrical panels do more than hold wires and switches. They have smart parts that keep your system safe and cool. These parts help your panel work well every day. Let’s see what you will find in a good panel.
Fan and Filter
Fans and filters help keep the panel cool and clean. The fan pushes hot air out and brings in fresh air. The filter stops dust and dirt from getting inside. This helps the panel last longer and work better. It is important in busy factories or outside places.
Tip: Linkwell’s LK3238 Series Fan and Filter is quiet. The filters are easy to change. You spend less time cleaning.
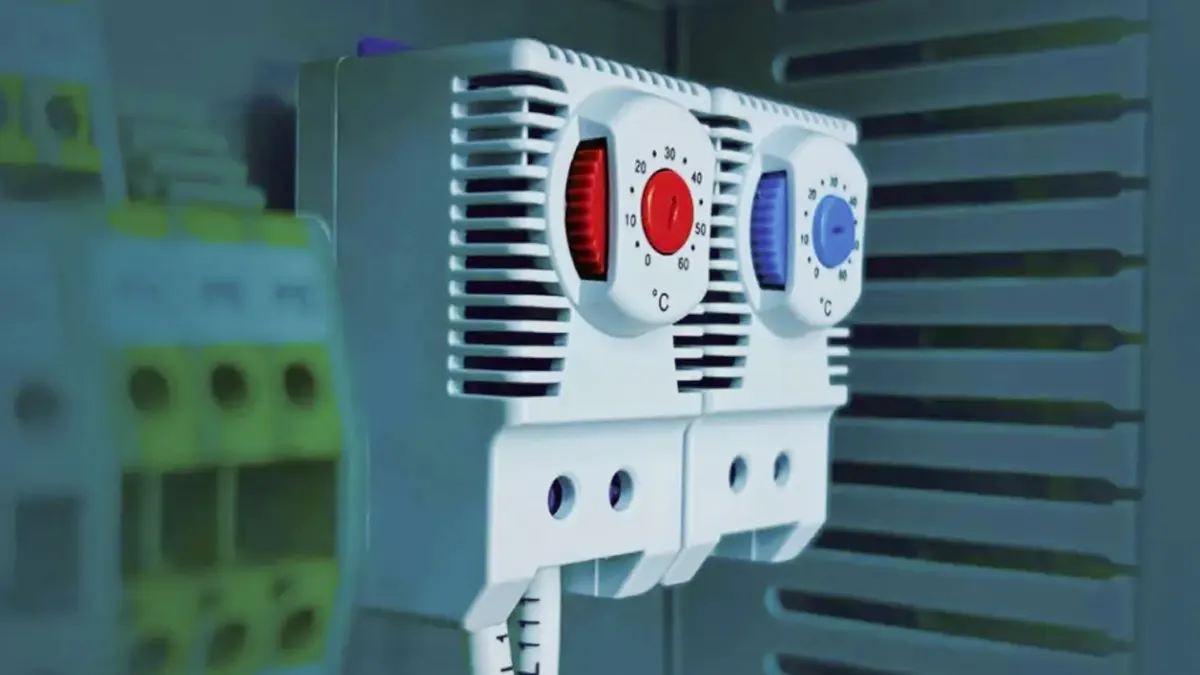
Thermostat and Hygrostat
Heat and moisture can hurt your electrical parts. A thermostat checks the temperature inside the panel. If it gets too hot, it turns on the fan or air conditioner. A hygrostat checks for moisture. It keeps water away so you do not get rust or short circuits.
Cabinet Air Conditioner
Sometimes, a fan is not enough to cool the panel. You may need a cabinet air conditioner in hot places. This device cools the air inside the panel. It keeps everything at a safe temperature. Linkwell’s EIA Series Cabinet Air Conditioner works well in tough places. It helps your system run without getting too hot.
Distribution Terminal Blocks
Distribution terminal blocks help you organize all the wires. They make it easy to connect and disconnect circuits. These blocks keep your wiring neat and safe. You can find problems faster because everything is labeled and easy to reach.
Circuit Breakers
Circuit breakers protect your devices from too much electricity. If a circuit gets overloaded, the breaker shuts off the power. This stops fires and keeps your equipment safe. There are main breakers for all the power and smaller breakers for each circuit.
- Main Breaker: Turns off power to the whole panel.
- Individual Breakers: Protect each circuit from too much power.
Relays
Relays are like smart switches. They let you control big machines with small signals. You can turn on a motor or a light from far away. Relays help you automate tasks and make your panel more flexible.
Panels today use advanced relays and smart controls. You save energy and can connect with solar or wind power.
Now you know the main parts inside an electrical panel. Each part helps keep your system safe, neat, and ready for the future.
Understanding Electrical Panels and Linkwell Solutions
What Is an Electrical Panel?
Your electrical panel is like a traffic cop for electricity. It sends power from the main line to different circuits. Each area gets the right amount of energy. Inside, there are switches, fuses, and circuit breakers. These parts help keep your system safe. If too much electricity flows, circuit breakers shut off the power. This stops things from getting too hot or catching fire. Electrical problems cause about 13% of home fires each year. Modern panels use smart breakers that turn off by themselves. This keeps your home or business safe.
Linkwell Electrical Control Panel Features
Linkwell gives you more than a simple panel. You get special features that make installation safer and easier. Linkwell panels come in colors like gray, orange, blue, and red. You can choose the color you like best. The panels work with different voltages, such as 230V AC and 115V AC. They have a high inflammability rating and strong protection levels. The fan motors follow ROHS rules. Each panel is certified by CE, ROHS, and UL.
| Feature | Details |
|---|---|
| Voltage Range | 230V AC, 115V AC |
| Available Colors | RAL7035, orange, blue, red |
| Inflammability Rate | UL94 V-0 |
| Protection Degree | IP54, IP56, IP57 |
| Fan Motor Compliance | ROHS |
| Certification | CE, ROHS, UL |
Linkwell panels use modular designs. You can change your system as you need. Advanced connections let you link with smart home systems. Custom features help you get a panel that fits your project.
Power Distribution Box and Lighting Panelboards
You need more than a control panel for a full setup. Linkwell has power distribution boxes and lighting panelboards. These help organize and protect your circuits. Distribution boxes split electricity safely to different places. Lighting panelboards help you manage many lights in one spot. These products have labeled terminals and pre-cut cable entries. This makes installation fast and easy. You get good performance and simple maintenance. Linkwell’s products work well in factories, telecom cabinets, and outside setups.
Tip: Using Linkwell’s certified products helps you feel safe. Your installation meets safety rules and will last a long time.
Tools and Materials for Installing an Electrical Panel
Essential Tools Checklist
You need the right tools to do this job well. Get these tools before you begin:
- Wire cutters trim wires to the right size.
- Wire strippers take off insulation without hurting the wire.
- Sheathing strippers remove the outside layer from cables.
- Ratcheting and self-adjusting wire crimping tools make tight connections.
- Cable tie tools help keep your wires neat.
Tip: The right tool saves time and stops mistakes. Linkwell’s accessories give you good results every time.
Materials and Linkwell Accessories
Use good materials for your project. Here is what you need and how it helps:
| Material | Function |
|---|---|
| Electrical wires | Flexible conductors that carry electric currents. |
| Electrical tape | Insulates and protects wires from moisture and abrasion. |
| Wire connectors | Joins two or more wires together, ensuring a secure connection. |
| Grounding rods | Connects the electrical system to the earth, dissipating excess voltage. |
Linkwell has certified wires, connectors, and distribution boxes. These accessories meet safety rules and work in tough places. You can pick the size and style that fits your project.
Note: Always check your materials match your panel’s voltage and where you use them.
Preparing the Workspace
Get your workspace ready before you start. Clean up clutter and make sure you have bright lights. Put your tools and materials where you can reach them. Keep water and drinks away from your work area. If you work outside, use a cover that keeps out rain.
Wear insulated gloves and safety glasses. Make sure your workspace is dry and safe to walk in. A clean area helps you focus and finish the job safely.
Preparation Steps Before Installation
Getting ready for electrical panel installation is a big deal. You want to make sure everything is safe and set up right before you start. Let’s walk through the steps you need to take.
Shutting Off Main Power
You must turn off the main power before you touch any wires. This keeps you safe and stops accidents. Here’s how you do it:
- Check the floor around your electrical service panel. Make sure it’s dry. Water and electricity don’t mix.
- Open the service panel door. You’ll see a row of circuit breakers inside.
- Find the main breaker. It’s usually the biggest one and might say 100 amps or more.
- Flip the main breaker to the OFF position. This shuts off power to your whole house.
- Walk around and check that all the lights are off. Use a non-contact electrical tester on a few outlets to make sure there’s no power.
- When you’re ready to turn the power back on, switch every circuit breaker to OFF first. Then flip the main breaker ON.
Site Preparation and Panel Placement
Picking the right spot for your new panel makes your job easier and keeps your home safe. You want the panel to be easy to reach and away from trouble spots. Here’s what you should look for:
| Factor | Description |
|---|---|
| Accessibility | Put the panel where any adult can reach it. Circuit breakers should be no higher than 6’7″. |
| Safety | Leave at least 3 feet of space in front of the panel. This helps you work safely and avoid fire hazards. |
| Compliance with NEC | Don’t install the panel in a clothing closet. The National Electrical Code says this is a fire risk. |
| Environmental Conditions | Keep the panel away from water and damp areas. Moisture can damage the panel and cause emergencies. |
Take your time with these steps. Careful prep makes the rest of your installation go smoothly.
Removing the Old Panel (If Needed)
Sometimes you need to take out an old electrical panel before you install a new one. This step can feel tricky, but you can do it if you stay careful and follow each step. Let’s break it down so you know what to expect.
Disconnecting Circuits Safely
First, you need to disconnect all the circuits from the old panel. You want to make sure no wires stay live while you work. Here’s how you can do it:
- Double-check that the main power is off. Use a non-contact voltage tester on every wire.
- Label each wire with tape or a marker. Write down which circuit each wire belongs to. This makes it easier when you connect them to the new panel.
- Loosen the screws on each breaker and gently pull the wires out. Don’t yank or twist the wires. If you see any damaged insulation, wrap it with electrical tape.
- Remove the ground and neutral wires from their bars. Keep them separated so you don’t mix them up later.
Tip: Take a photo of the wiring before you start. You can use it as a reference when you install the new panel.
Removing the Existing Panel
Once you disconnect all the wires, you’re ready to remove the old panel. You might face a few challenges during this step. Here’s a table that shows what you could run into and how to handle it:
| Challenge | Description | Solution |
|---|---|---|
| Insurance Coverage Denial | Insurance companies may not renew your policy if you keep outdated panels. | Replace the panel before your insurance renewal date. |
| Determining Upgrade Urgency | It’s hard to know when you need a new panel. | Ask a licensed electrician to inspect and advise you. |
| Budgeting for Panel Replacement | Waiting too long can lead to expensive repairs or safety risks. | Remember, prevention costs less than fixing fire damage. |
To remove the panel, unscrew it from the wall. Hold the panel steady so it doesn’t fall. Lift it away and set it aside. Clean up any dust or debris left behind. Now you have a clear space for your new Linkwell panel.
Installing an Electrical Panel with Linkwell Products
You’re ready for the main event—installing an electrical panel with Linkwell products. This part takes patience and attention to detail. Let’s walk through each step so you feel confident and safe.
Mounting the Panel
Mounting your panel is the first hands-on step. You want to make sure everything lines up and stays secure. Here’s how you do it:
- Gather all your tools and safety gear. You’ll need screwdrivers, wire strippers, pliers, a voltage tester, a flashlight, electrical tape, and safety equipment like insulated gloves and goggles.
- Turn off the main power supply at your circuit breaker panel. This keeps you safe while you work.
- Use a voltage tester to confirm there’s no power inside the panel. Double-check every wire.
- Carefully remove the panel cover and set it aside. Keep screws in a safe spot.
- Find the correct slot for your new breaker. Line it up with the bus bar inside the Linkwell panel.
- Snap the breaker into place. Make sure it’s secure and doesn’t wiggle.
- Wire the connections. Always keep the breaker in the ‘off’ position before you start.
- Perform a visual inspection. Use your voltage tester again to confirm everything is de-energized.
Securing and Leveling
A panel that’s crooked or loose can cause problems later. You want your Linkwell panel to look professional and work perfectly. Follow these steps:
- Mark the location for the panel on the wall using a Sharpie. Pick a height that’s easy for you to reach.
- Remove the necessary knockouts for the wires. Use a screwdriver and make sure the holes fit your cable clamps.
- Mark how far the panel needs to sit proud of the wall. For drywall, this is usually about 5/8 inch.
- Secure the panel to the wall using a 5/16 hex-head by 1-inch-long No. 8 screw. Tighten each screw so the panel doesn’t move.
Installing Main Service Wires
Now you’re ready to connect the main service wires. This step is important for safety and performance. Here are some best practices to follow:
| Best Practice | Description |
|---|---|
| Separation of Grounds and Neutrals | Keep grounds and neutrals separate except at the main disconnect. |
| Bonding Requirements | Bond the neutral and ground only at the main breaker location. |
| Installation Techniques | Install high-amperage breakers first. This shortens the current path and ensures proper torque. |
| Circuit Identification | Label each circuit on the cable jacket. Keep a circuit schedule for easy identification. |
When you install the main service wires, make sure you use the right torque for each connection. Tight wires prevent overheating and keep your system safe. Always label your circuits as you go. This helps you find problems quickly and makes future upgrades easier.
You’ve just completed the core steps for electrical panel installation. With Linkwell products, installing an electrical panel becomes a smooth and reliable process. Take pride in your work and double-check each connection before moving on.
Wiring and Breaker Setup
Getting the wiring and breakers right is a big part of installing an electrical panel. You want every connection to be safe, neat, and easy to understand. Let’s break down each step so you feel confident as you work.
Installing Breakers and Busbars
You need to follow a clear process when you install breakers and busbars. Here’s a step-by-step guide:
- Pick the right bus bar for your project. Think about the material, current rating, and insulation.
- Turn off the power and check with a tester. Make sure the panel is safe to touch.
- Plan where the bus bar will go. Good placement helps with power flow and future upgrades.
- Secure the bus bar using brackets and screws. It should not move or wiggle.
- Strip the insulation from your wires. Attach them to the bus bar and tighten the screws.
- Add insulation covers if needed. This keeps everything safe.
- Test your connections for continuity. Make sure electricity flows where it should.
- Restore power and watch for any problems.
When you mount breakers, always test fit them first. Strip the wires, apply anti-oxidant compound, and torque the screws to the right level. Label each circuit as you go. This makes future repairs easier.
Connecting Hot, Neutral, and Ground Wires
Wiring can feel tricky, but you can do it if you follow safety rules. Here are some tips:
- Always use a standard electrical diagram. This helps you avoid mistakes.
- If you feel unsure about connecting a hot wire, call a licensed electrician.
- The ground wire keeps you safe. It does not carry current during normal use.
- Bond the ground and neutral wires only at the main panel. This protects your home from surges.
- In subpanels, keep the neutral and ground wires separate.
Take your time with each wire. Double-check every connection before you move on.
Organizing and Securing Wiring
A neat panel makes your work look professional and helps with troubleshooting. Here are some top techniques:
| Technique | Description |
|---|---|
| Labeling | Mark circuits at outlets and on cables so you know what each one does. |
| Bundling wires | Group wires loosely. Don’t pull them too tight. This saves space and helps you reach them later. |
| Proper termination methods | Attach wires securely to breakers and buses. Use the same method for each wire. |
| Cable management | Remove knockouts for cables. Use connectors to protect wire insulation. |
| Neat layout | Bend wires at right angles and organize them in layers. This keeps the panel tidy. |
Good organization means fewer problems down the road. You’ll thank yourself when you need to make changes or repairs.
Labeling and Documentation
Labeling and documentation help everyone use the electrical panel safely. You need to know what each breaker does. You should see where every wire goes. This makes fixing problems faster. It also helps you follow safety rules.
Labeling Circuits
Labeling circuits makes your panel simple to understand. It helps you and anyone who works on it later. You also follow safety rules. The National Electrical Code says labels must last in your environment. Every circuit needs a label that is easy to read and shows its job.
Here’s what you should put on each circuit label:
- Write which area or equipment each breaker controls.
- Show the voltage rating so you do not mix things up.
- List the current rating to stop overloads.
- Add safety warnings like “Danger: High Voltage.”
- Give emergency contact information for quick help.
You can use a table to keep track of your labels:
| Code Reference | Requirement |
|---|---|
| NEC 110.21(b) | Labels must last and not wear out. |
| NEC 210.5(C)(1)(b) | Mark conductors at each panelboard forever. |
| NEC 408.4(A) | Identify every circuit for its job. |
Creating a Panel Directory
A panel directory is like a map for your electrical system. It shows what each breaker does. It gives important details about the panel. You need a directory for safety and to follow the rules.
Your panel directory should have these things:
- Panel name and where it is in the building.
- Type of panel, like main or sub-panel.
- Voltage and amperage ratings.
- Manufacturer’s name.
- Dates for installation and inspection.
- Inspector’s name and credentials.
- Next inspection date.
- Circuit directory with clear names.
- Arc flash warning label.
- Emergency circuits marked.
- Permanent labels that are easy to read.
Here’s a table to show what to include:
| Information Type | Details Required |
|---|---|
| Panel ID/Name | Clearly labeled |
| Panel Location | Exact spot in the building |
| Panel Type | Main, Sub-Panel, etc. |
| Voltage/Amperage Rating | Shown clearly |
| Manufacturer | Name listed |
| Inspection Dates | Last and next inspection dates |
| Inspector Info | Name and credentials |
| Circuit Directory | Accurate circuit names |
| Arc Flash Warning | Present and up to date |
| Emergency Circuits | Clearly marked |
| Permanent Labels | All labels must stay on |
Good labeling and documentation save time and trouble. You make your electrical system safer for everyone.
Final Checks and Testing
Before you flip the switch and bring your new panel to life, you need to check everything one last time. This step keeps you safe and helps your system work the way you want.
Inspecting Connections
Take a close look at every connection. You want to spot problems before they cause trouble. Here’s what you should do:
- Make sure all panels, outlets, and metal parts are bonded and grounded. This keeps electricity where it belongs.
- Look for signs of trouble. Scorch marks, swollen outlets, or rust can mean something is wrong.
- If you see flickering lights or smell something burning, write it down. You might need a pro to check it out later.
- Use your voltage tester to check that all wires and parts have zero energy. Never trust your eyes alone.
- Scan for damage without touching anything. If you see broken or burned equipment, don’t touch it. Repairs come first.
- Keep water and drinks away from your work area. Liquids and electricity do not mix.
Power Restoration and Circuit Testing
You’re almost done! Now it’s time to test your work and bring power back safely. Follow these steps:
- Check the settings on every new circuit breaker. Make sure they match your needs.
- If you worked with a contractor, ask them to double-check the settings.
- Test each breaker’s protection features. Flip them on and off to see if they trip when they should.
- Write down your breaker settings and test results in a logbook. This helps you remember what you did.
- Give a copy of your test report to the building owner or keep it for your records.
For ongoing safety, ask a qualified electrician to test your panel every few years. They will follow IEC 60364-6 standards to keep your system safe. Regular testing checks that breakers still work and protect your home from overloads.
When you finish these steps, you can feel proud. Your careful work means your electrical panel is safe, reliable, and ready for action!
Troubleshooting and Professional Support
Common Installation Issues
You might run into a few problems during electrical panel installation. Don’t worry—most issues have simple fixes. Here are some common problems you could face:
- Loose Connections: If wires aren’t tight, you may see flickering lights or hear buzzing. Use a screwdriver to check every terminal.
- Wrong Breaker Size: Using a breaker that’s too big or too small can cause tripping or overheating. Always match the breaker to the circuit’s load.
- Mixed Up Wires: If you connect the wrong wire to the wrong spot, circuits won’t work. Double-check your labels and use a wiring diagram.
- Grounding Problems: Missing or loose ground wires can make your system unsafe. Make sure every ground wire is secure.
- Moisture in the Panel: Water can cause rust or shorts. If you see condensation, dry the area and check for leaks.
If you notice burning smells, sparks, or breakers that trip again and again, stop right away. These signs mean you need expert help.
When to Contact Linkwell or a Licensed Electrician
Sometimes, you need extra support. Here’s when you should reach out for help:
- You feel unsure about any step in the installation.
- You see signs of damage, like burnt wires or melted insulation.
- You don’t have the right tools for the job.
- You want to make sure your products meet safety standards.
- You need advice on local codes or permits.
- You want to use certified products for your project.
| Situation | What You Should Do |
|---|---|
| Unclear about wiring steps | Ask Linkwell or an electrician |
| Safety concerns | Get professional support |
| Need code compliance | Consult a licensed electrician |
| Product selection questions | Contact Linkwell for guidance |
Conclusion
You’ve made it to the end of your electrical panel installation journey! If you followed each step, you set yourself up for a safe and successful project. When you use a step-by-step guide, you make sure every part of your installation goes smoothly. You avoid fire hazards, stay within the law, and keep your insurance valid. You also know what to expect before you even start working.
Here’s what you gain by following a clear process:
- You boost safety and lower the risk of accidents.
- You meet local codes, so you don’t run into trouble later.
- You prepare better and know exactly what comes next.
Choosing certified products makes a big difference. Linkwell’s panels and boxes meet international standards like IEC, CE, and UL. The company tests every product to make sure it’s safe and reliable. You get help from a team with years of experience and a strong record of on-time delivery. Linkwell also offers technical support whenever you need it.
When you use Linkwell’s solutions, you avoid compliance issues and get peace of mind. You know your installation will last and work the way you want.
Remember, safety comes first. If you ever feel unsure, reach out to a professional or ask Linkwell for advice. Careful planning and quality products help you build a safer, smarter future.
You now know how to put in an electrical panel one step at a time. Safety is very important, so follow all the steps. Certified Linkwell products help you follow the rules and keep your system working well. If you do not feel confident, ask a professional for help.
- Check every connection two times.
- Pick good materials for your job.
- Make sure your workspace stays neat.
FAQ
How do I know if I need a new electrical panel?
You might need a new panel if your lights flicker, breakers trip often, or you see rust. If your home is old, ask an electrician to check your panel.
Can I install an electrical panel by myself?
You can do simple tasks if you know basic safety rules. For big jobs or high voltage, call a licensed electrician. Safety always comes first.
What certifications should my panel have?
Look for panels with UL, CE, or IEC marks. These show the panel meets safety standards. Linkwell panels have these certifications.
How often should I inspect my electrical panel?
Check your panel every six months. Look for loose wires, rust, or signs of overheating. Regular checks help prevent problems.
Who can I contact for help with Linkwell products?
You can reach Linkwell by phone, WhatsApp, or email. The team offers 24/7 support and expert advice.